
Plenum // JL.

So, you’ve purchased a plenum for your Jeep JL. Congrats! Now it’s time to get it installed.
Tools Needed:
Blanket or Furniture Pad.
2.5 mm Allen Key/T-Handle or Socket.
4mm Allen Key/T-Handle or Socket.
Jeep Tool Kit.
Time Needed:
30 Mins - 1 Hr.
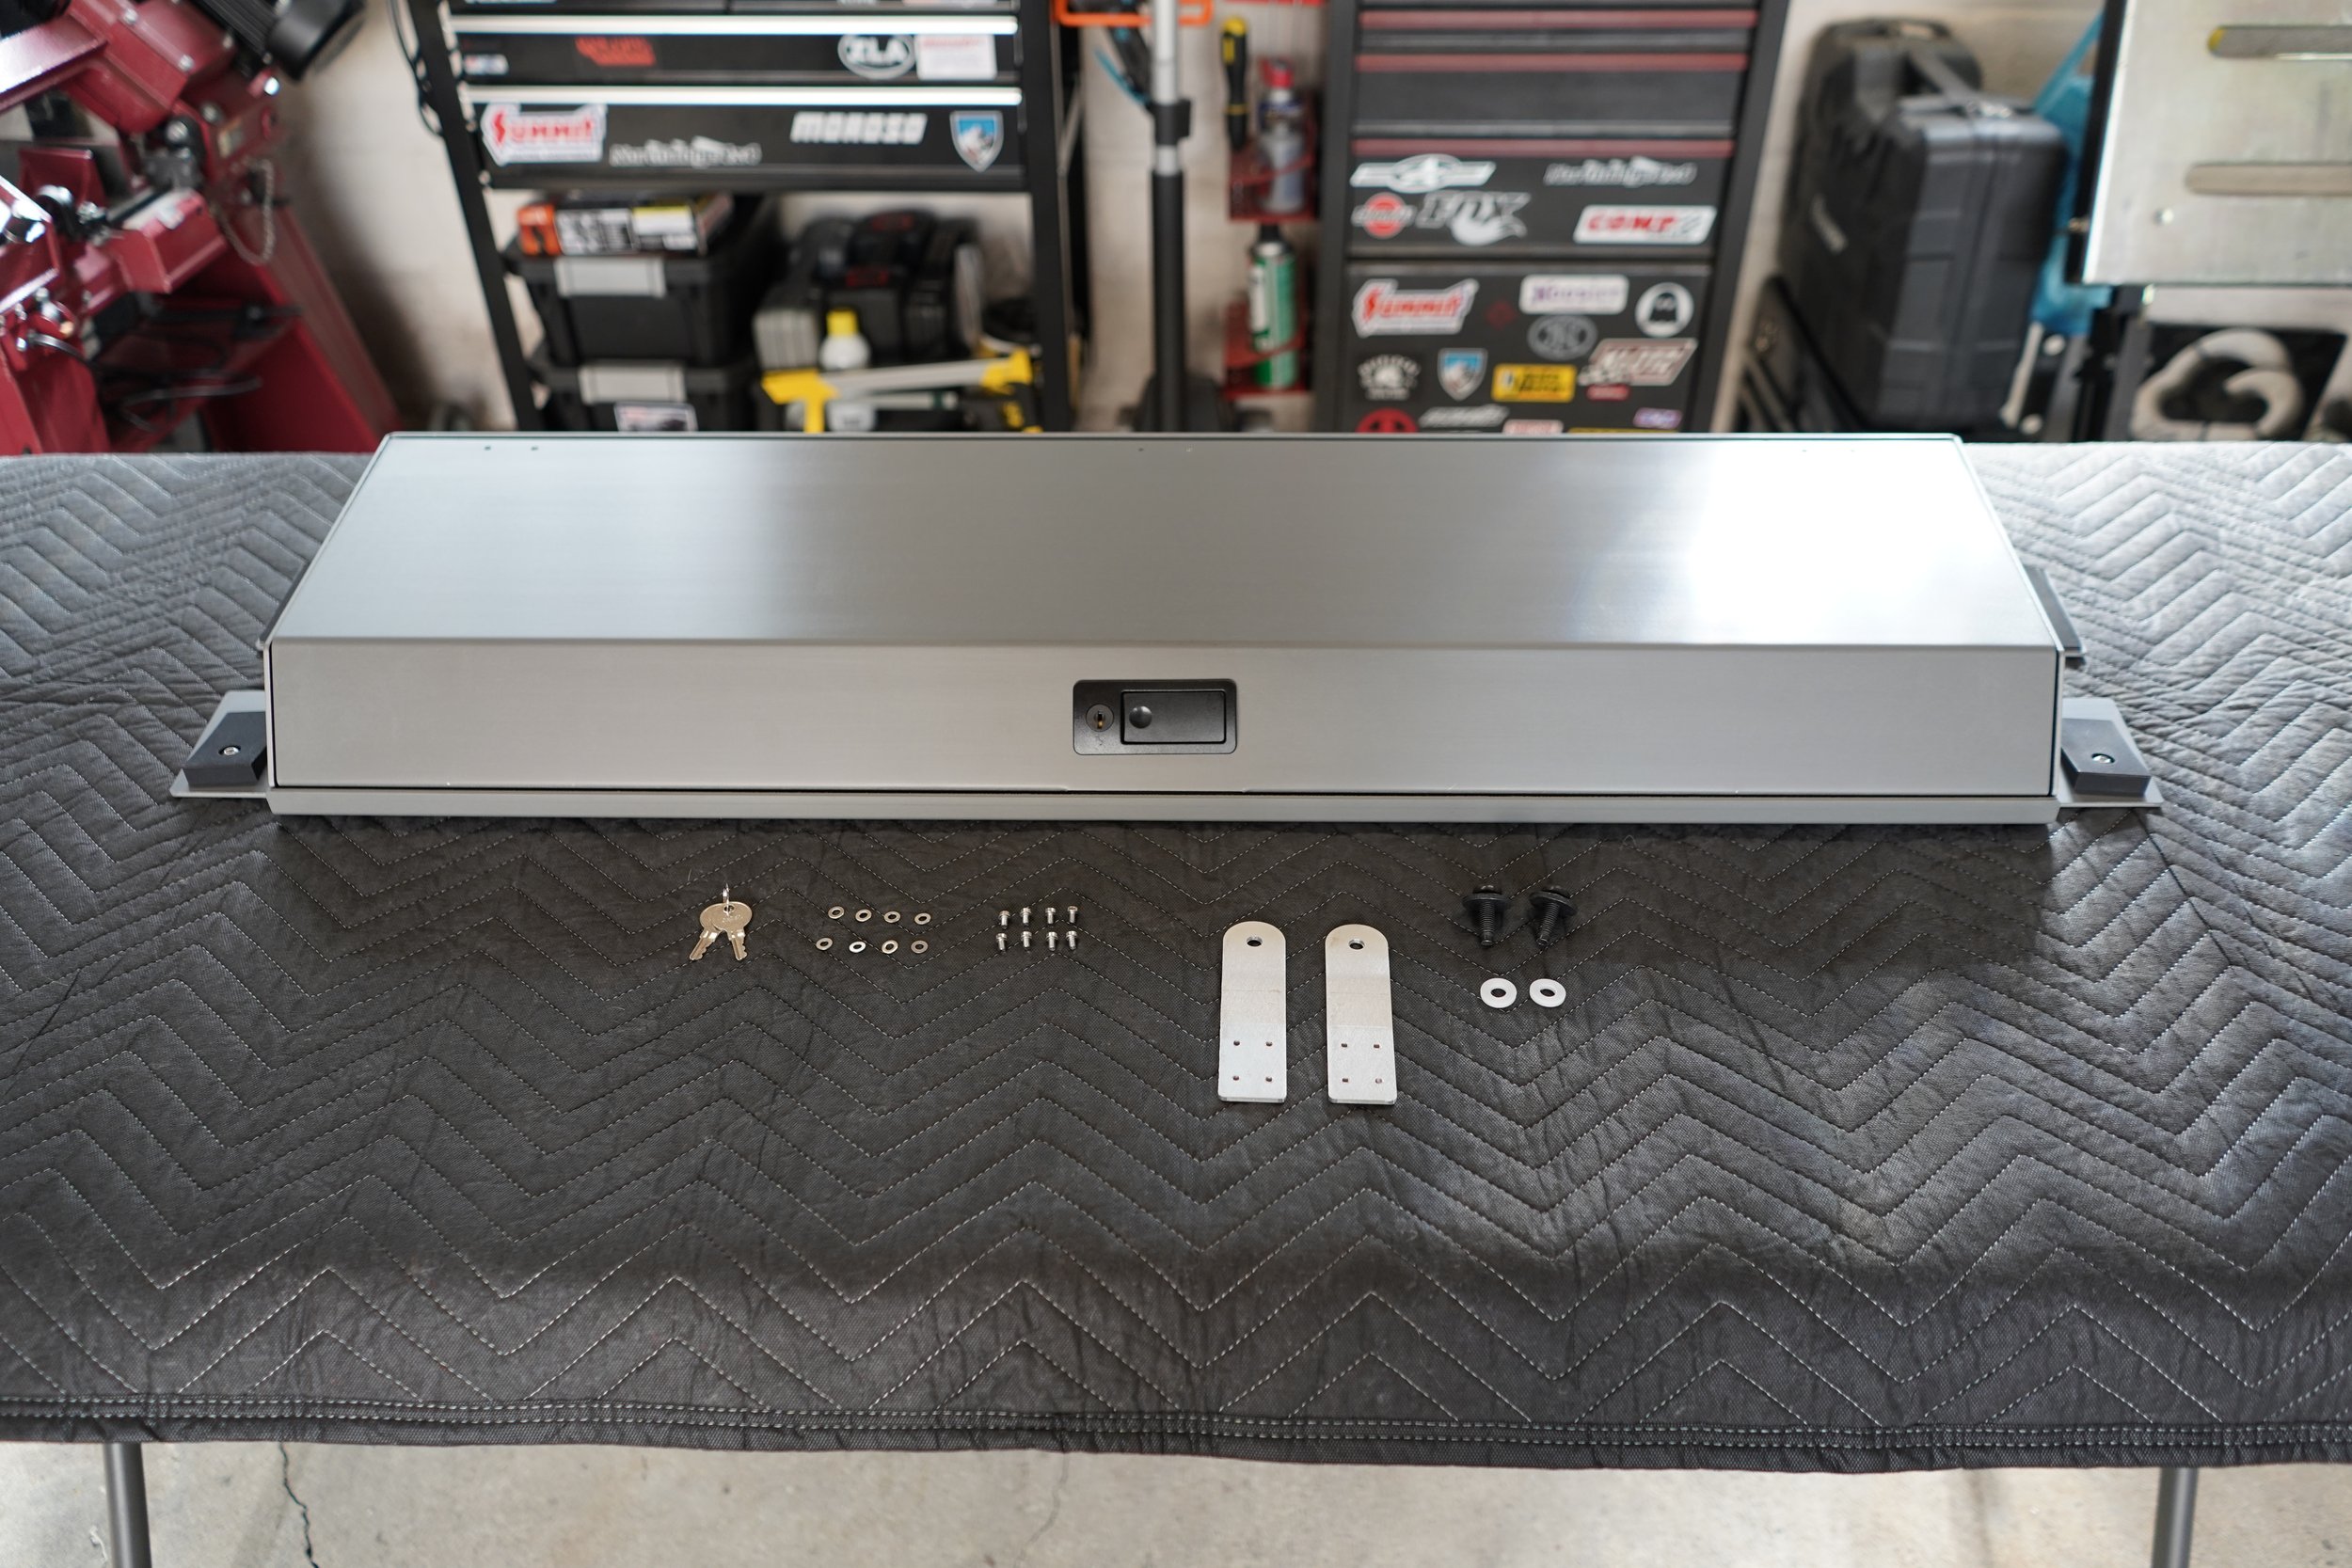
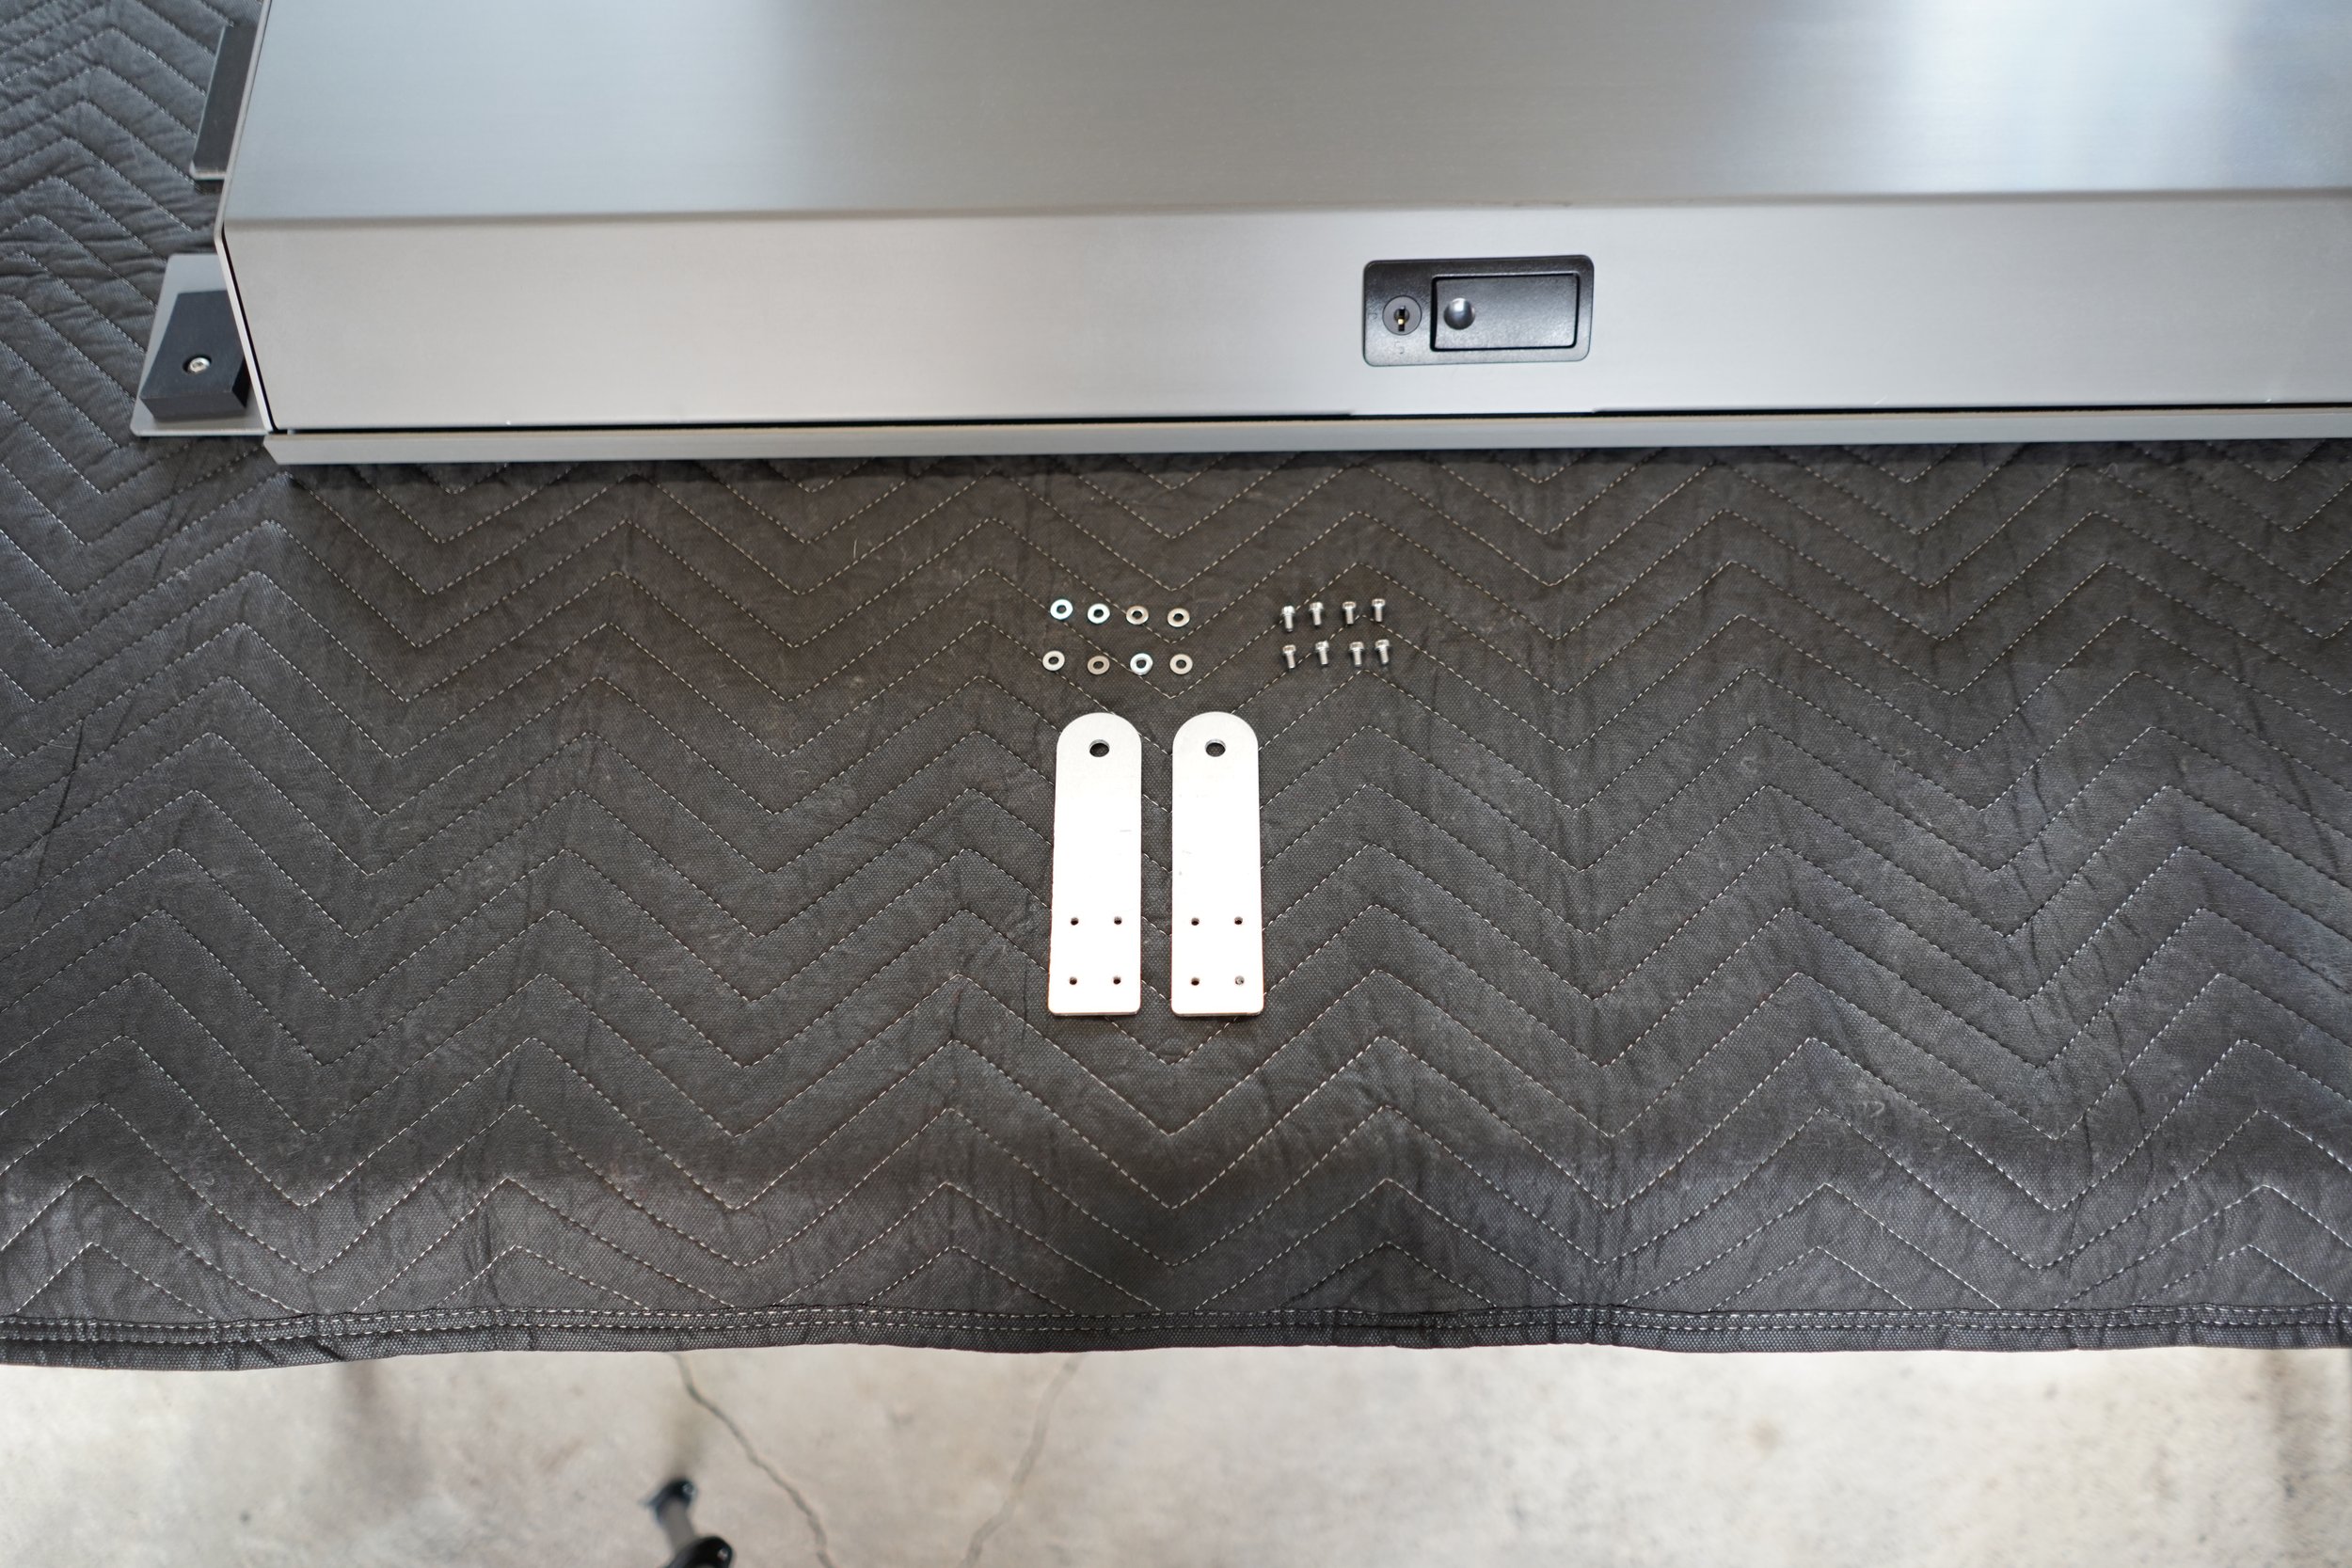
Let’s take a look at what comes in the box.
Plenum Chassis (x1)
Grid Mounting Panel (x1)
Mounting Tabs (x2)
M4 Bolt A (x8)
M4 Washer (x8)
M6 Screws (x8) (ships inside unit/ holds the Grid Panel in Place)
Factory M8 fasteners w/ captured Washer (x2)
M8 plastic spacing Washers (x2)
Keys for Locking Latch (x2)
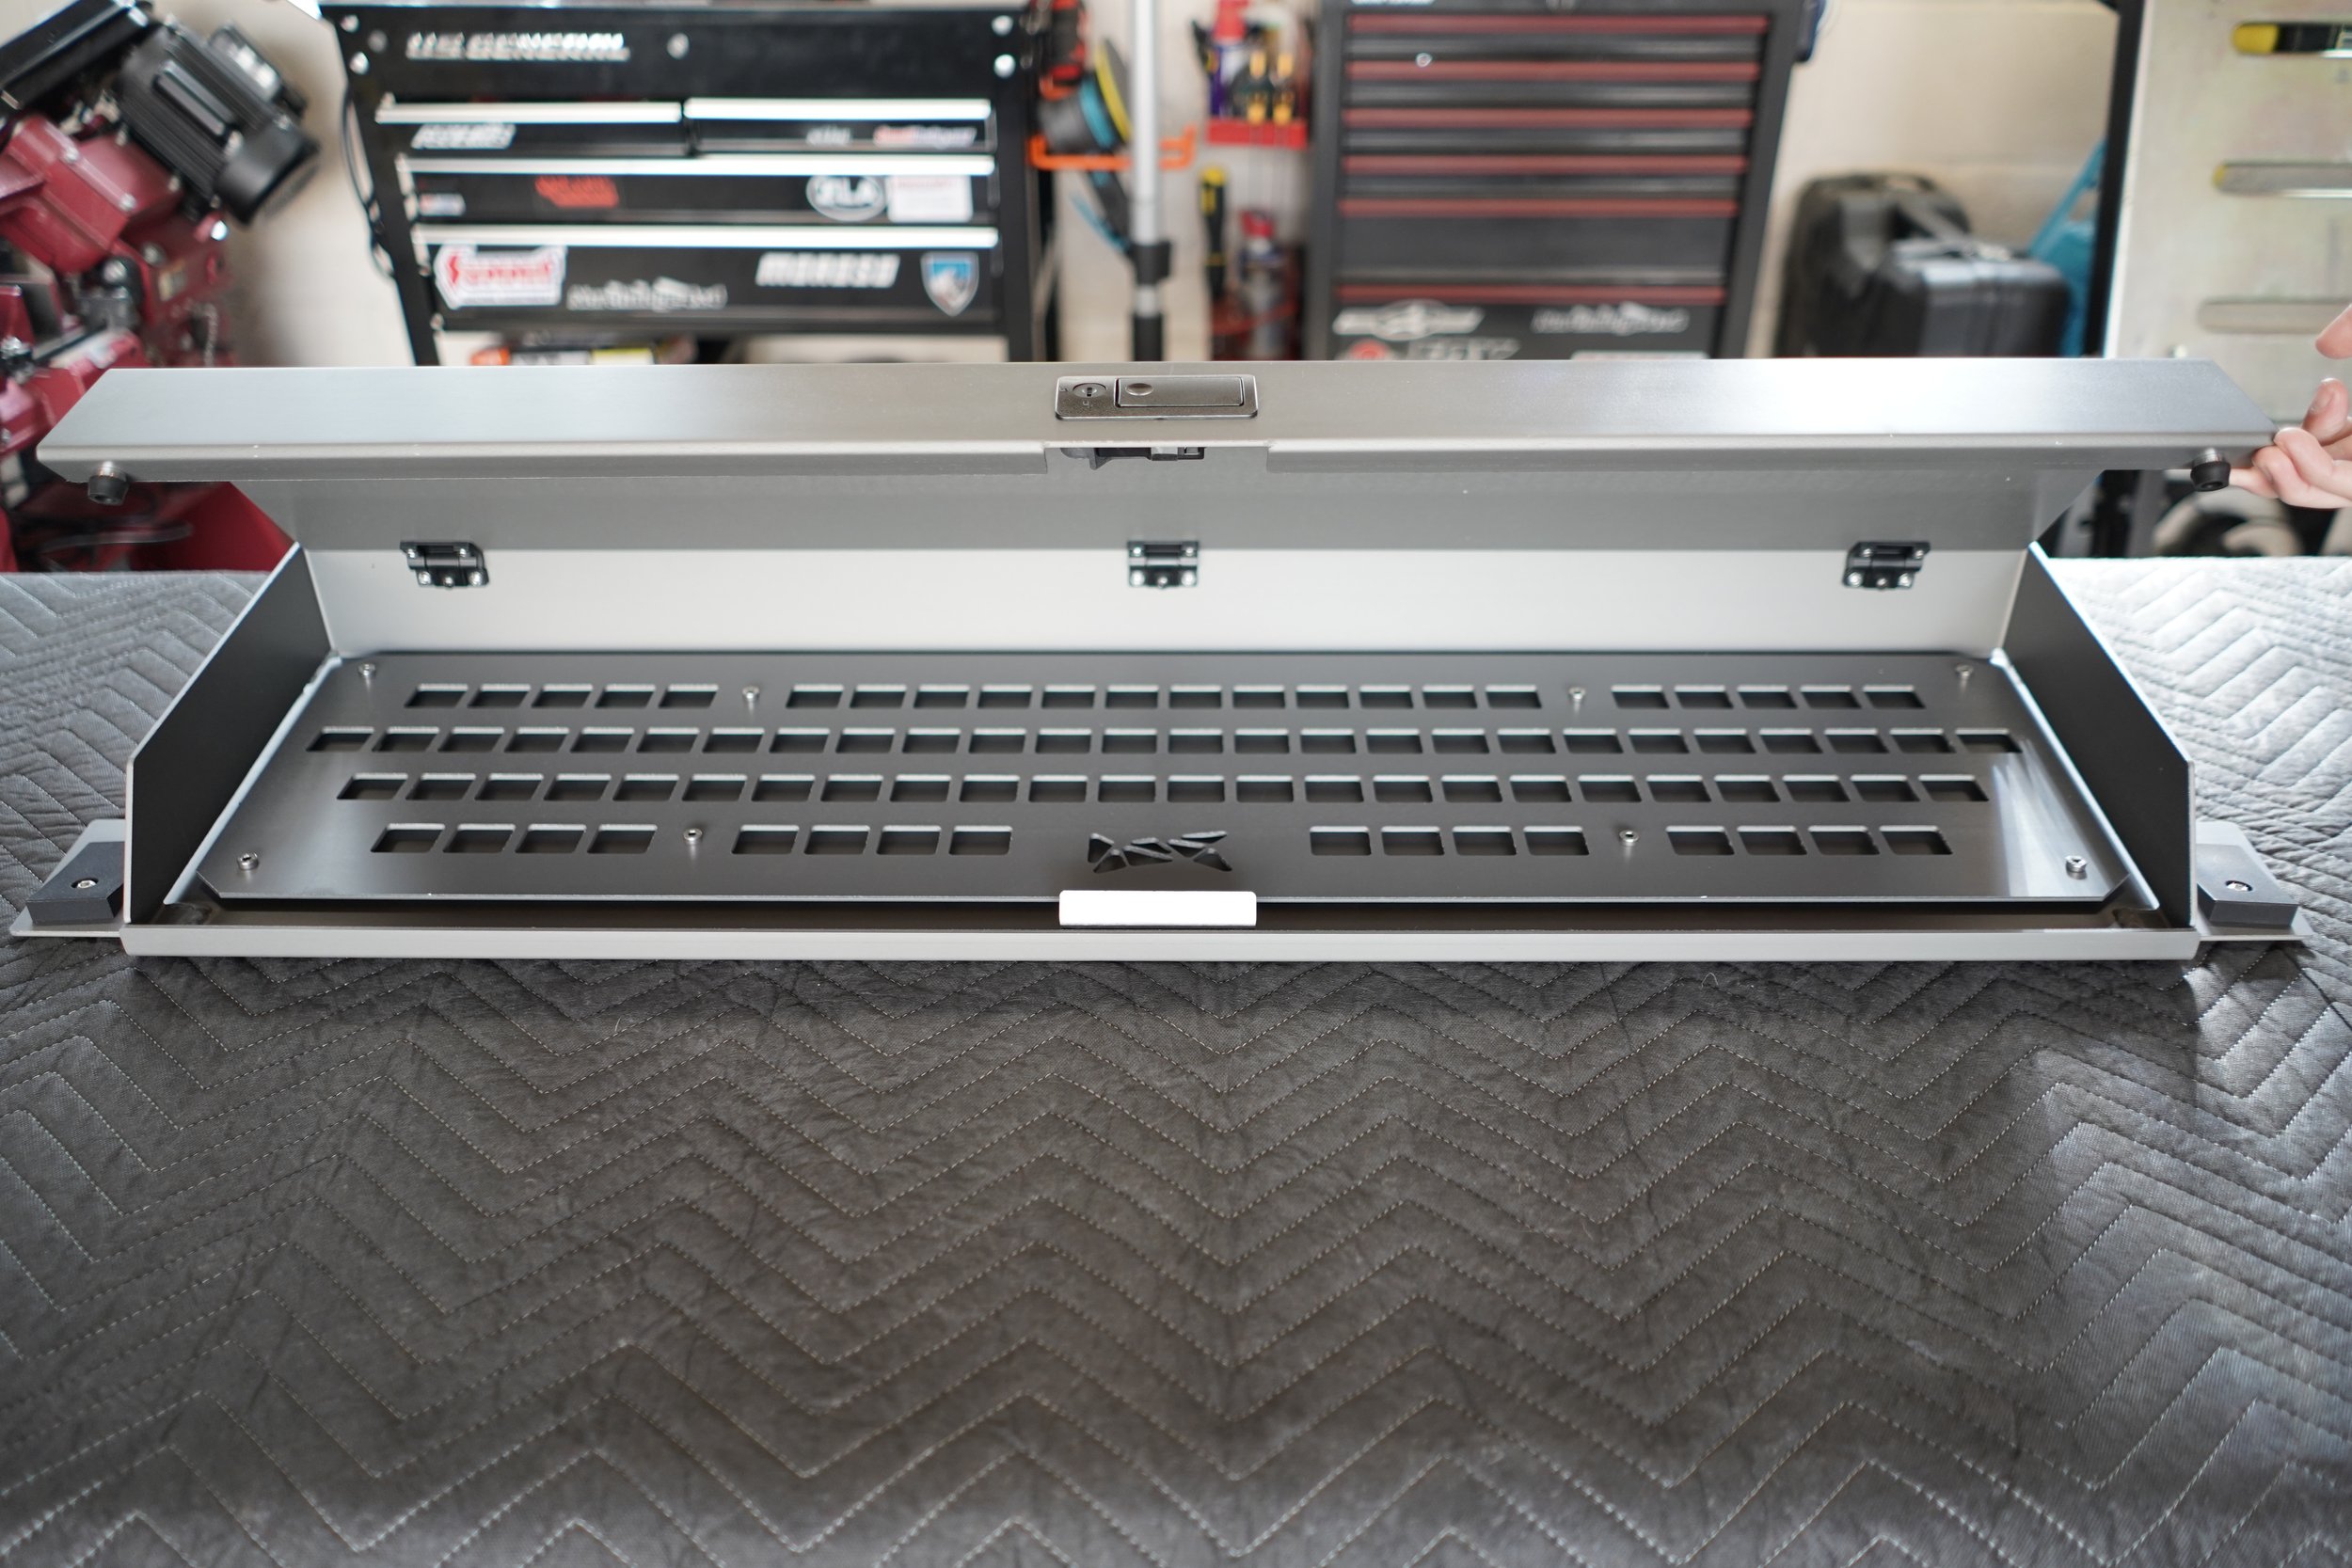
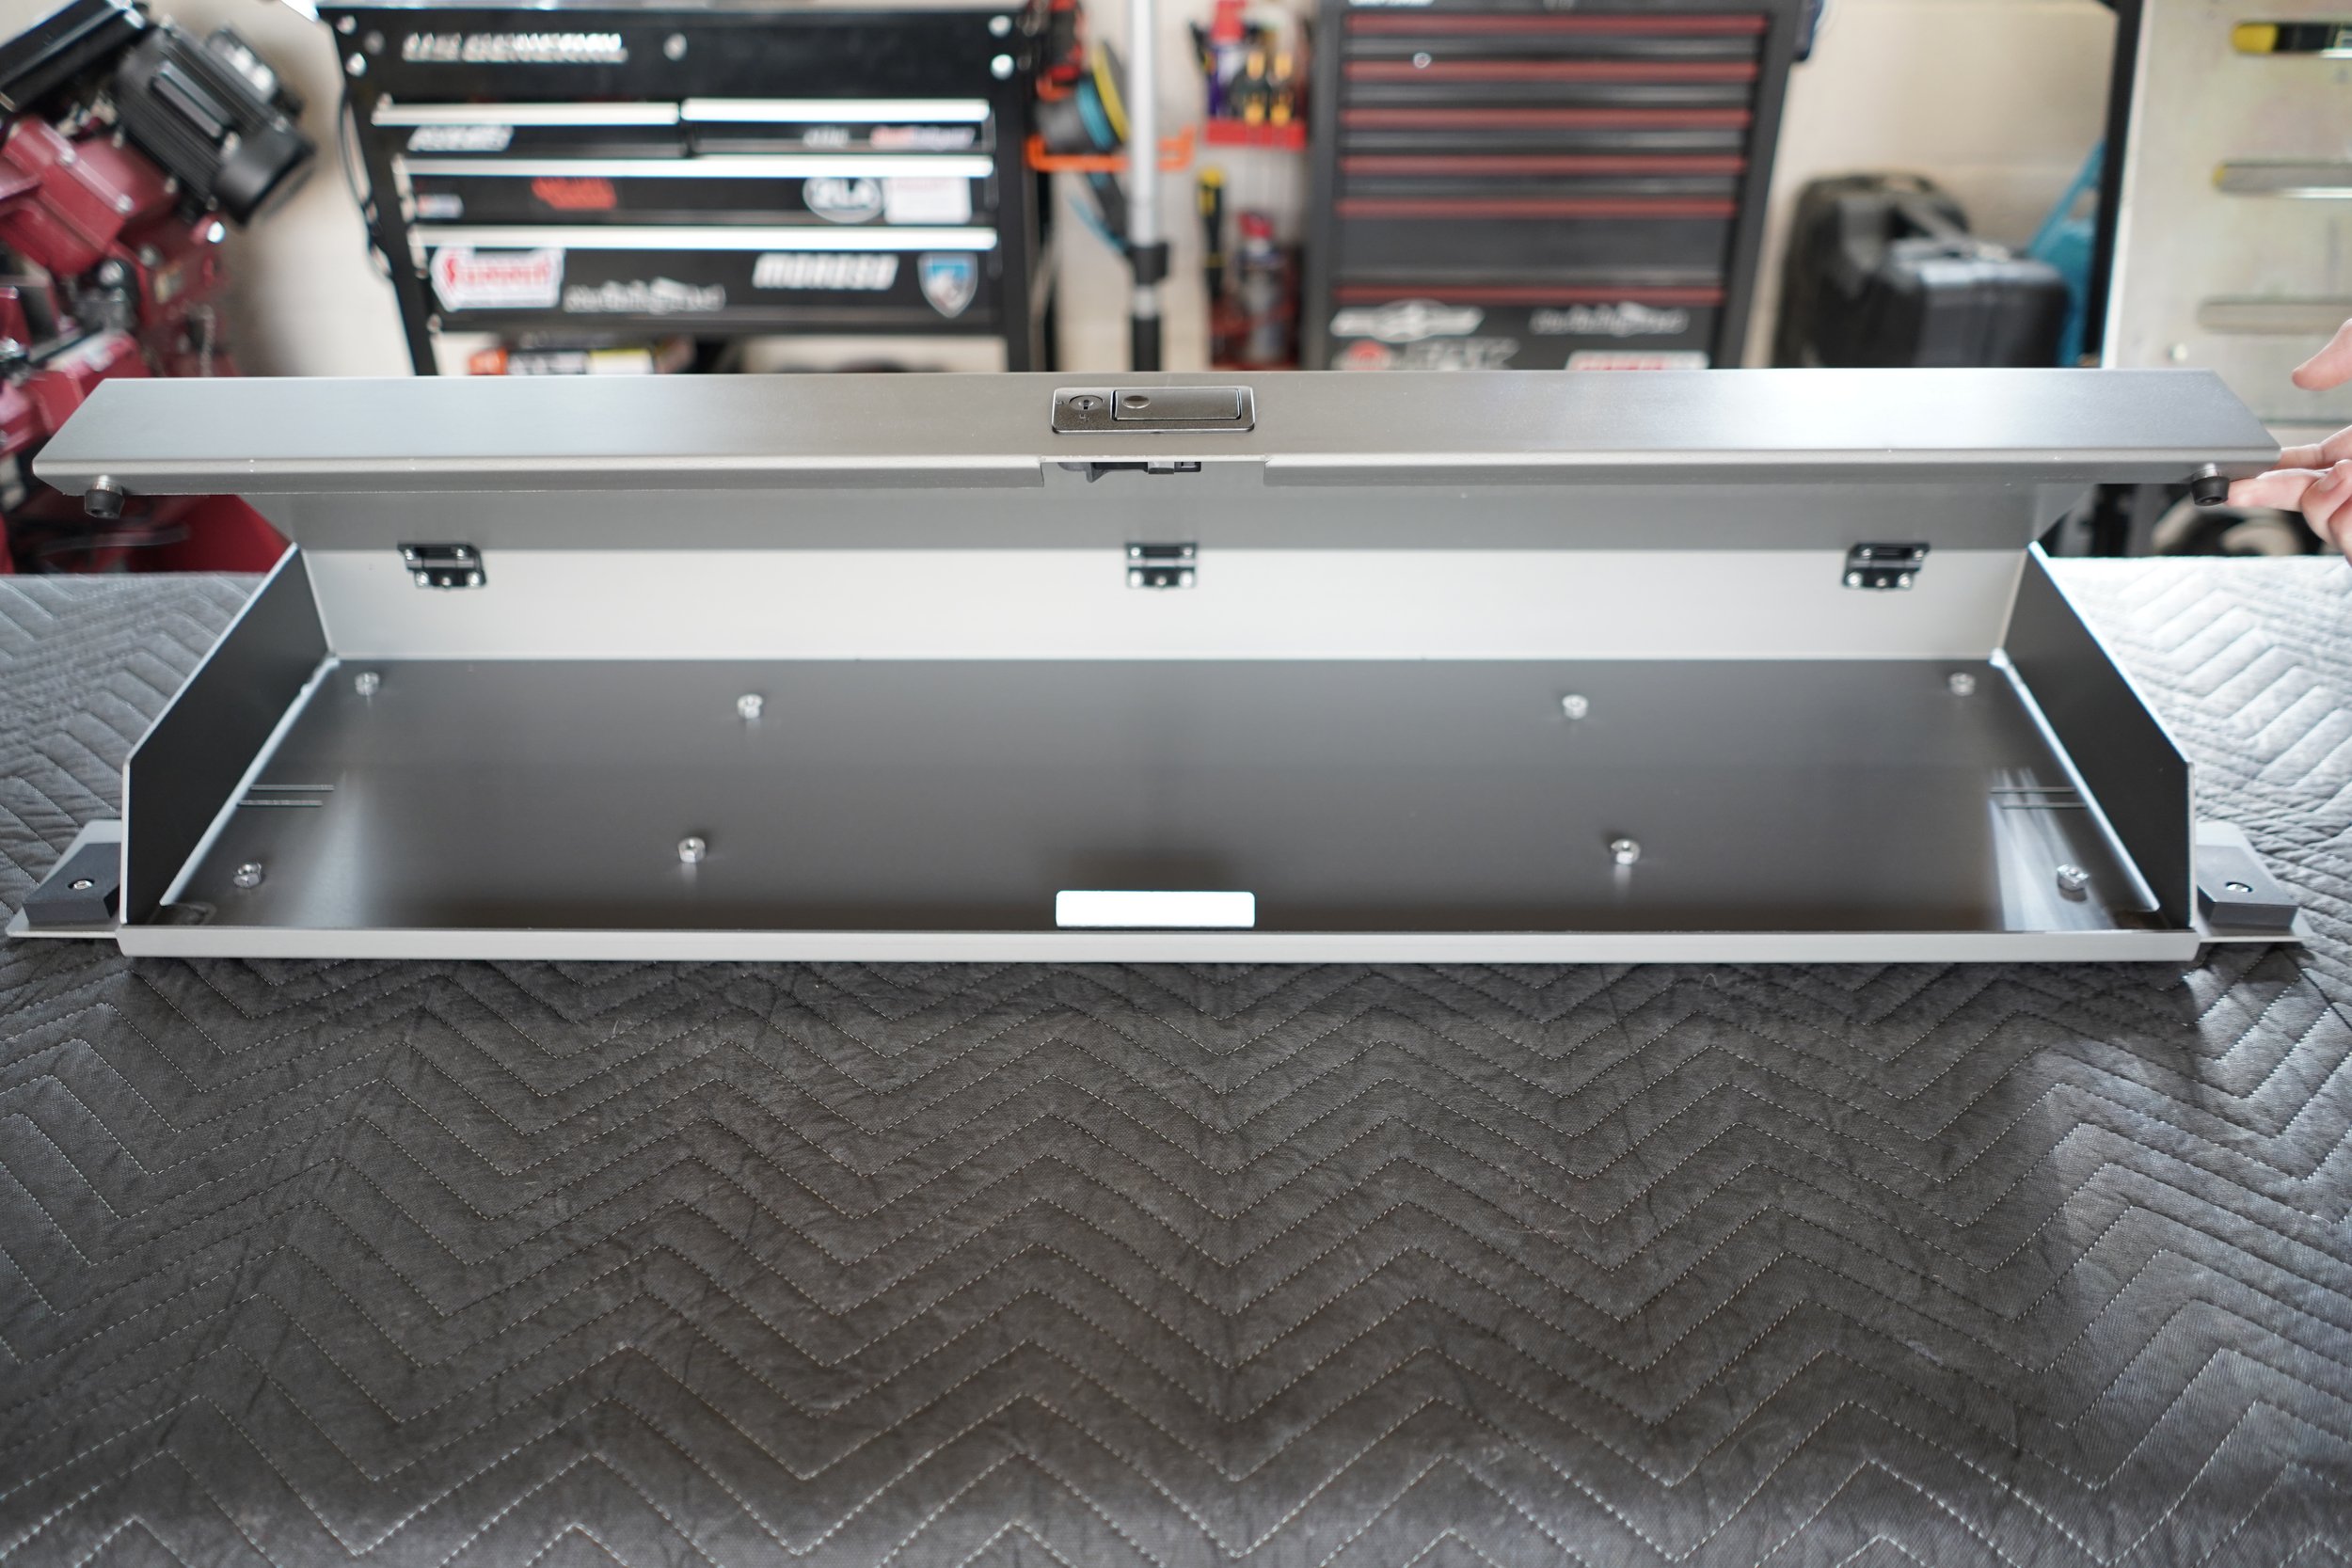
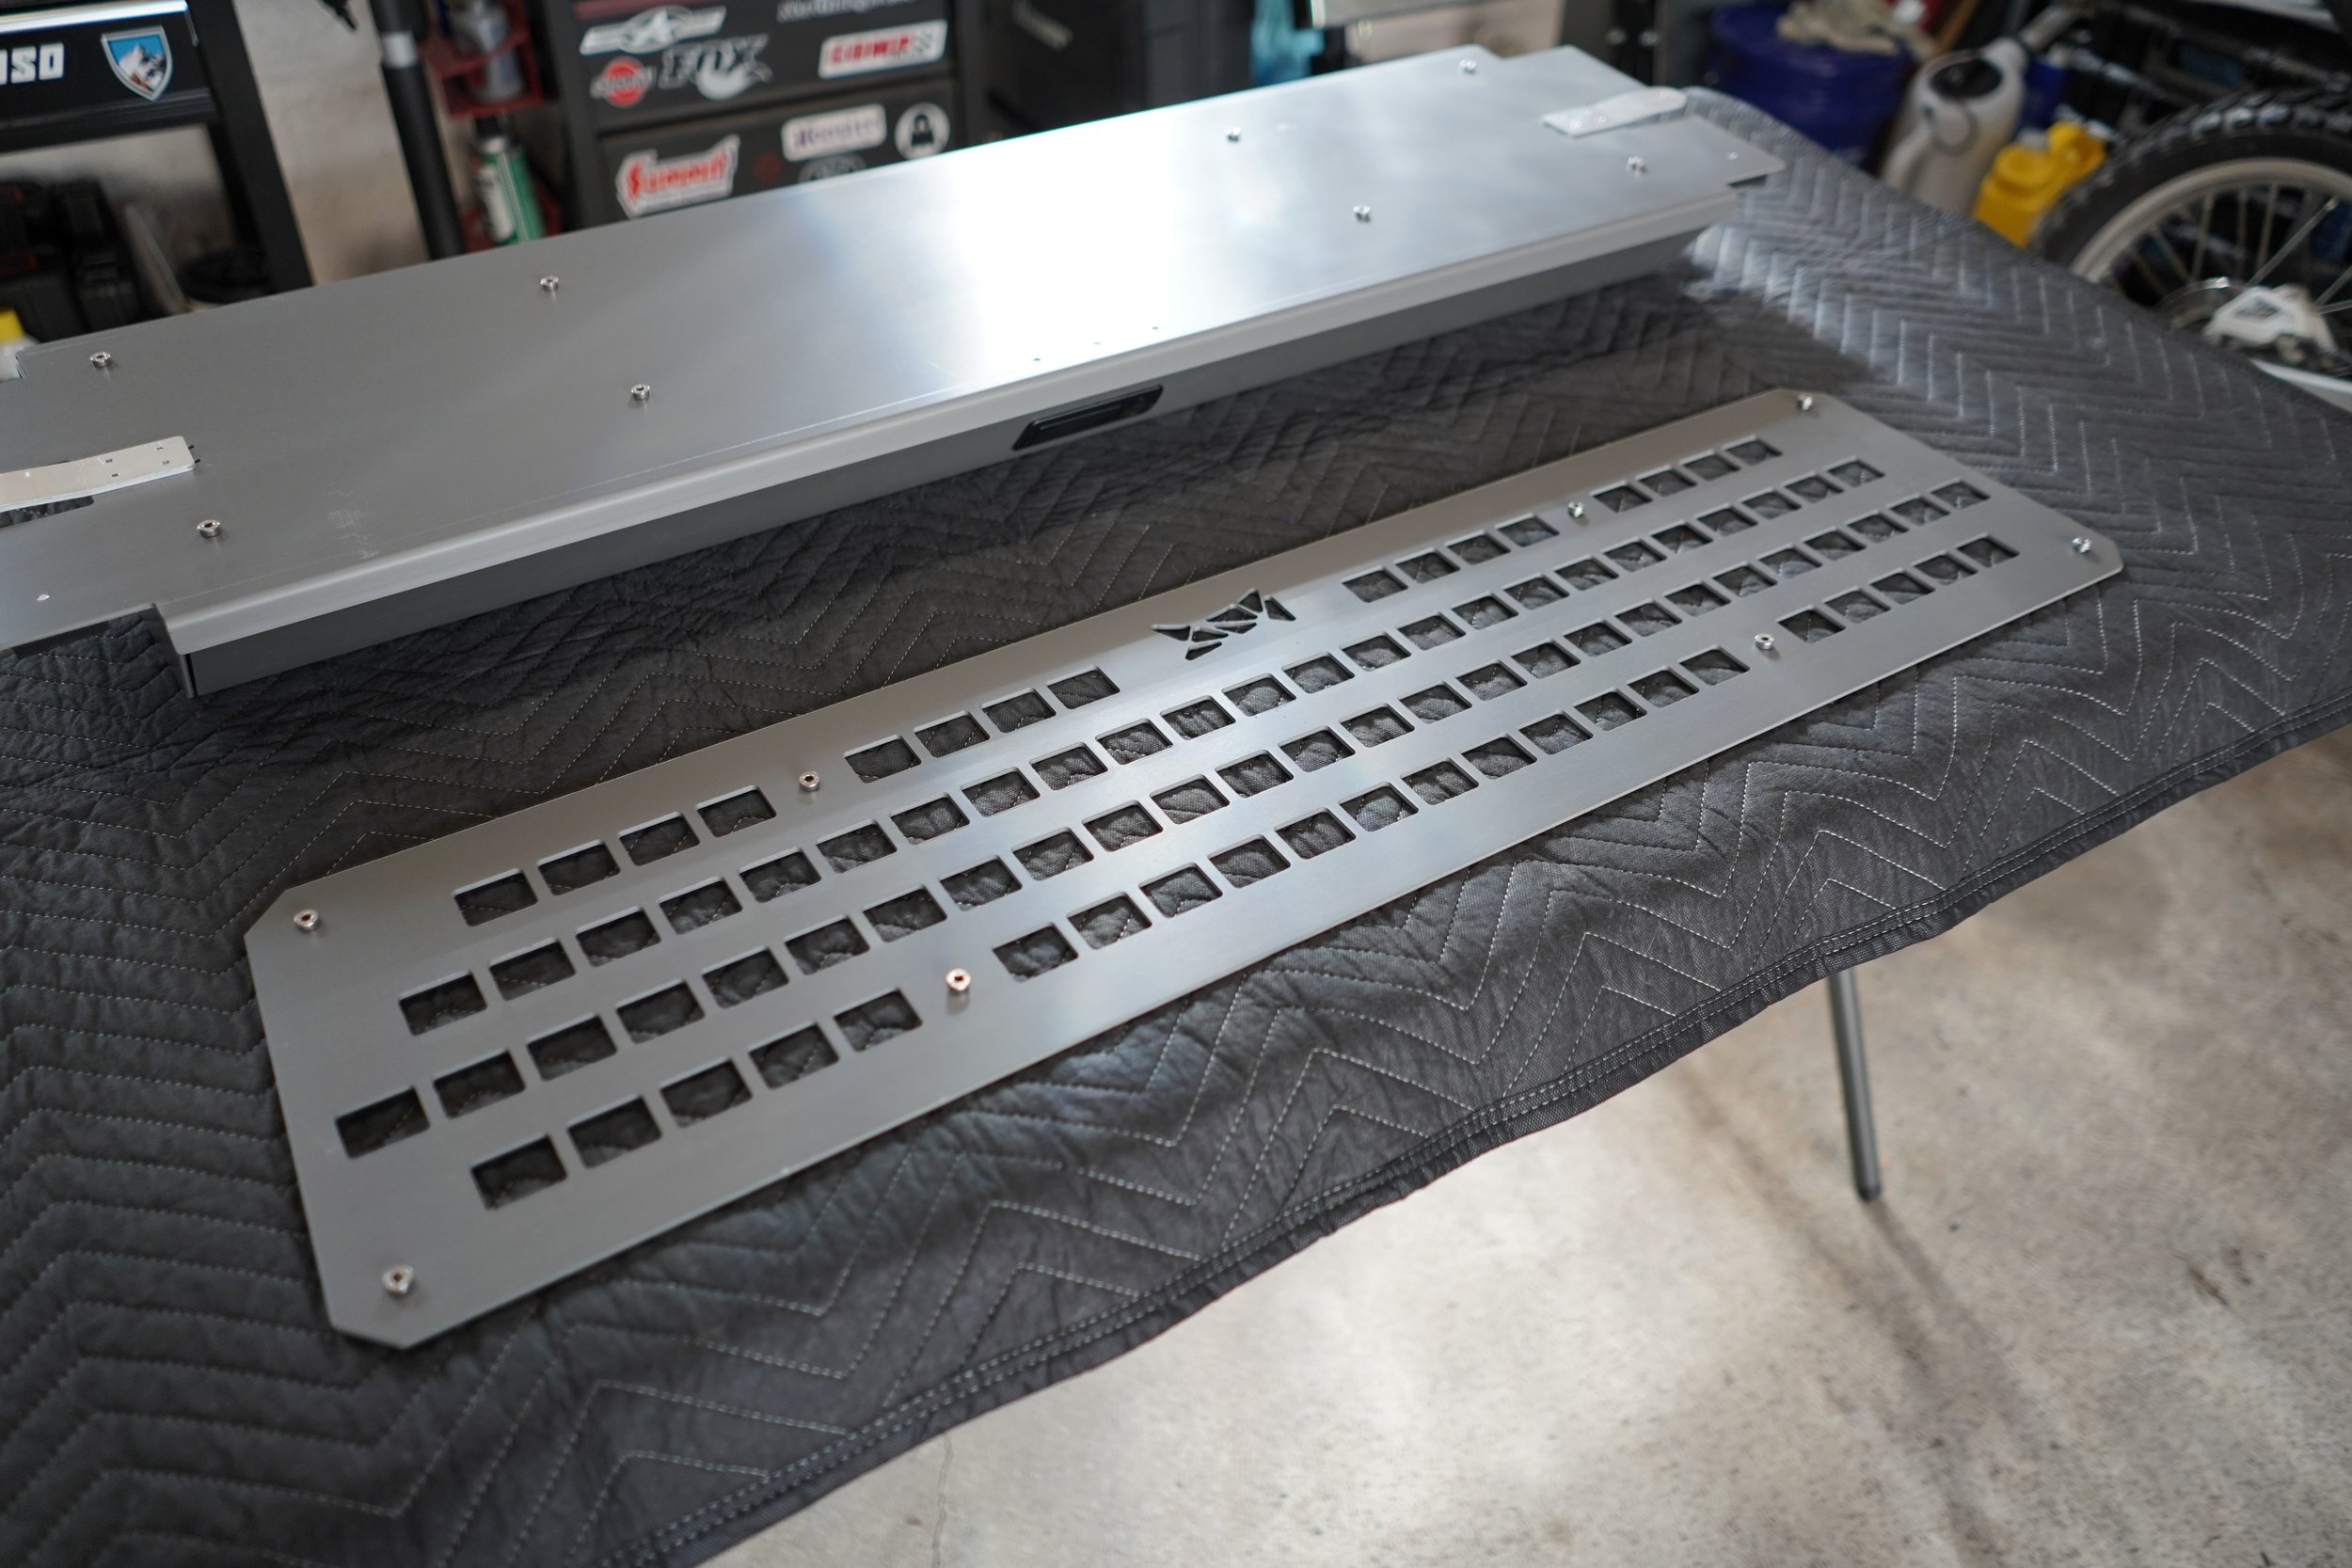
Step 1 - Lay a blanket or padding down on a flat working surface and remove the grid panel.
Lay the unit down with the latched door facing up.
Use a 4mm allen key to remove all (8) M6 fasteners attaching the Grid Panel to the main chassis.
Remove the Grid Panel from the unit and set it aside.
Step 2 - Prepare the unit for Installation.
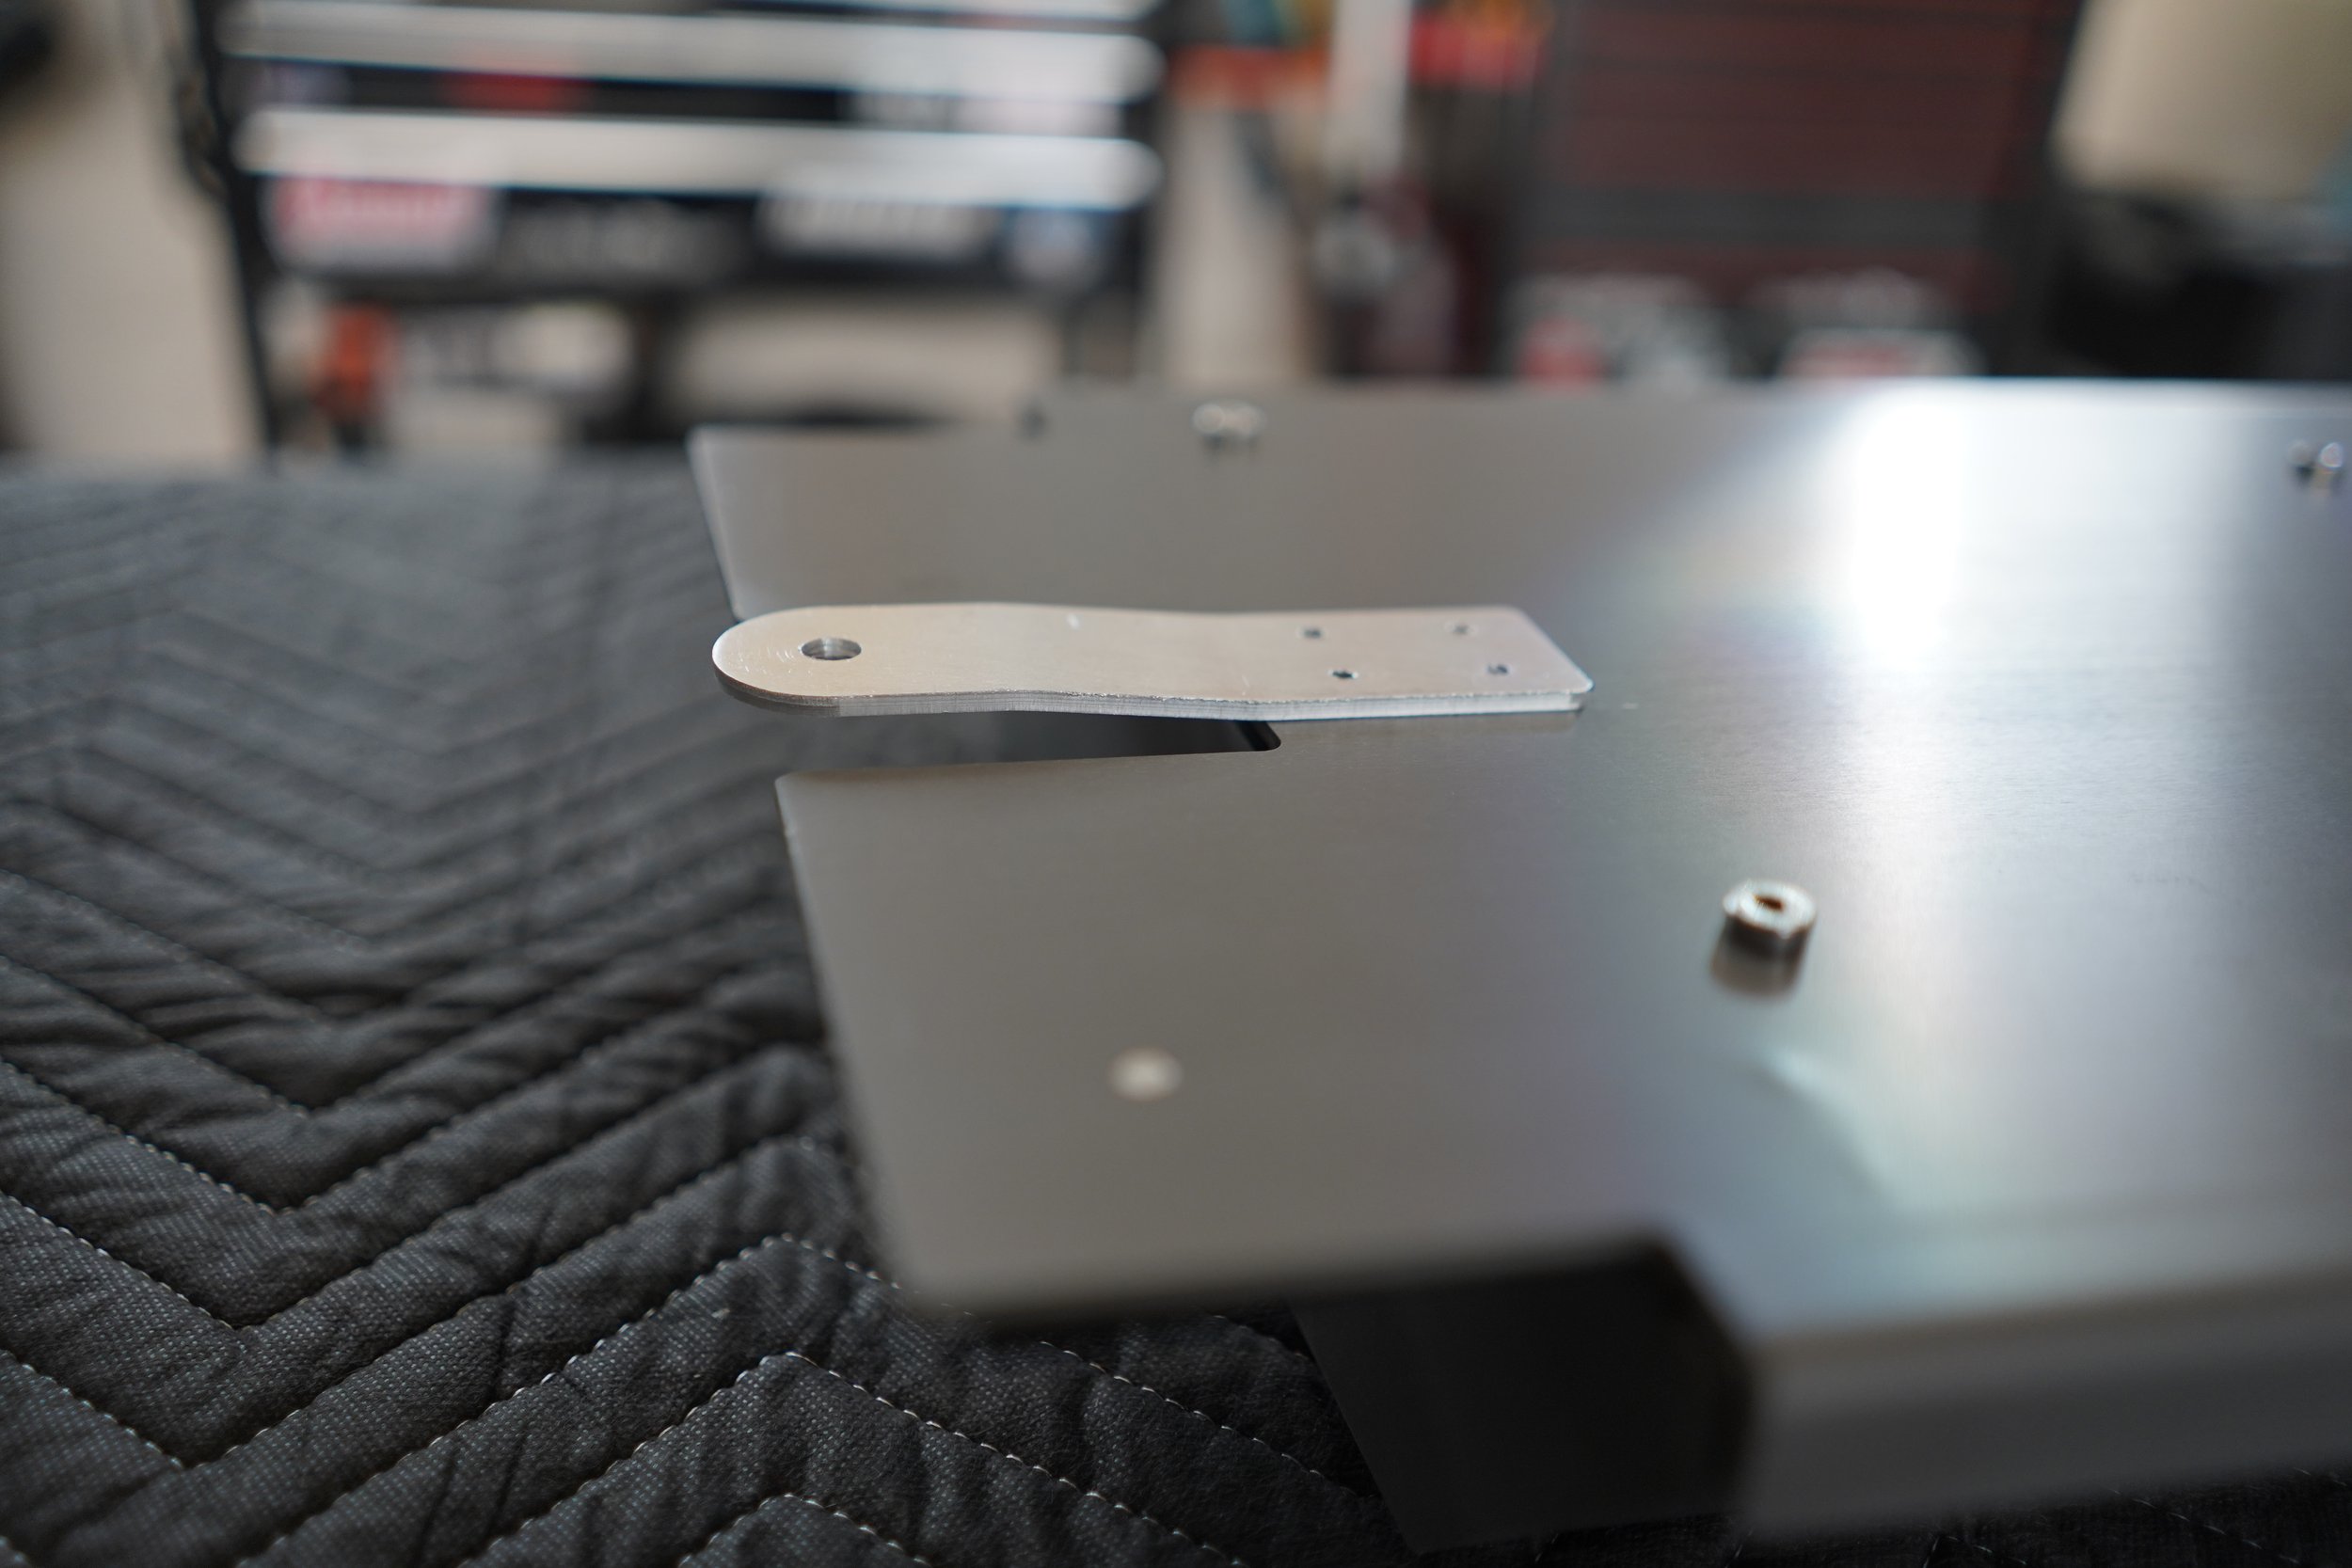
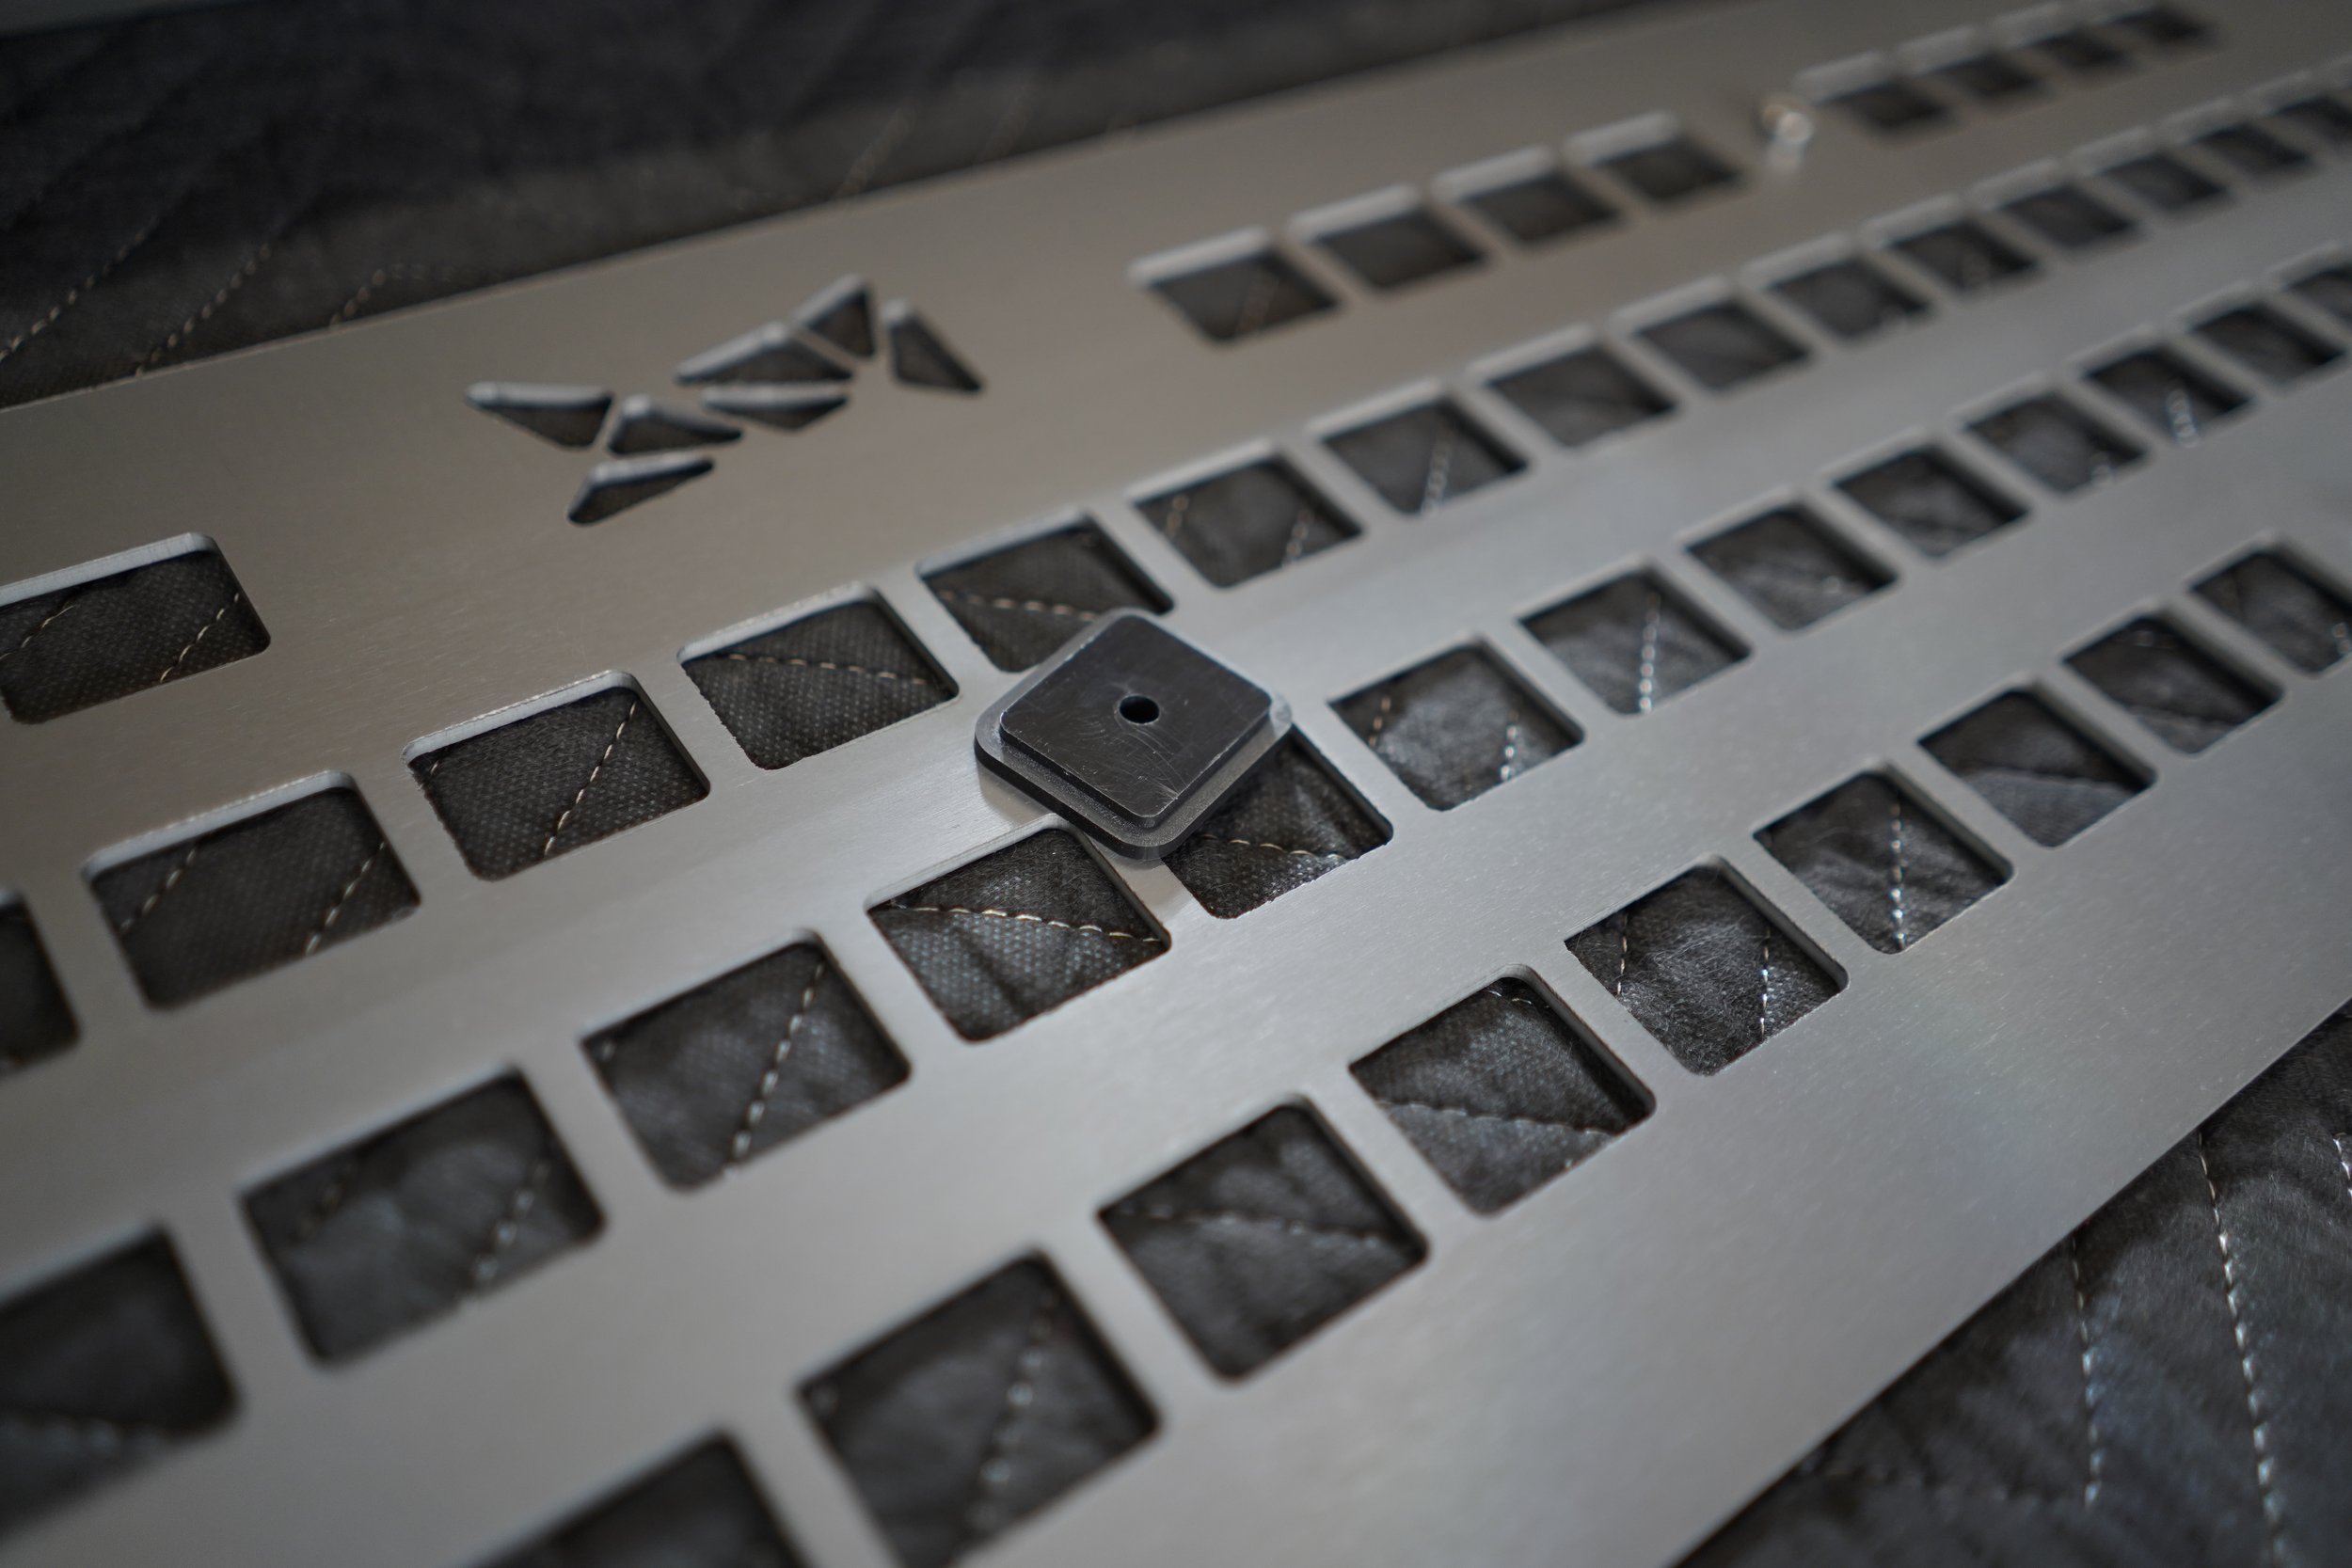
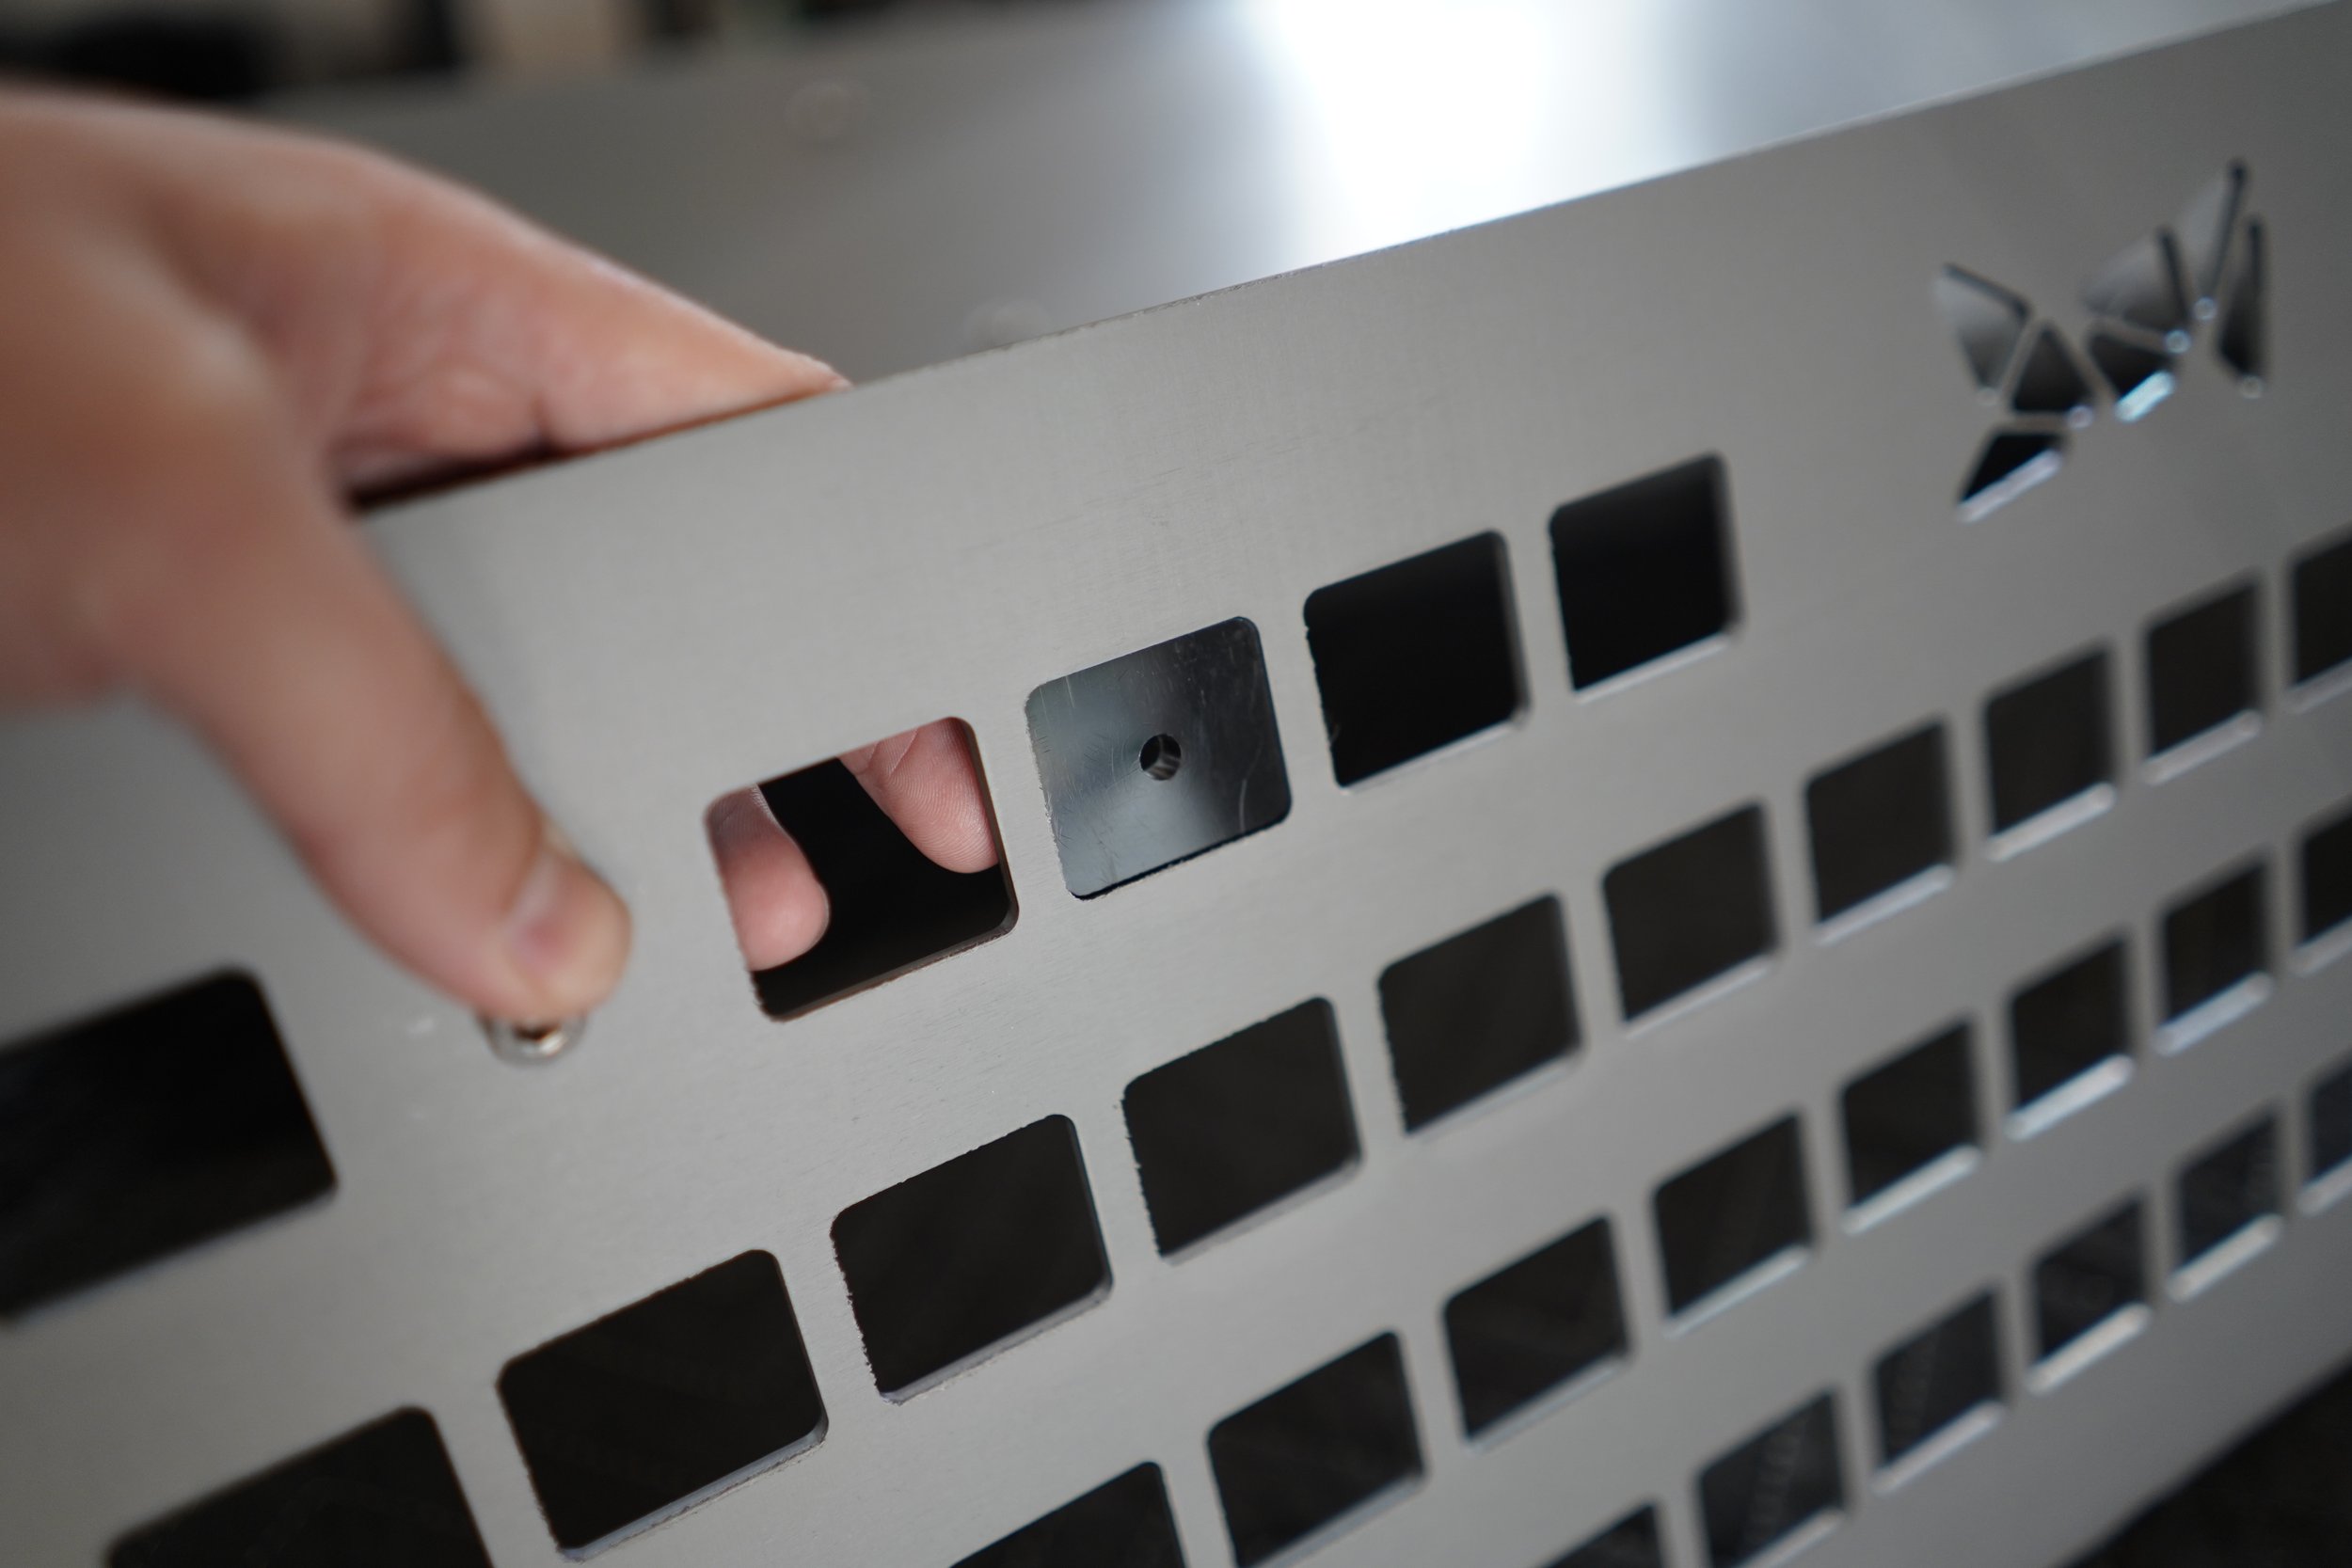
Using the included M4 hardware, attach the aluminum mounting tabs to the main chassis.
The tabs are threaded to accept the M4 hardware. These pieces are aluminum so be sure to start all fasteners by hand to avoid stripping threads. The heads of the screws and washers go on the “interior” of the unit. (pictured below)
Be sure to orient the tabs according to the photo below. The bend should bring the mounting surface up above the main chassis.
Loosely install this hardware so the mounting tabs can slide freely in the provided slots.
Step 3.1 - Prepare your jeep for Installation. (Soft top)
Follow the guidelines in your factory owners manual to fold down your soft top.
You will need to remove all windows from the top and fold it all the way to the rear of the Jeep. YOU DO NOT NEED TO REMOVE THE TOP AND ITS FRAME FROM THE VEHICLE. You just need to fold it all of the way back so you can access the rear bolts of the top frame. (See photos below)
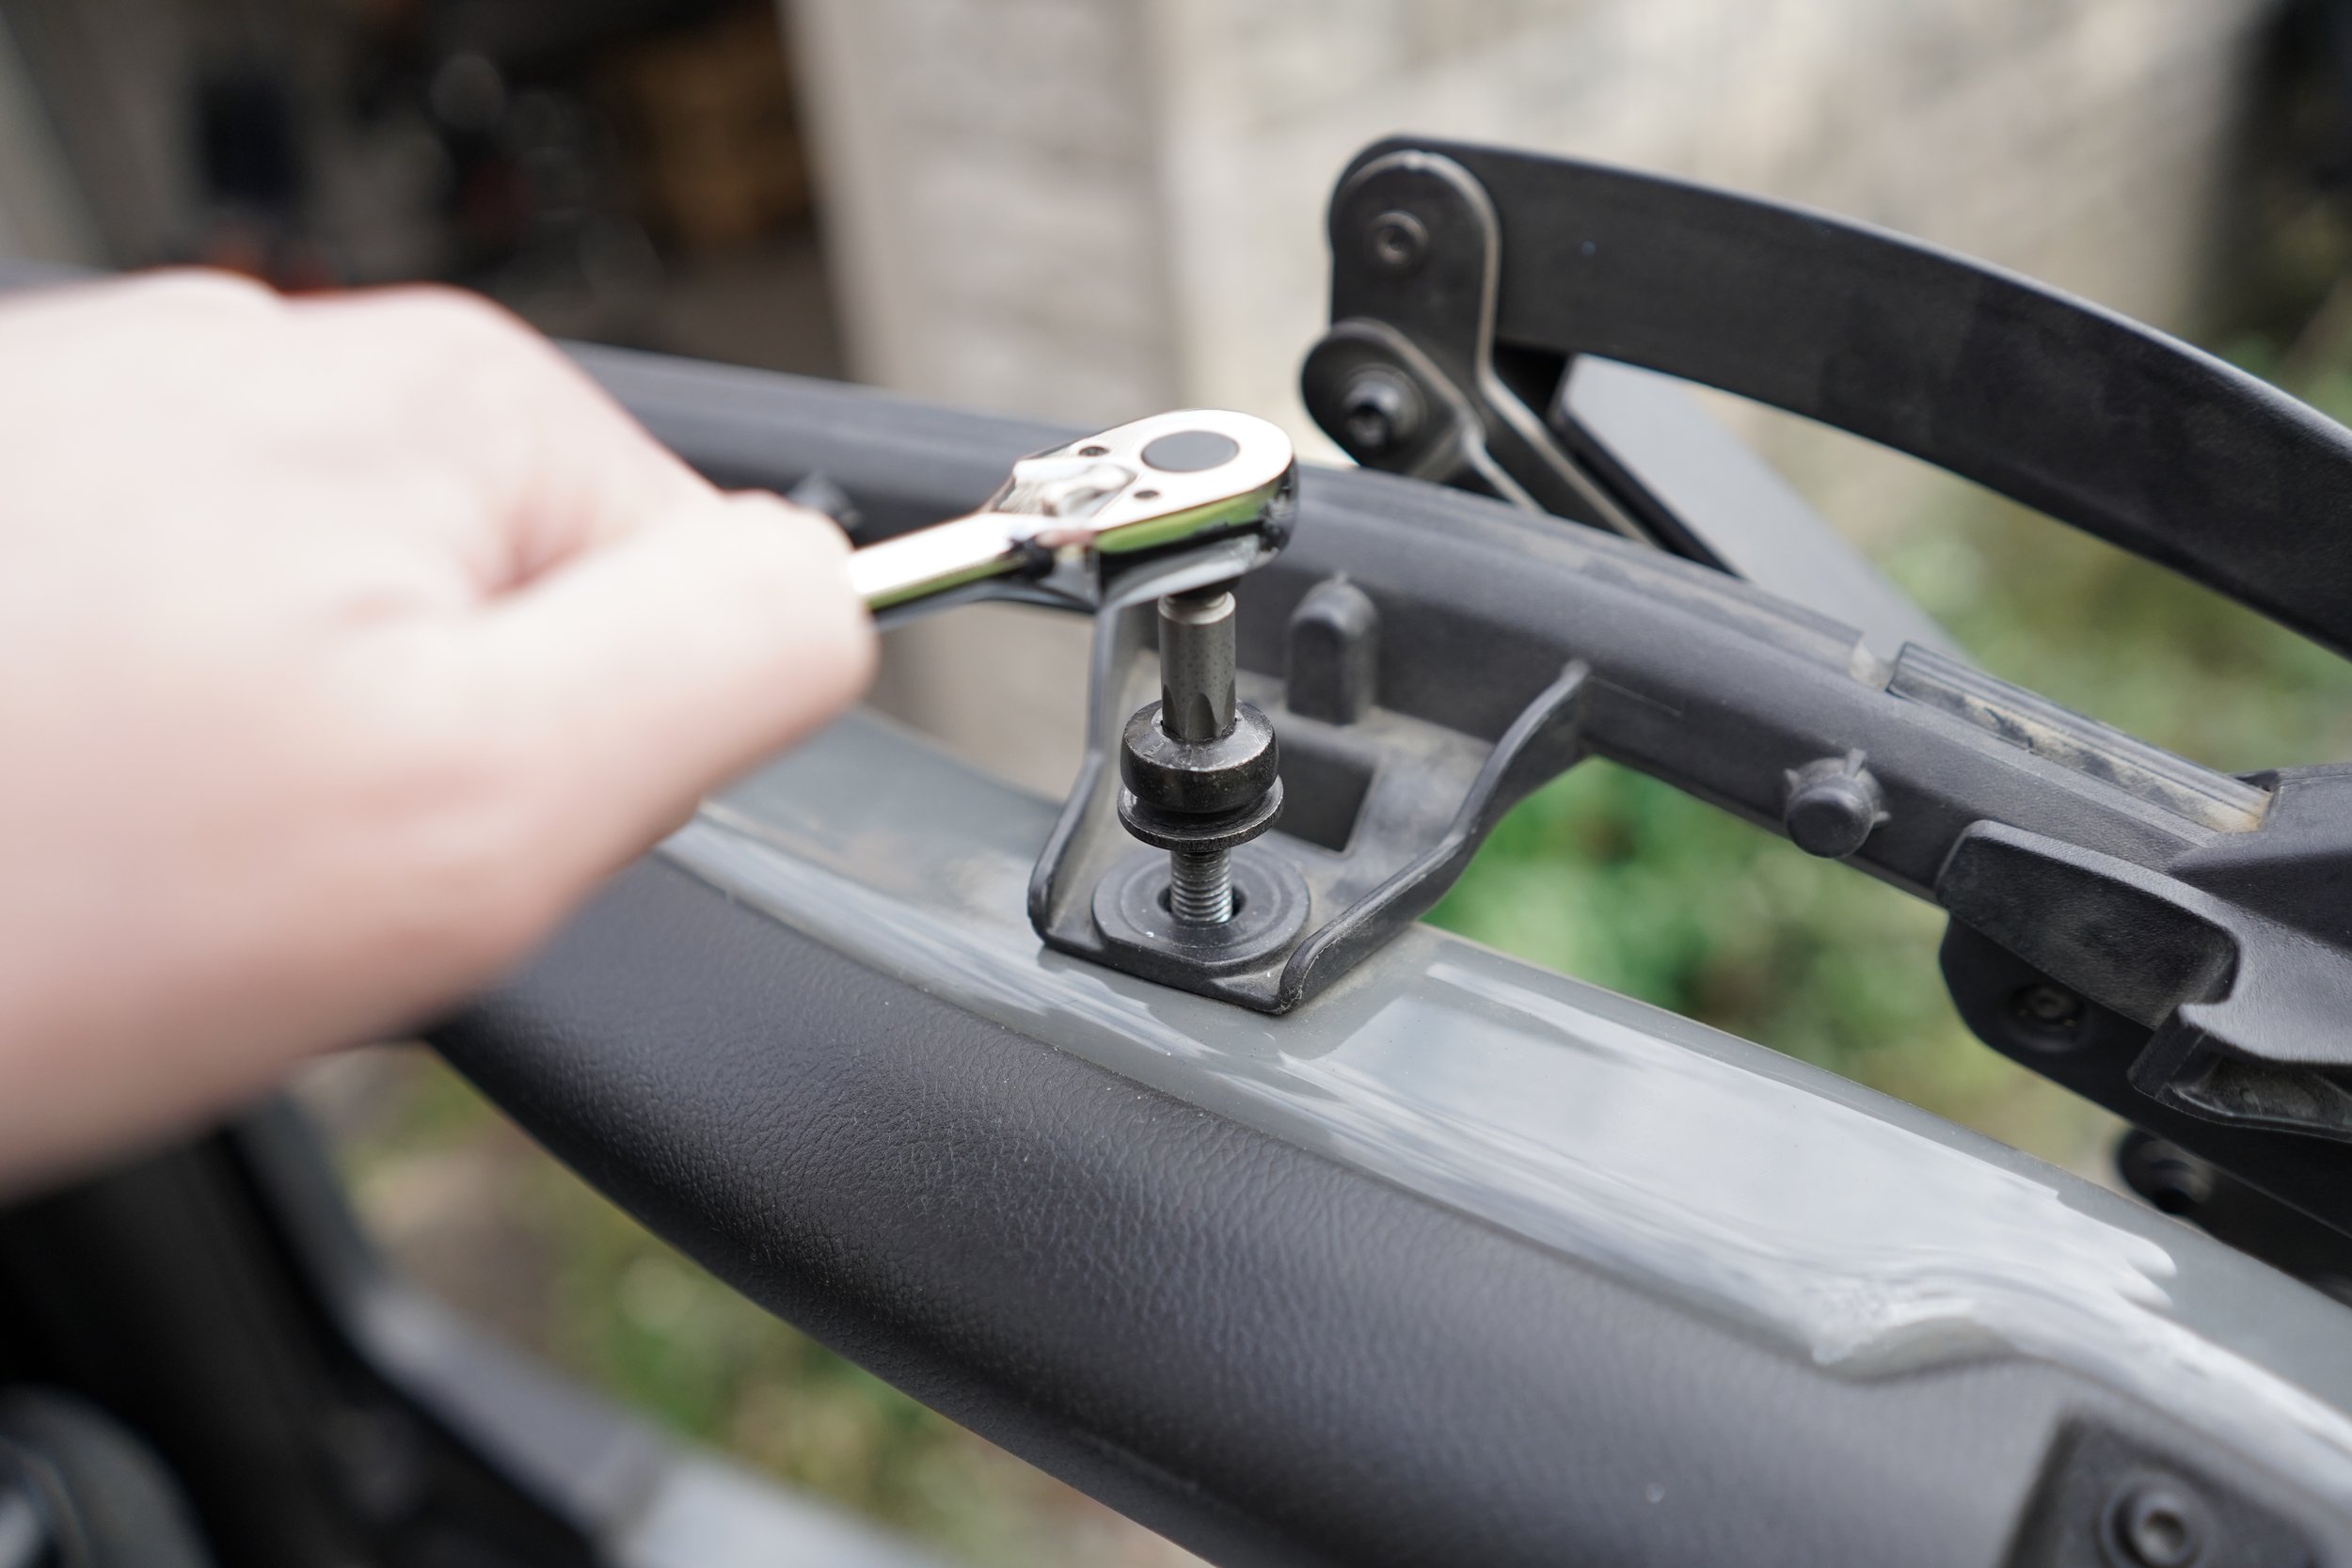
Remove these rear mounting bolts using the Torx bit and ratchet included in the jeep Tool Kit.
Step 3.2 - Prepare your jeep for Installation. (Hard top)
Follow the guidelines in your factory owners manual to remove the hard top from the jeep.
Due to the roll/sport bar geometry, we recommend completely removing the hard top from the Jeep for this Installation. This will make things easier to access and reduce the possibility of scratching/damaging interior surfaces.
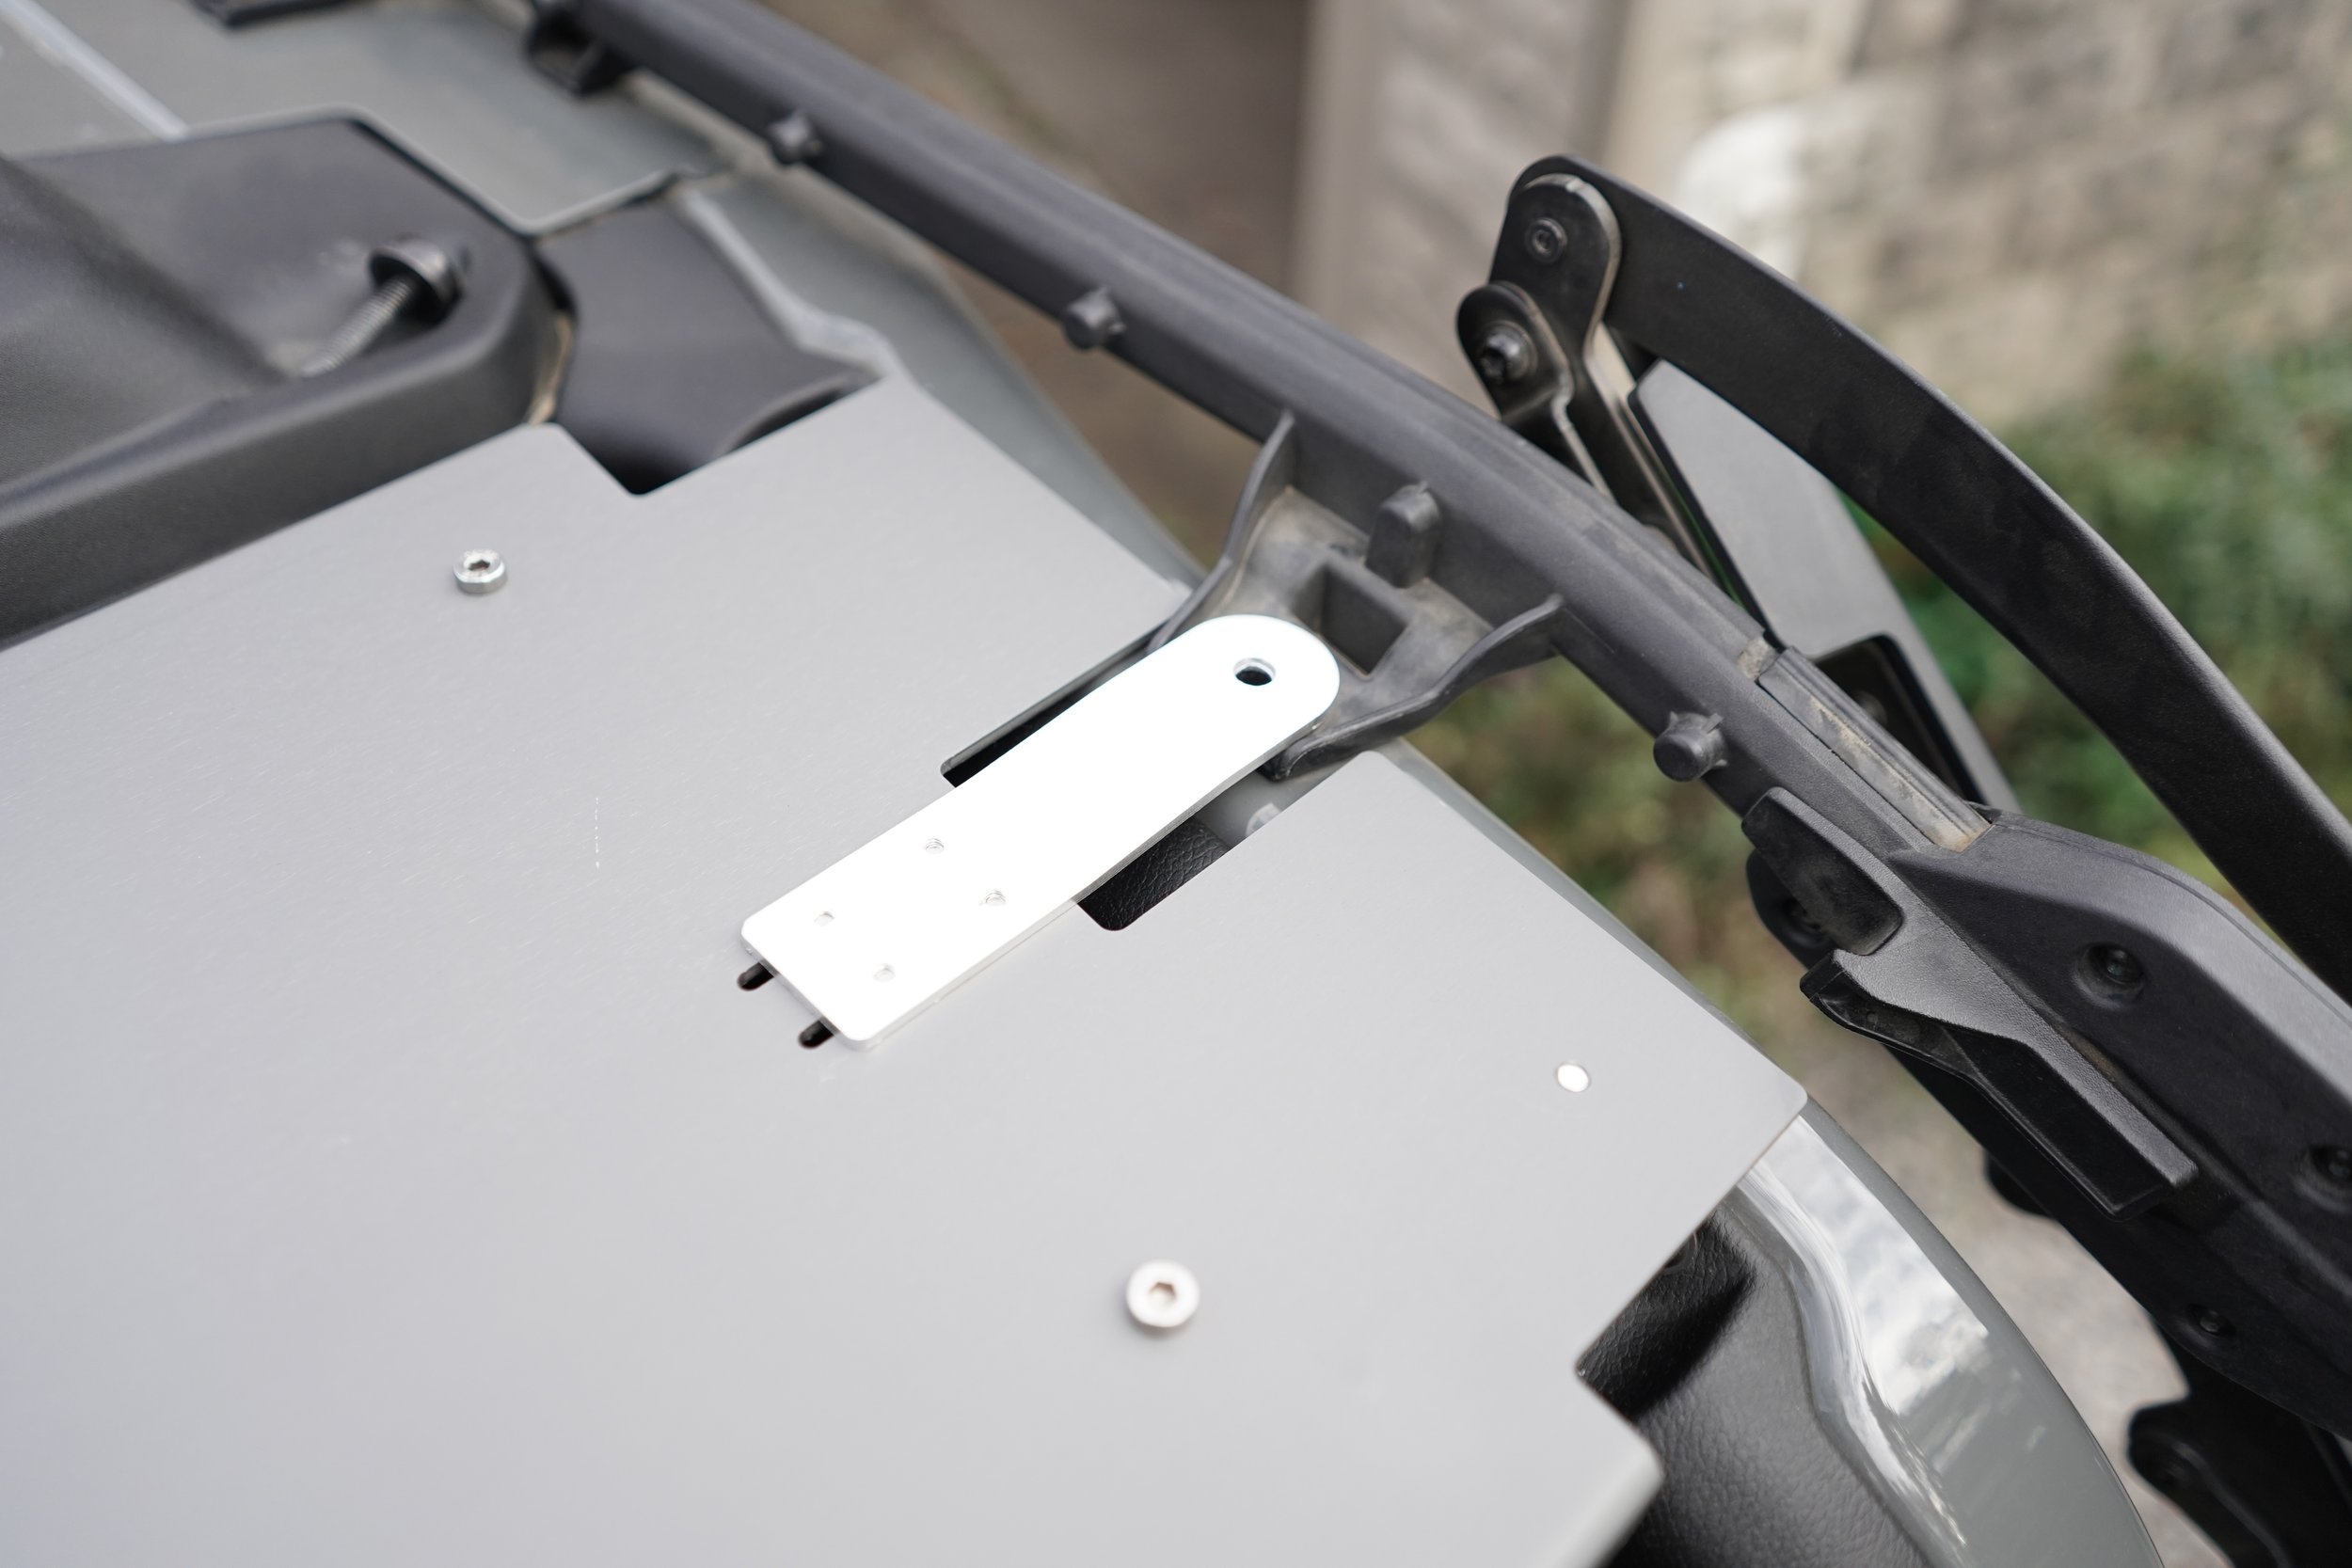
Step 4 - Install the main Chasis.
Lift the main chassis into place with the door latch facing outward toward the rear of the jeep.
The plenum should occupy the space between the two roll/sport bars directly behind overhead speakers.
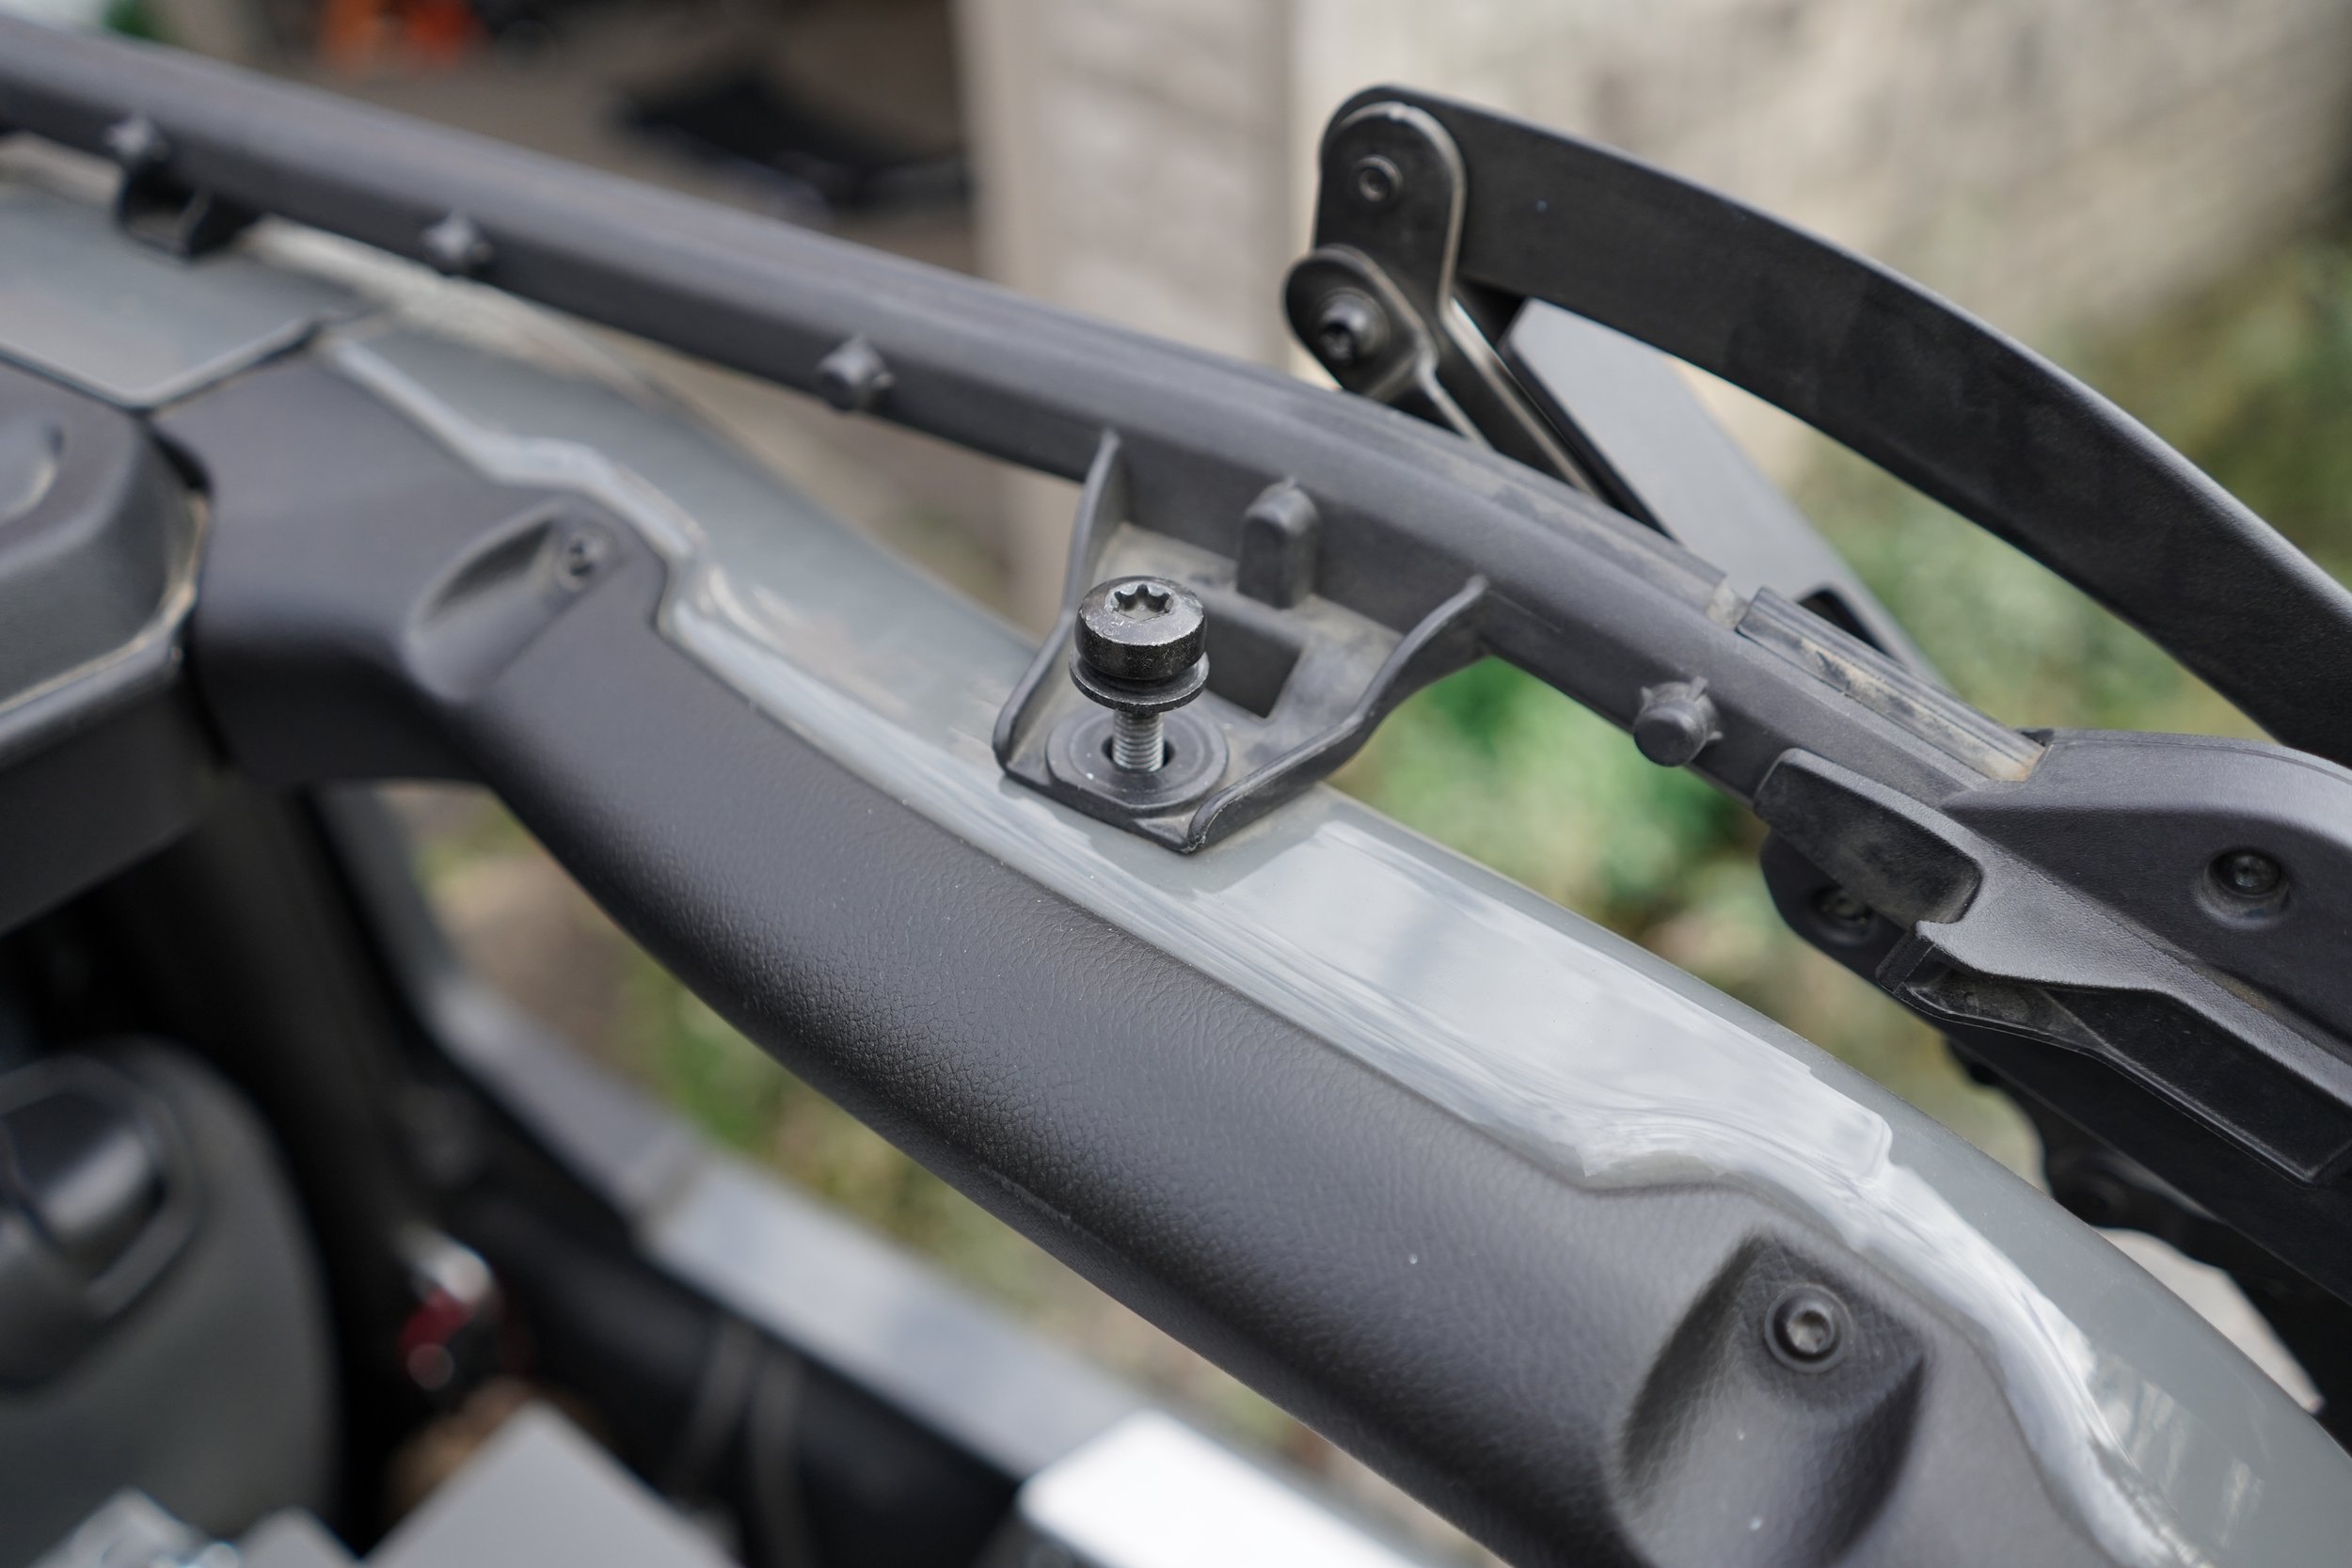
Once the unit is in place, the mounting holes on the mounting tabs should roughly line up with the rear set of threaded holes in the roll/sport bar.
If you have a soft top, the mounting tab will go on top of the plastic tab on the soft top frame.
If you have a hard top, this space will be empty and clear.
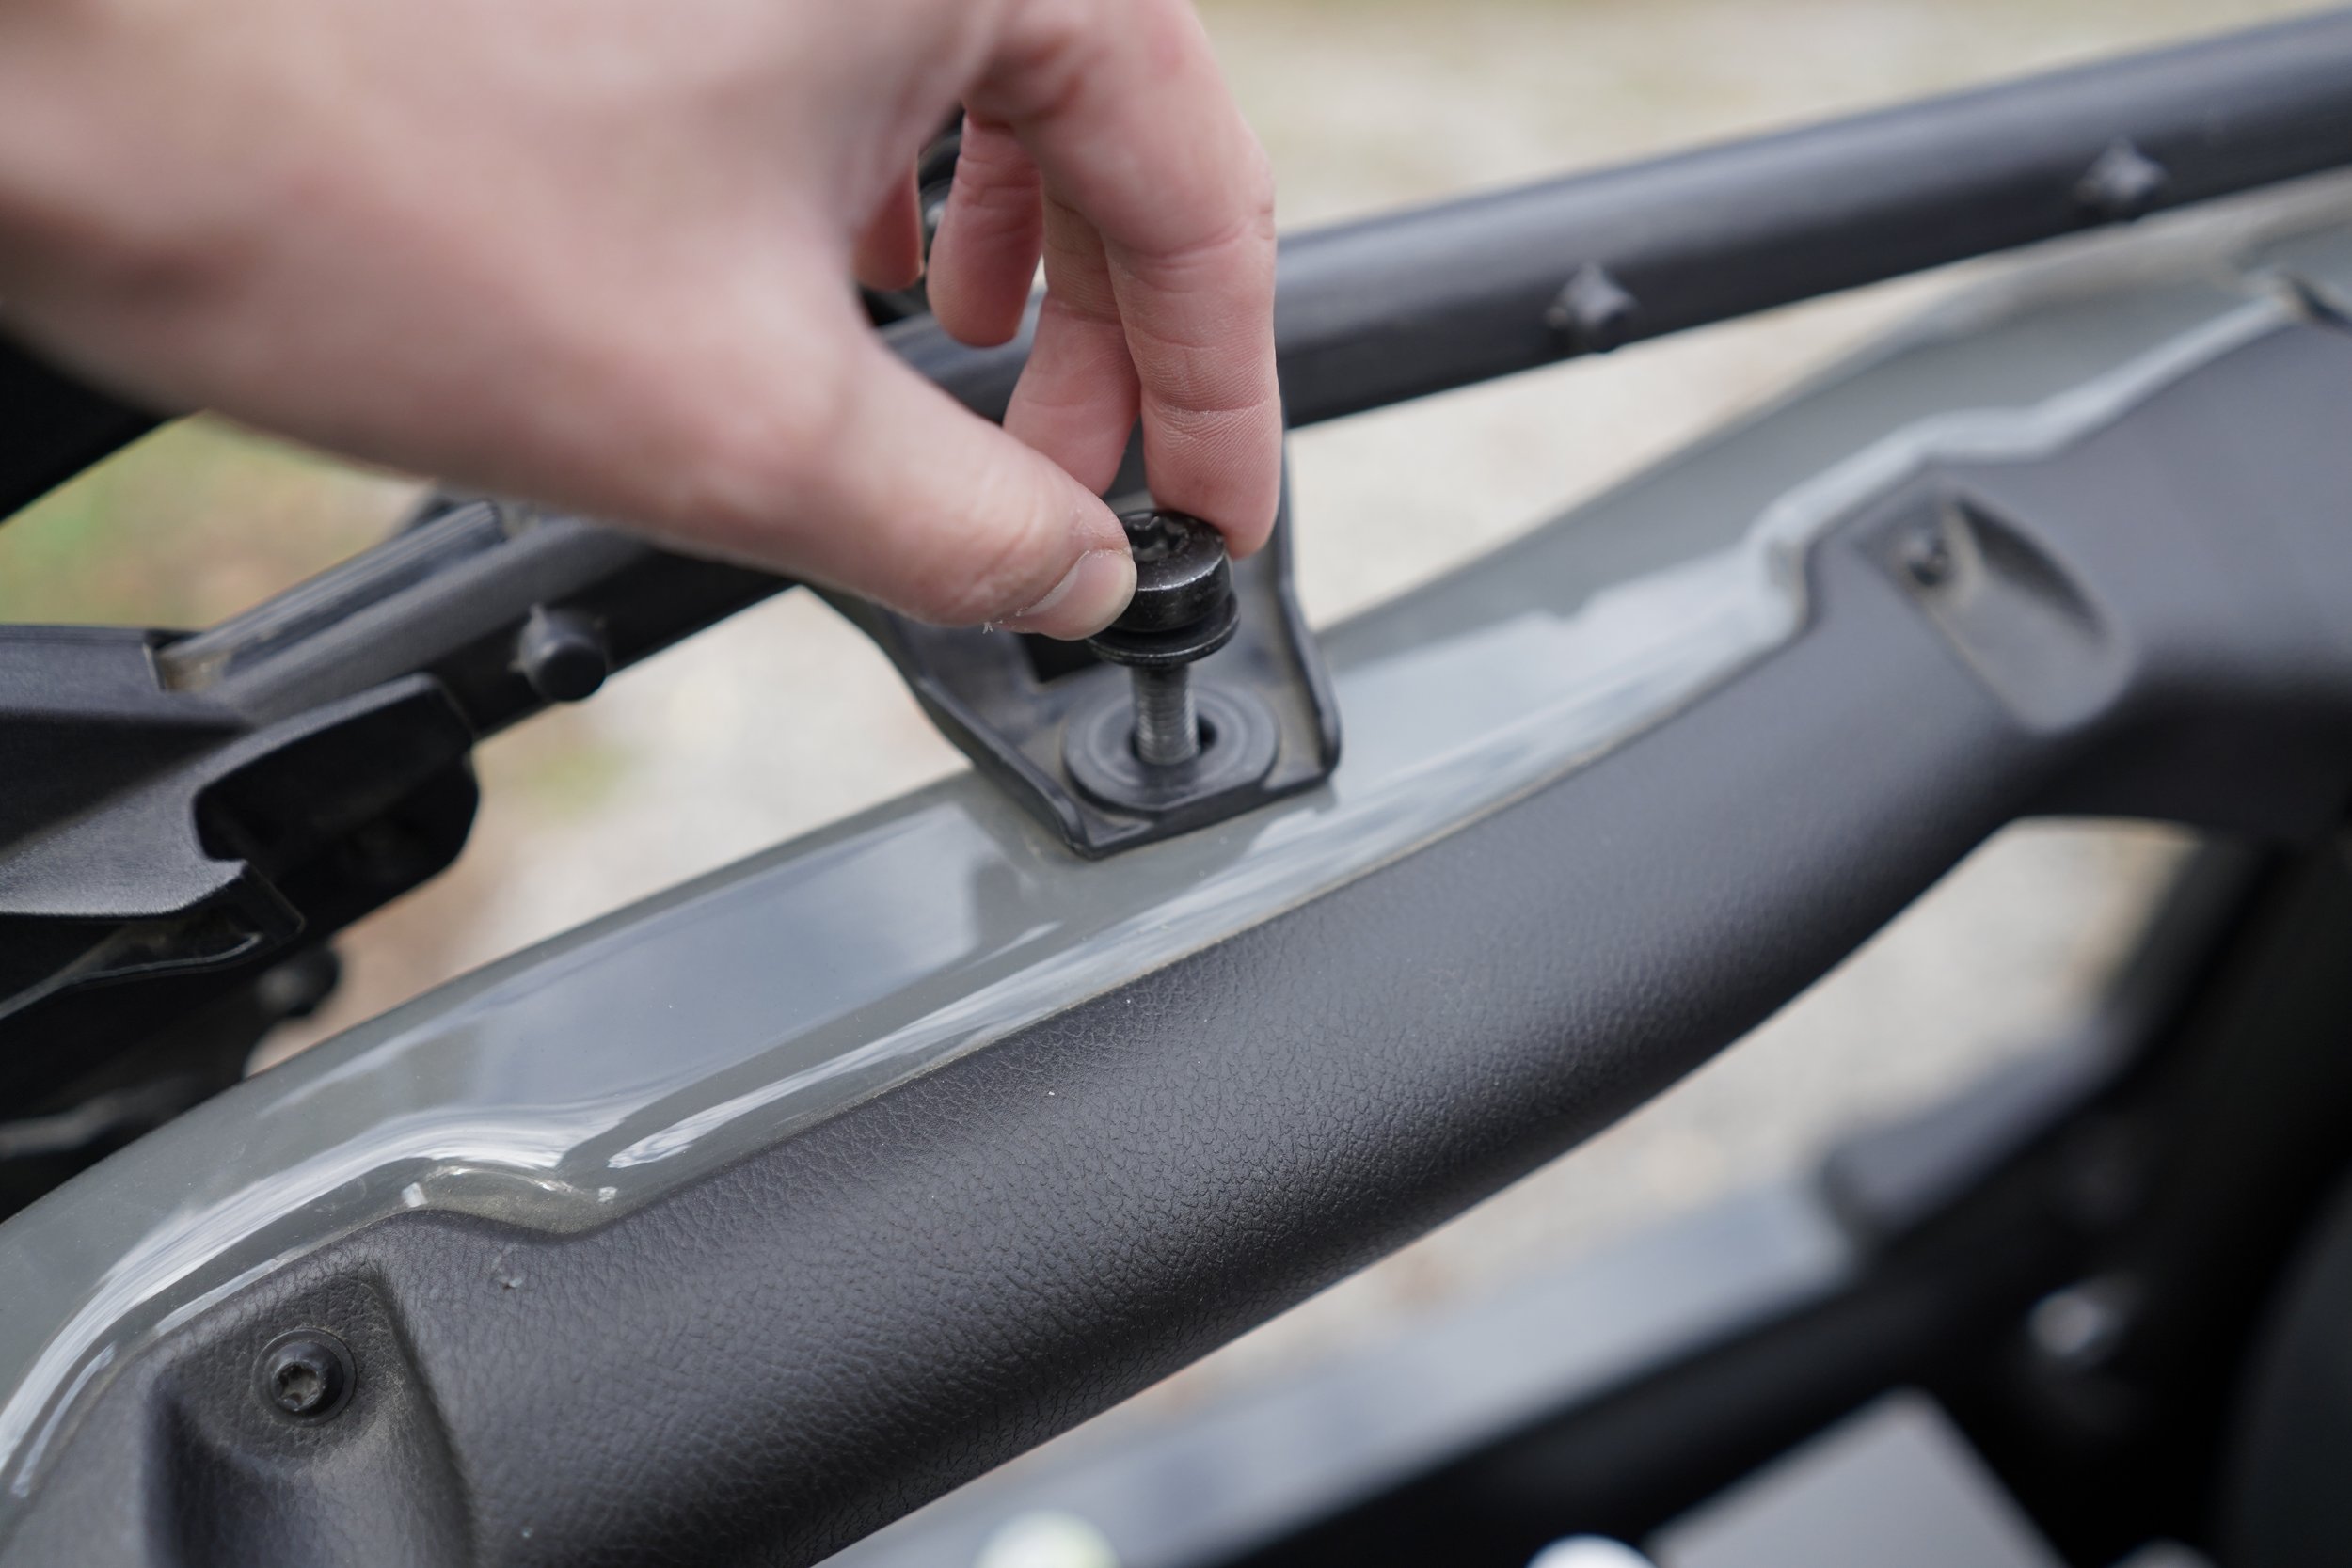
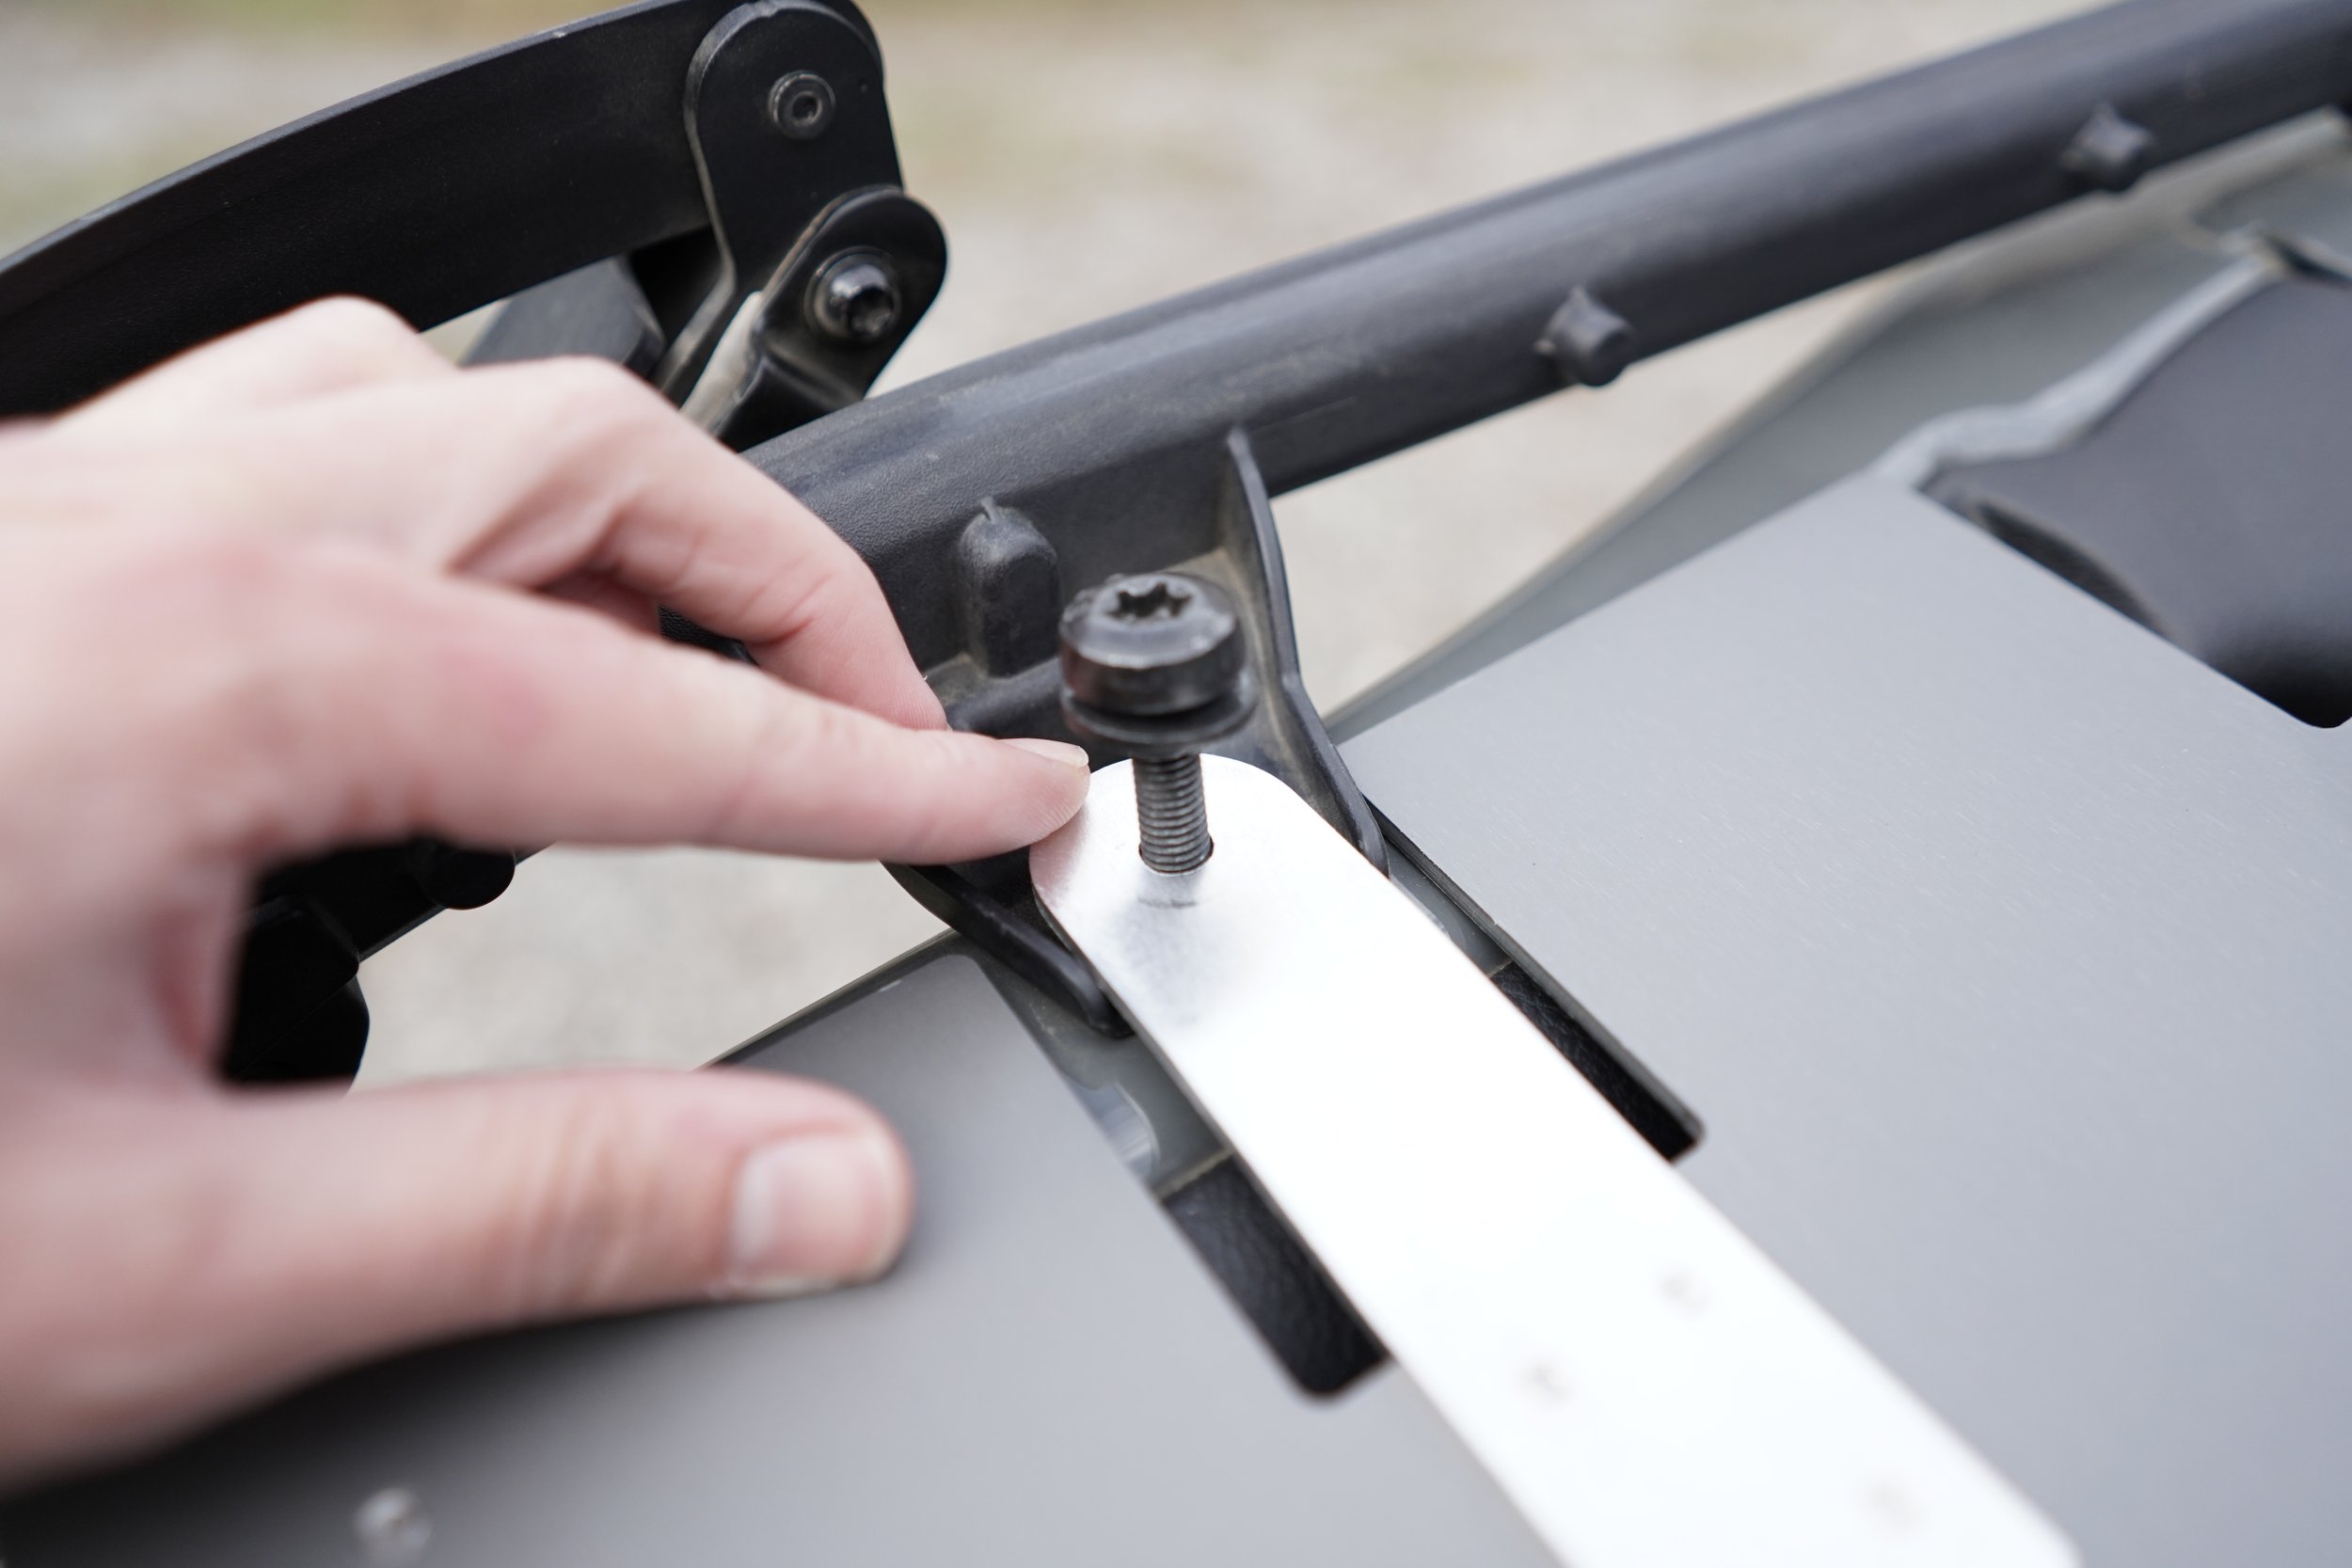
Since the fasteners for each support tab are still loose- you can adjust the position of these to align with the threaded holes on the jeep. Align these parts by threading the factory M8 hardware by hand.
For Soft Top- Use the same hardware you removed from your jeep in the previous step.
For Hard Top- Use the M8 hardware included with the plenum. Use the white plastic spacing washers between the support tab and roll/sport bar surface since there is no soft top frame present.
Tighten the factory hardware using the Jeep toolkit to factory specs. (See owners manual)
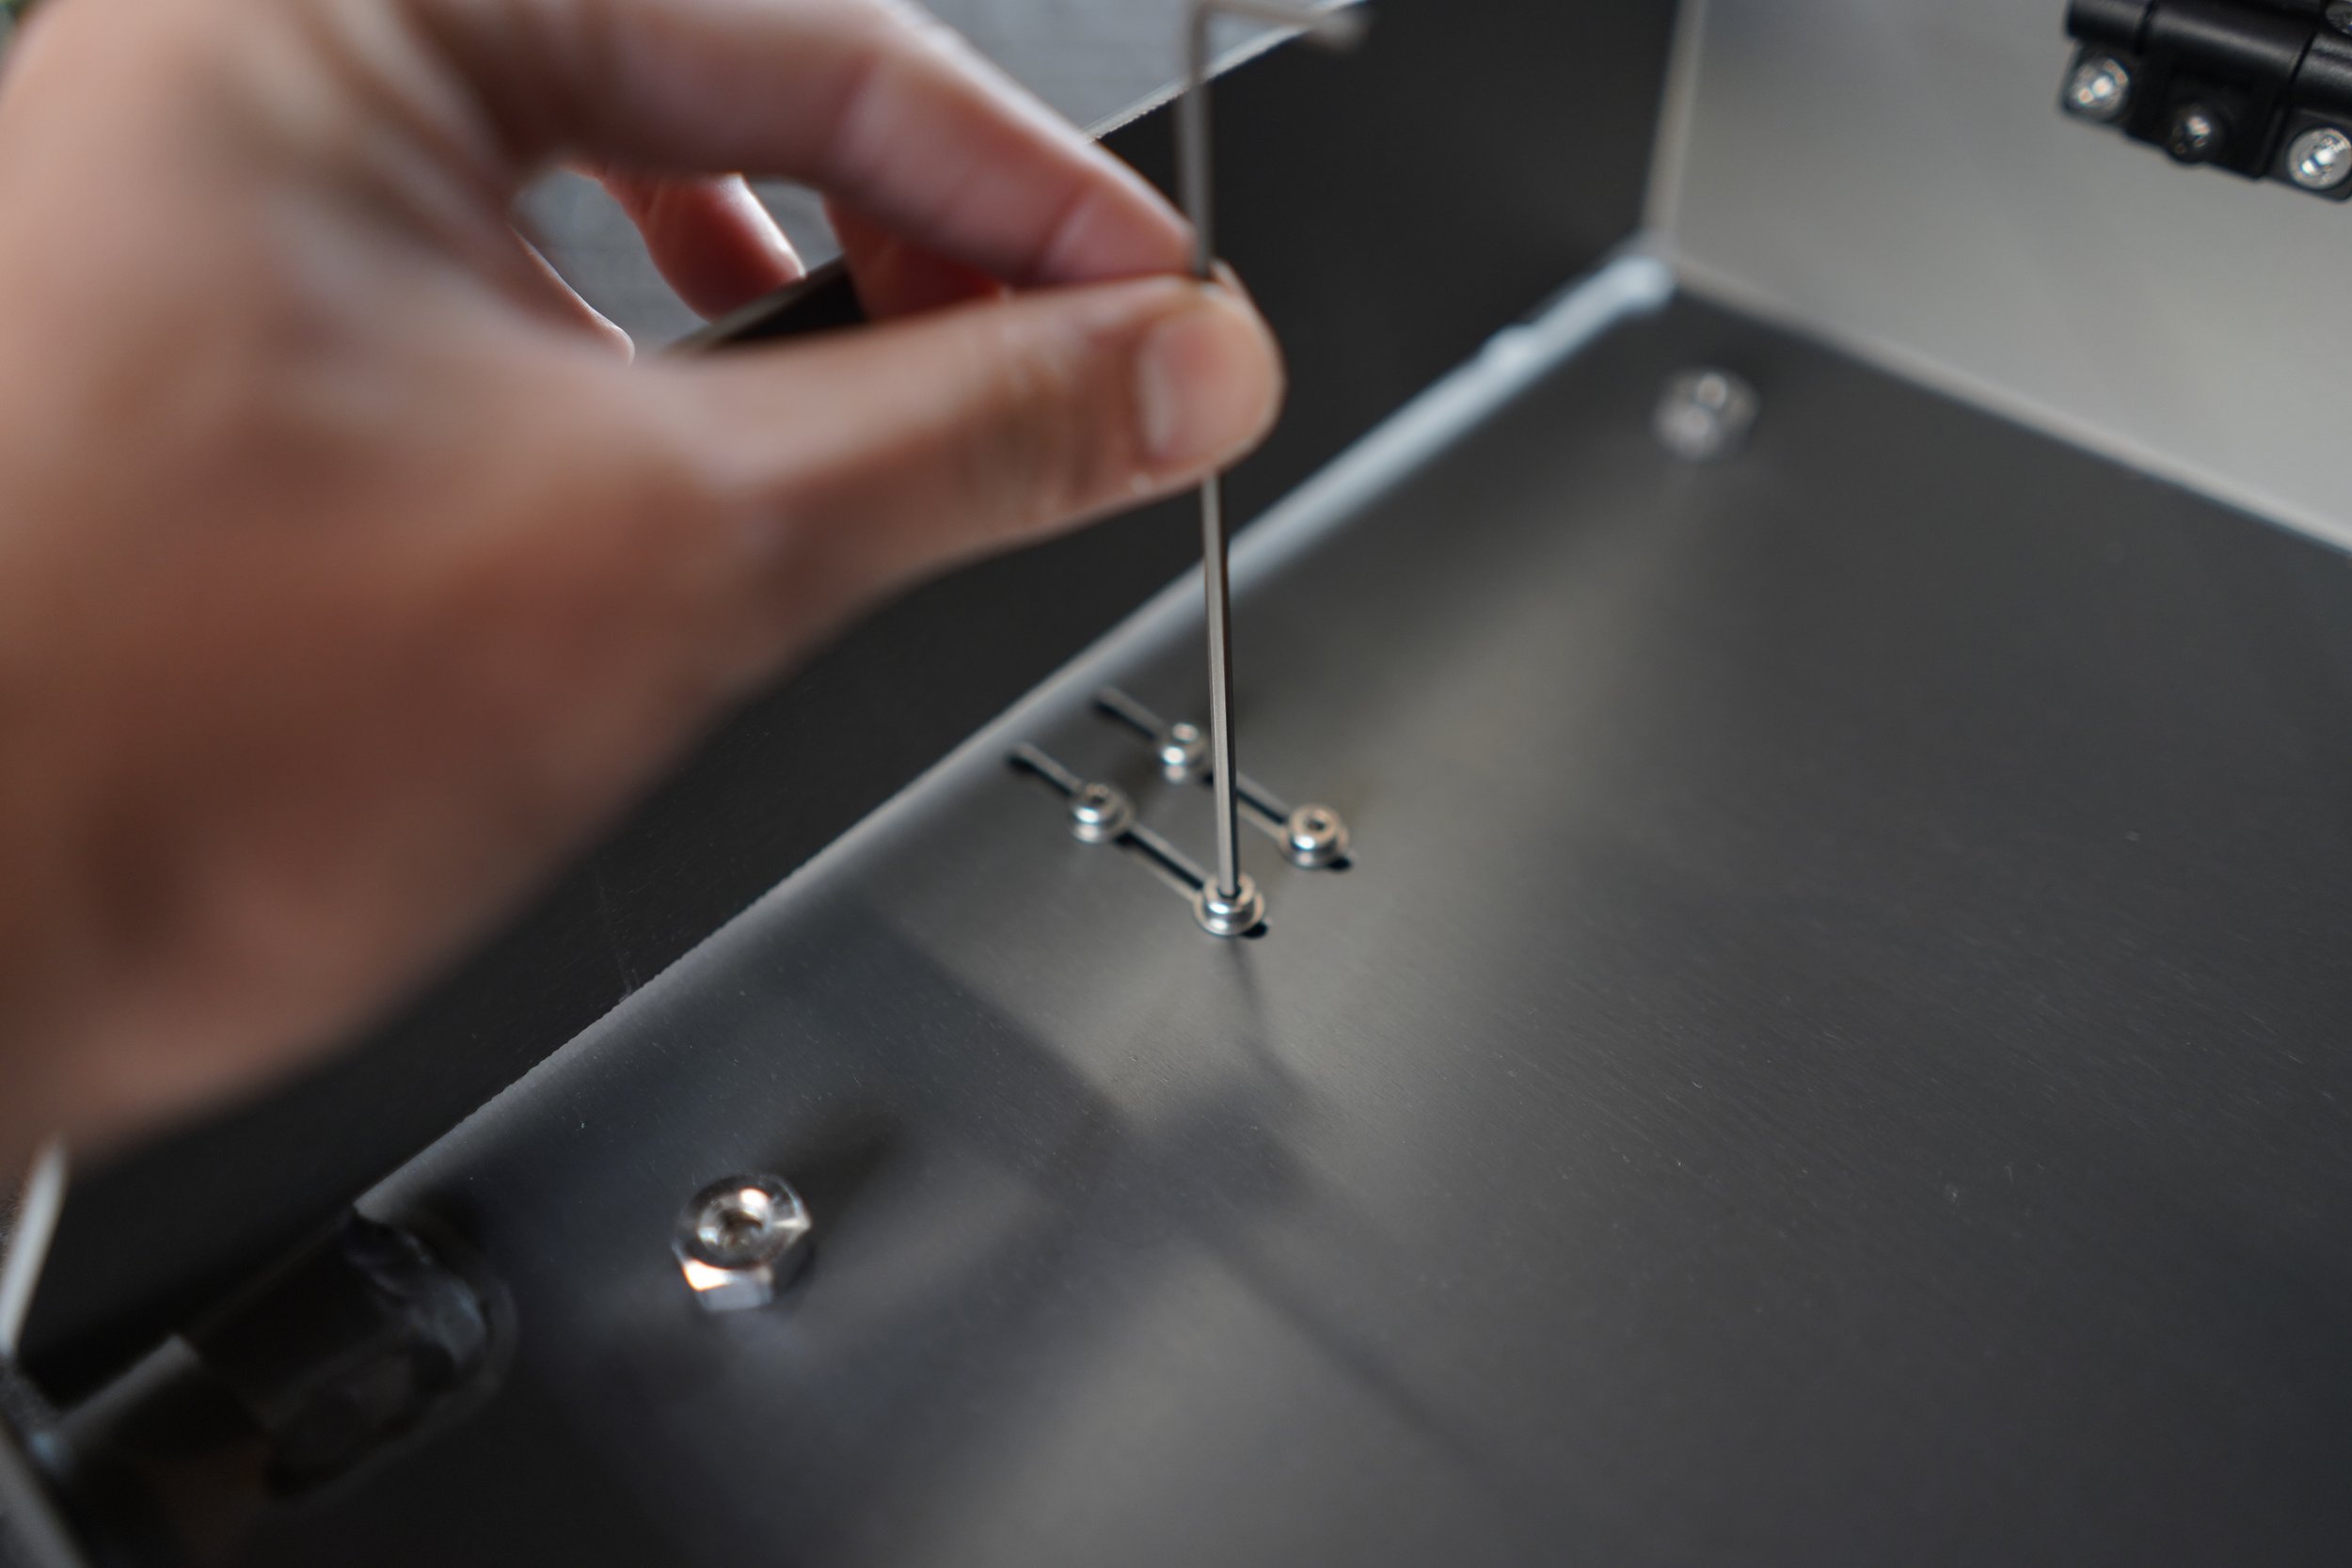
Now tighten all (8) m4 fasteners inside the Plenum chassis using a 2.5mm alley key. These should just be “wrist” tight. Be careful not to over tighten as the threads are aluminum.


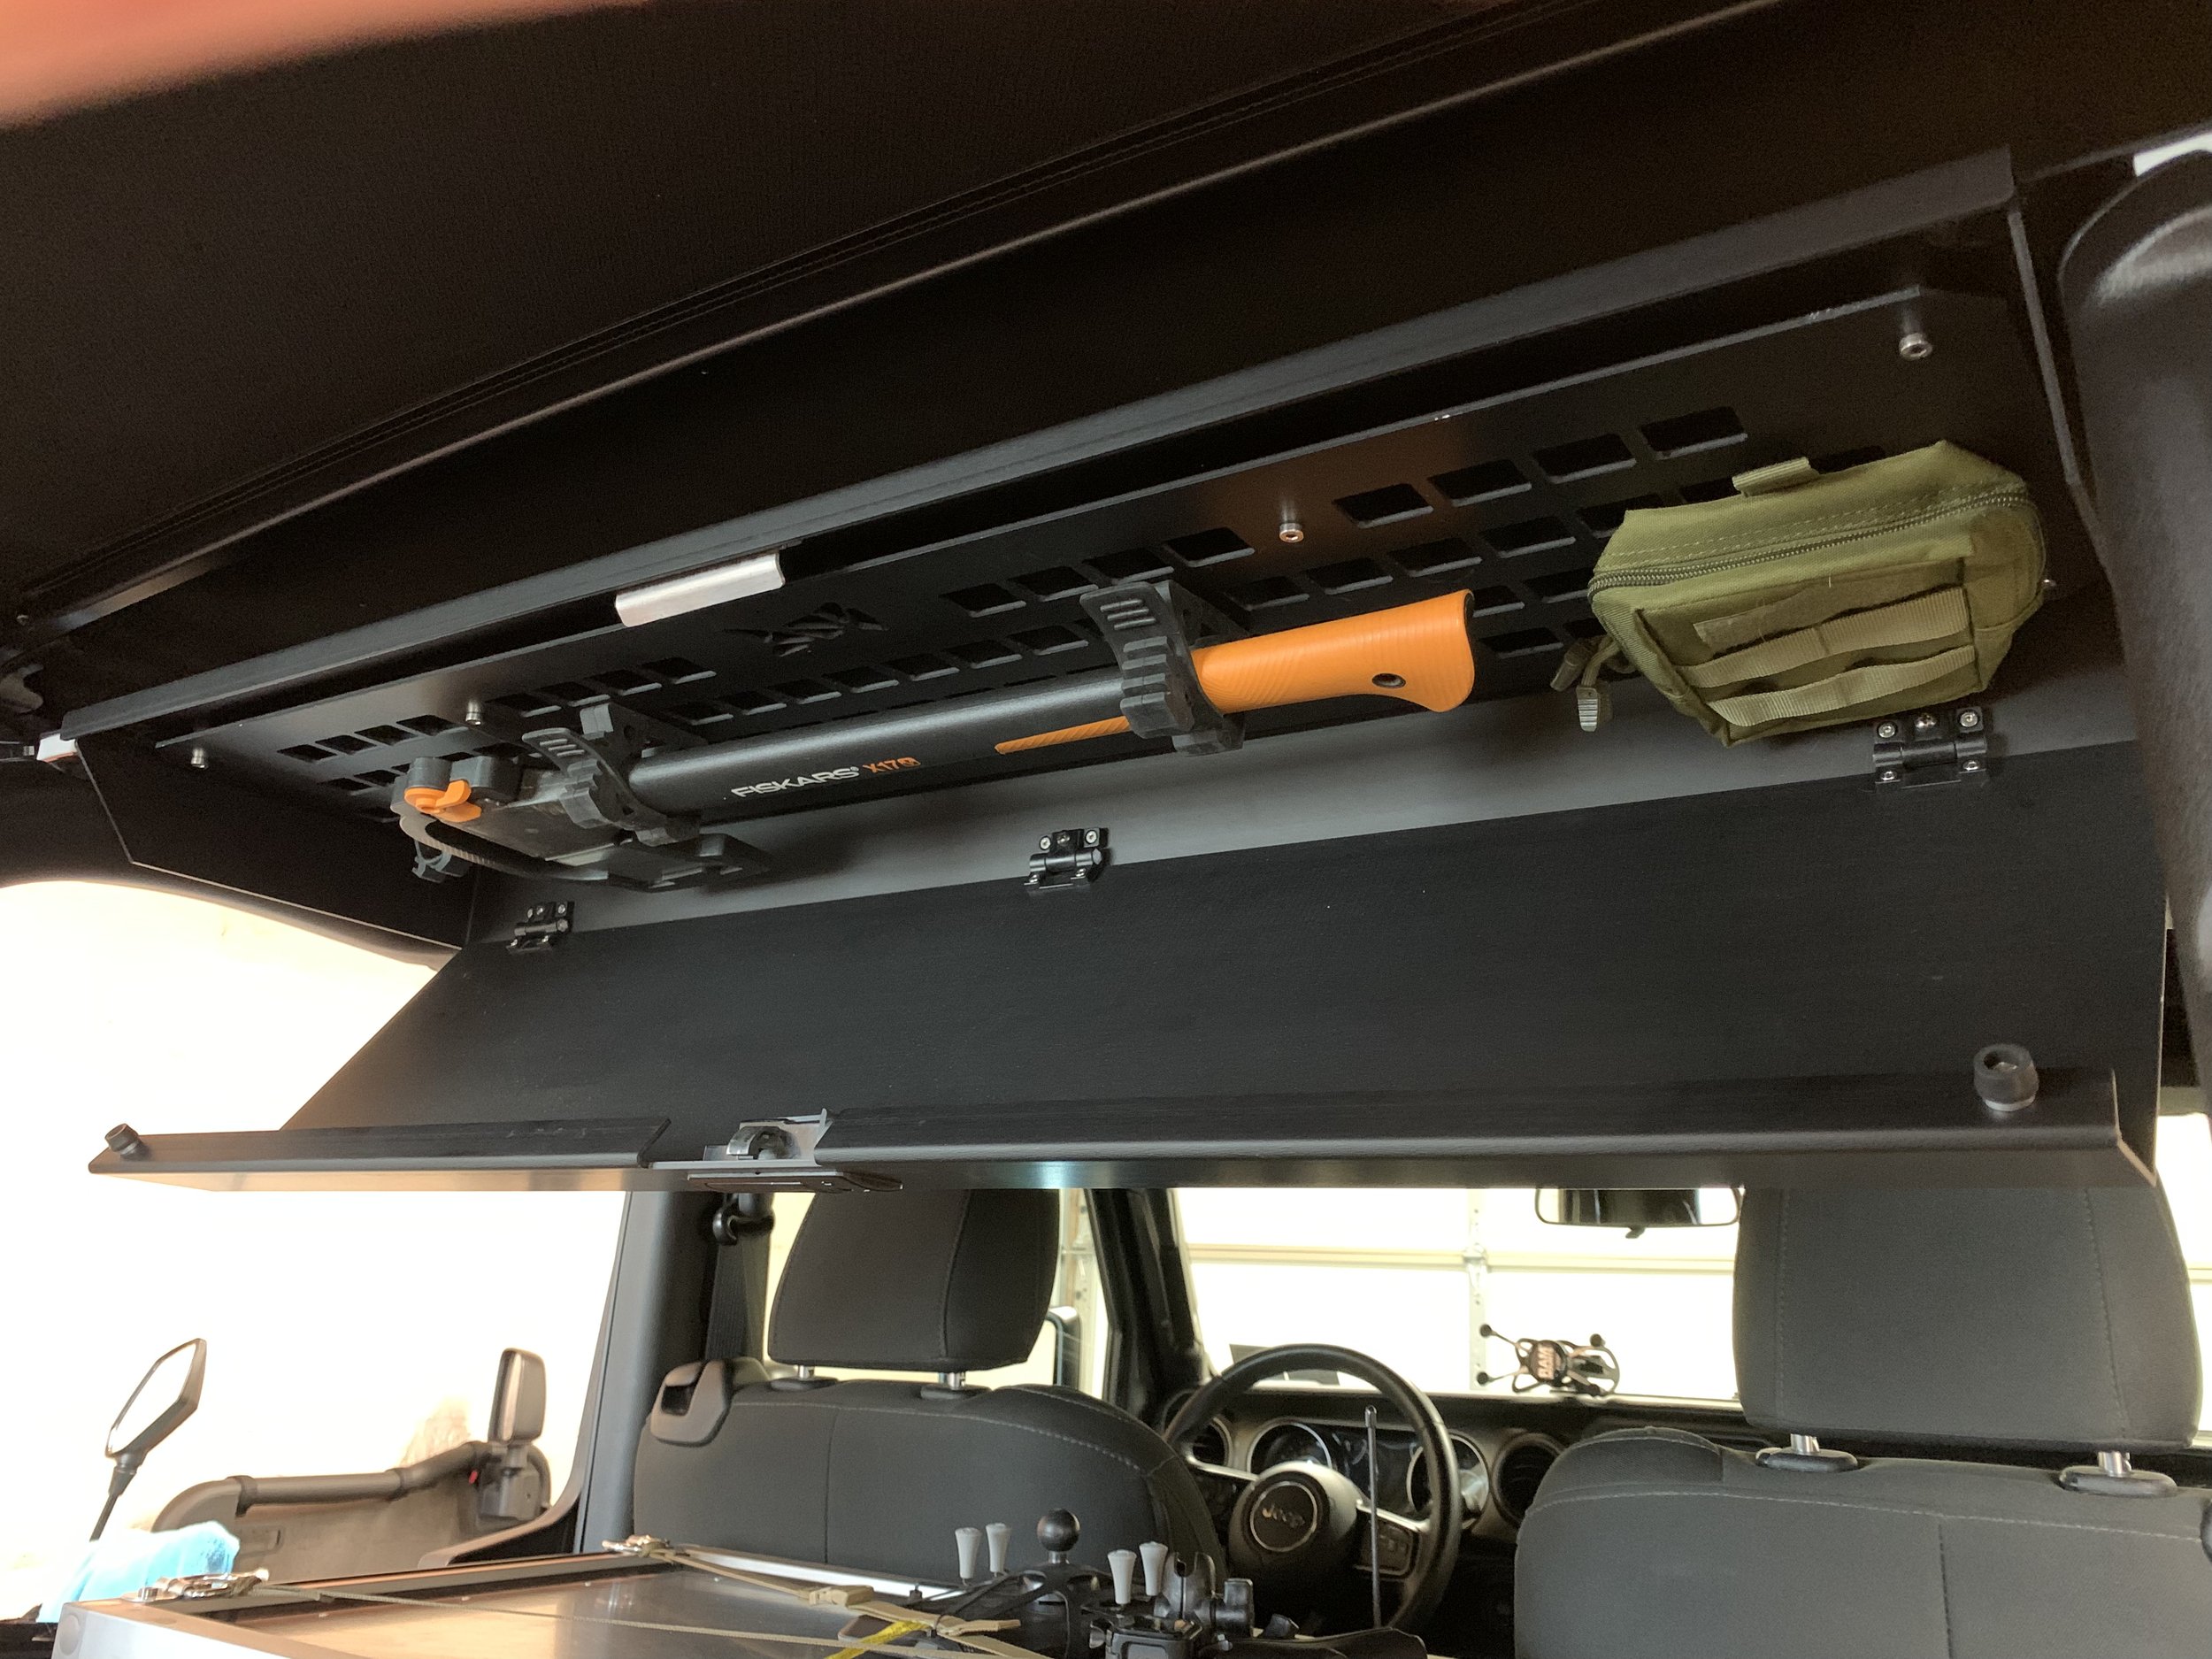
Step 5 - Configure the grid panel with your gear.
Load up the grid panel with your pouches and gear.
You’ll need a set of our grid adapters if you plan on using quickfist clamps or any “bolt on” gear. You can find those here.
Step 6 - Install the Grid panel.
Once your grid panel is all set up, remove any gear from the pouches or clamps so the panel is easier to lift into place.
Lift the panel into place insuring that the laser cut logo is oriented toward the back of the jeep.
Start by hand threading each m6 fastener into place. Start with the inner 4 screws, and then do the outer 4.
Tighten the fasteners to “wrist tight” using the 4mm allen key using the same order. DO NOT OVER TIGHTEN WITH POWER TOOLS.
Step 7 - RE-Install the top.
Re- install your hard or soft top according to the factory owners manual.
Enjoy!
A few reminders, Tips, and Tricks.
If the locking door becomes loose over time- tighten the Phillips head screws on the latches to keep them under tension. This ensures the door opens slowly on its own and prevents any shakes or audible rattles.
This intended to be used only with an unoccupied or removed back seat.