
Grid// JL Installation.

So, you’ve purchased a grid for your Jeep JL or JLU. Congrats! Now it’s time to get it installed.
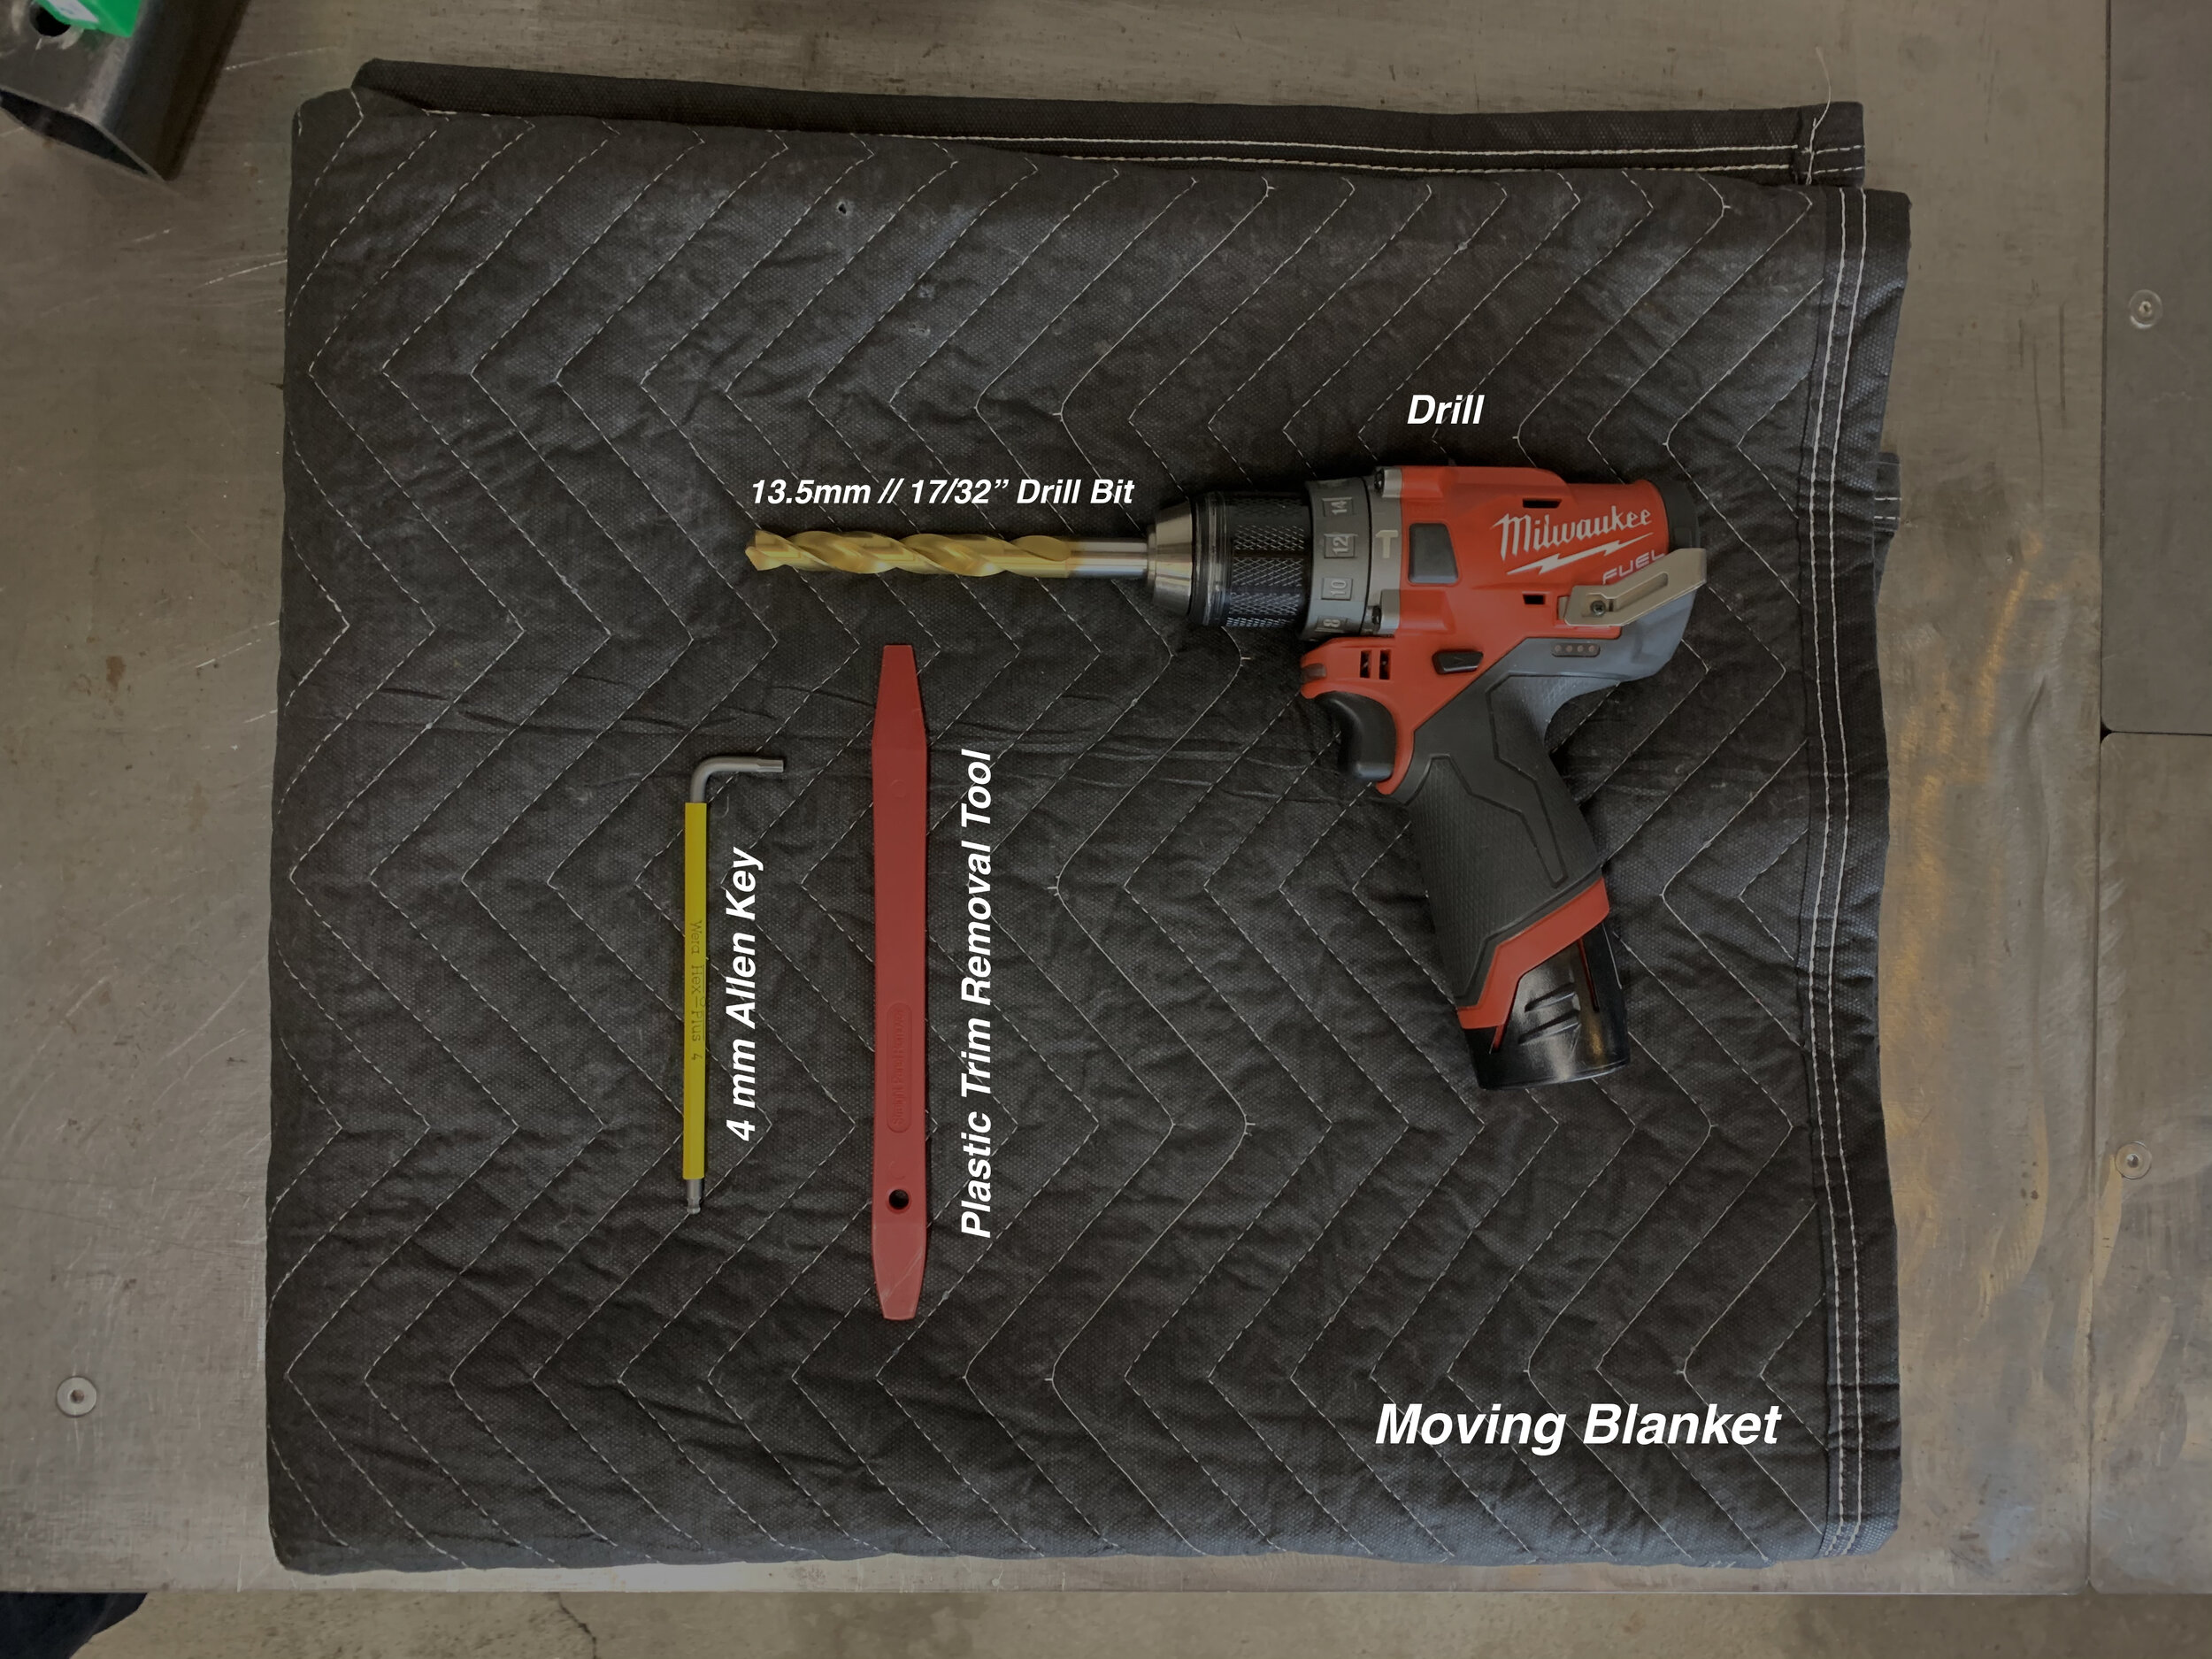
Tools Needed:
Blanket or Furniture Pad.
Drill with 13.5mm bit. (17/32” for those of us working in Freedom Units)
4mm Allen Key or T-Handle.
Plastic Trim Removal Tool.
Time Needed:
30 Mins to 1 Hr.
Let’s take a look at what comes in the box.
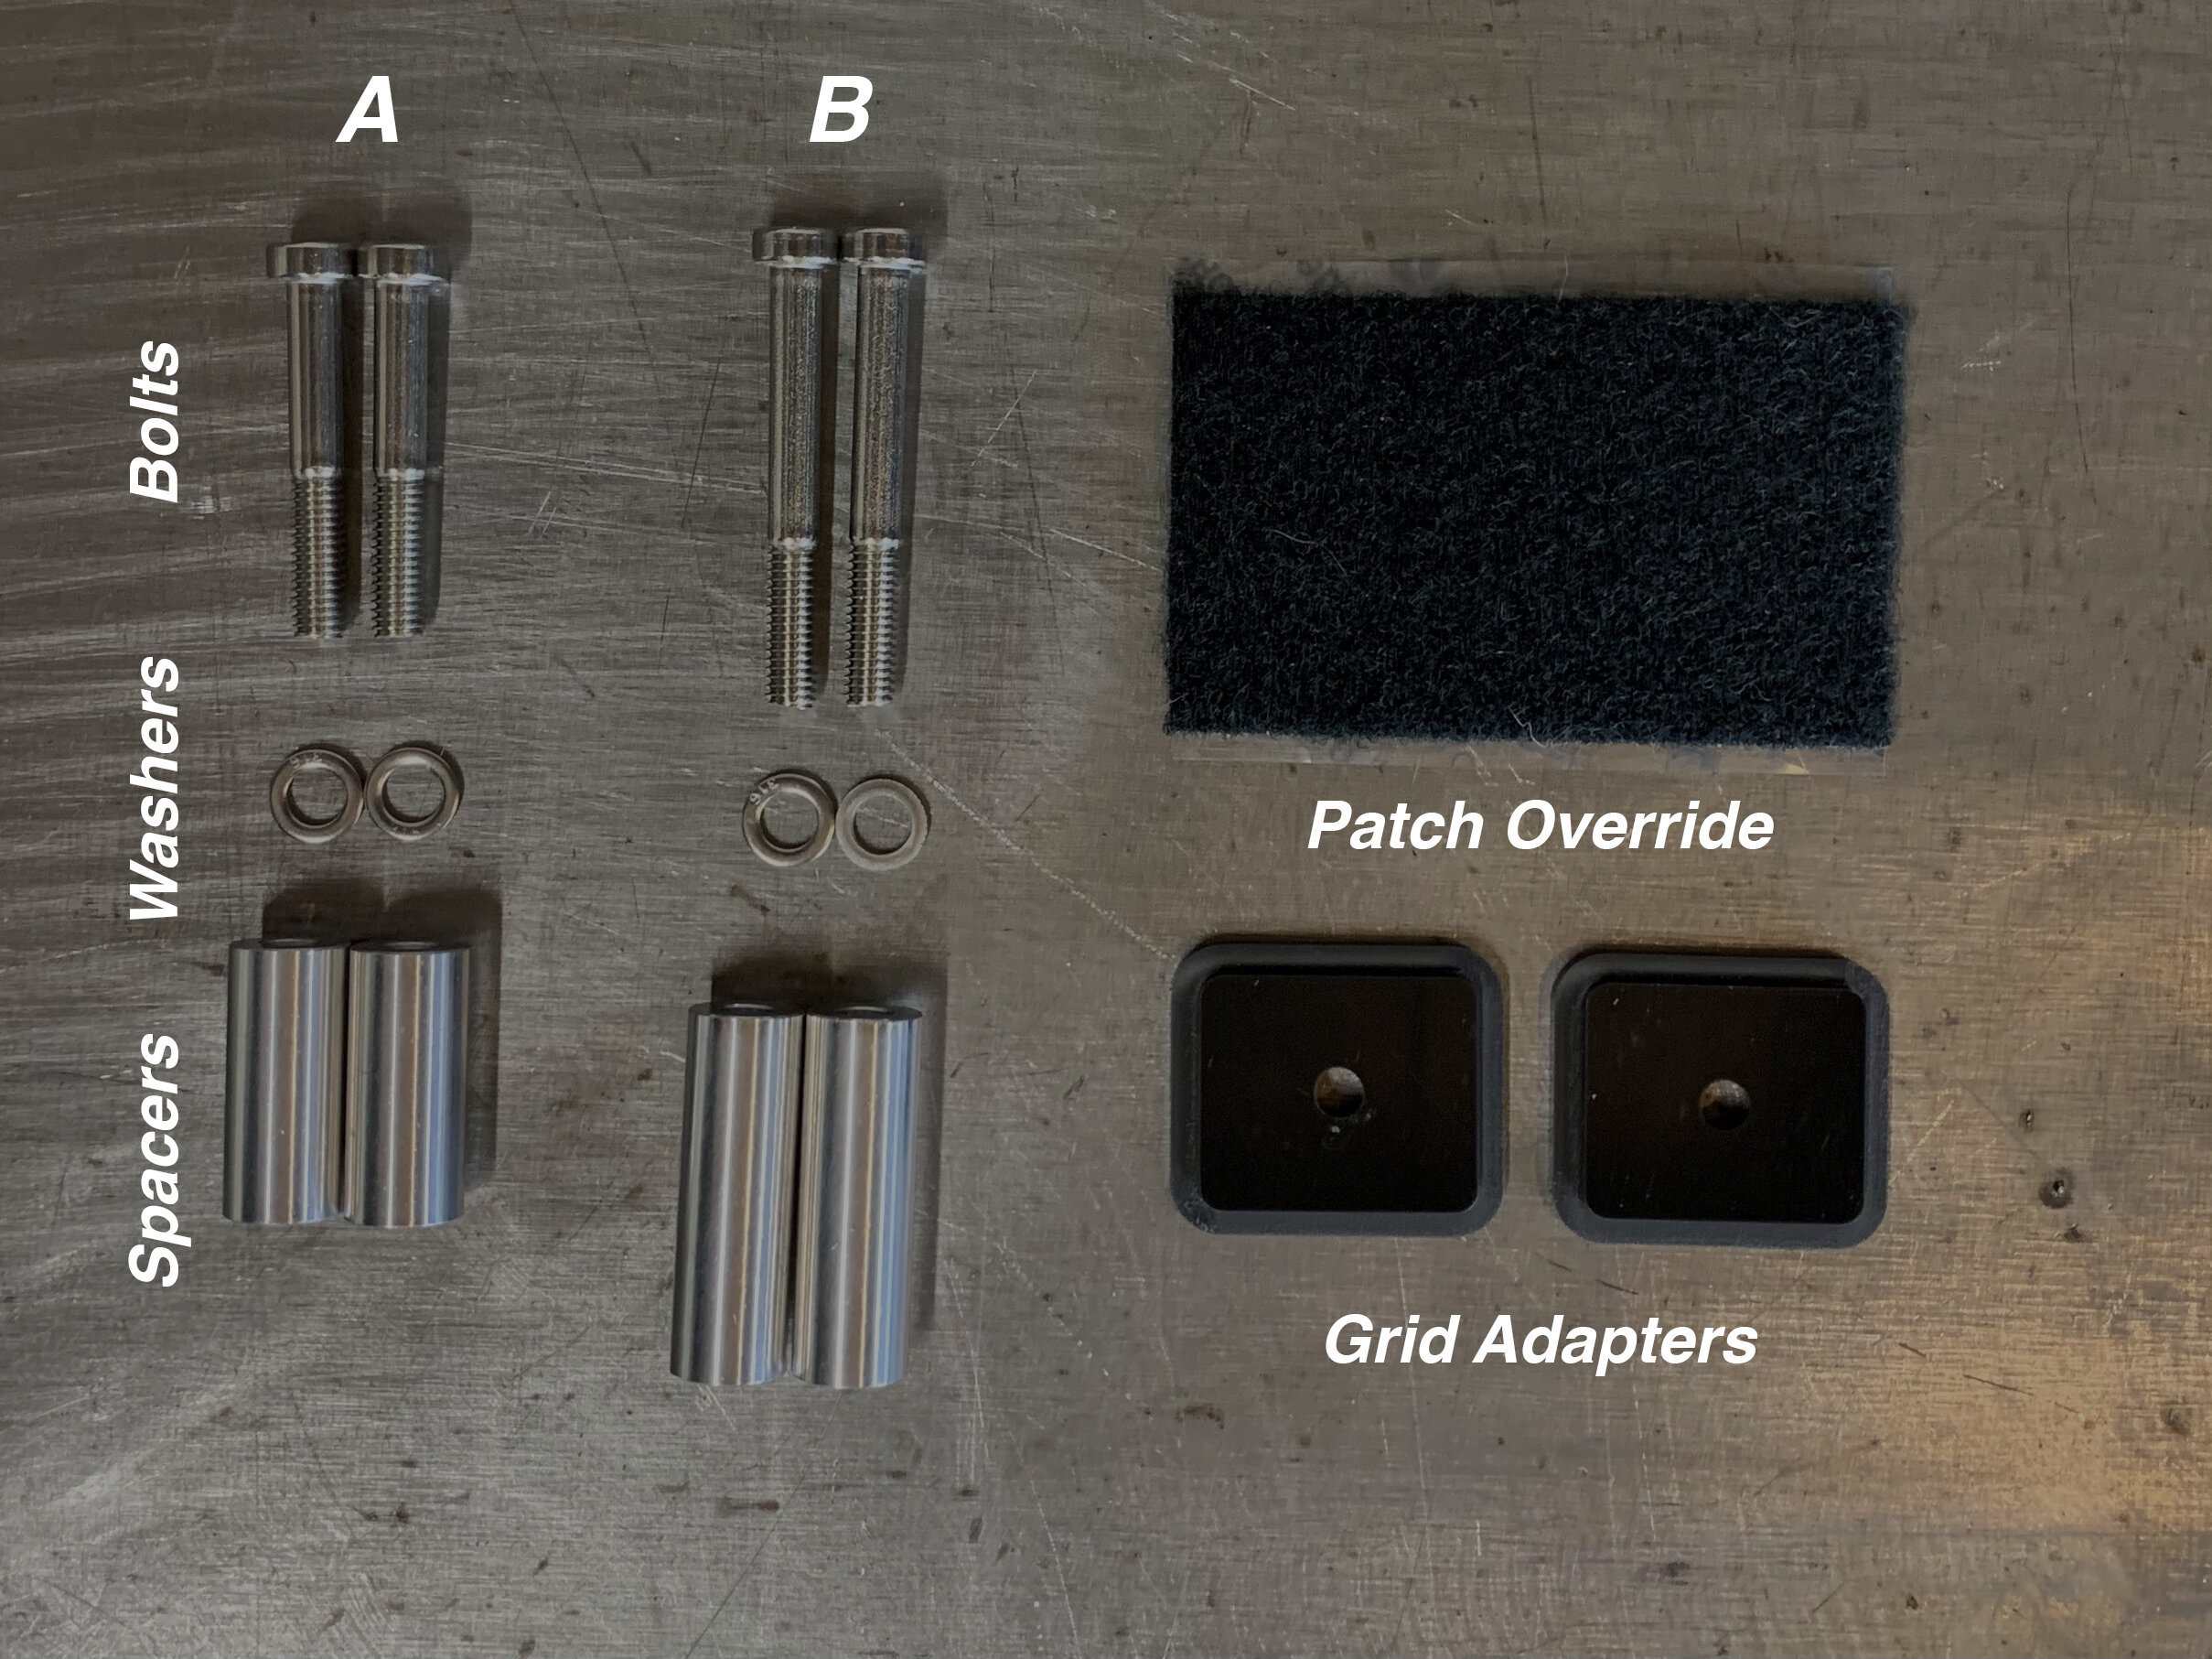
Grid (x1)
Short 6mm Bolt A (x2)
Long 6mm Bolt B (x2)
6mm Washer (x4)
Short Spacer A (x2)
Long Spacer B (x2)
Grid Adapter (x2)
Patch Override (x1)
Once we have all the hardware and tools we need, we can get started!
Step 1 - Lay blanket or padding below the tailgate. We do this for a couple of reasons.
The plastic trim is a bit slippery and sometimes it pops free when you least expect it. (Ask us how we know.) Having this padding underneath ensures you won’t ding or otherwise mar the tailgate trim if it gets away from you.
It gives you a nice clean and protected space to work, right next to the Jeep.

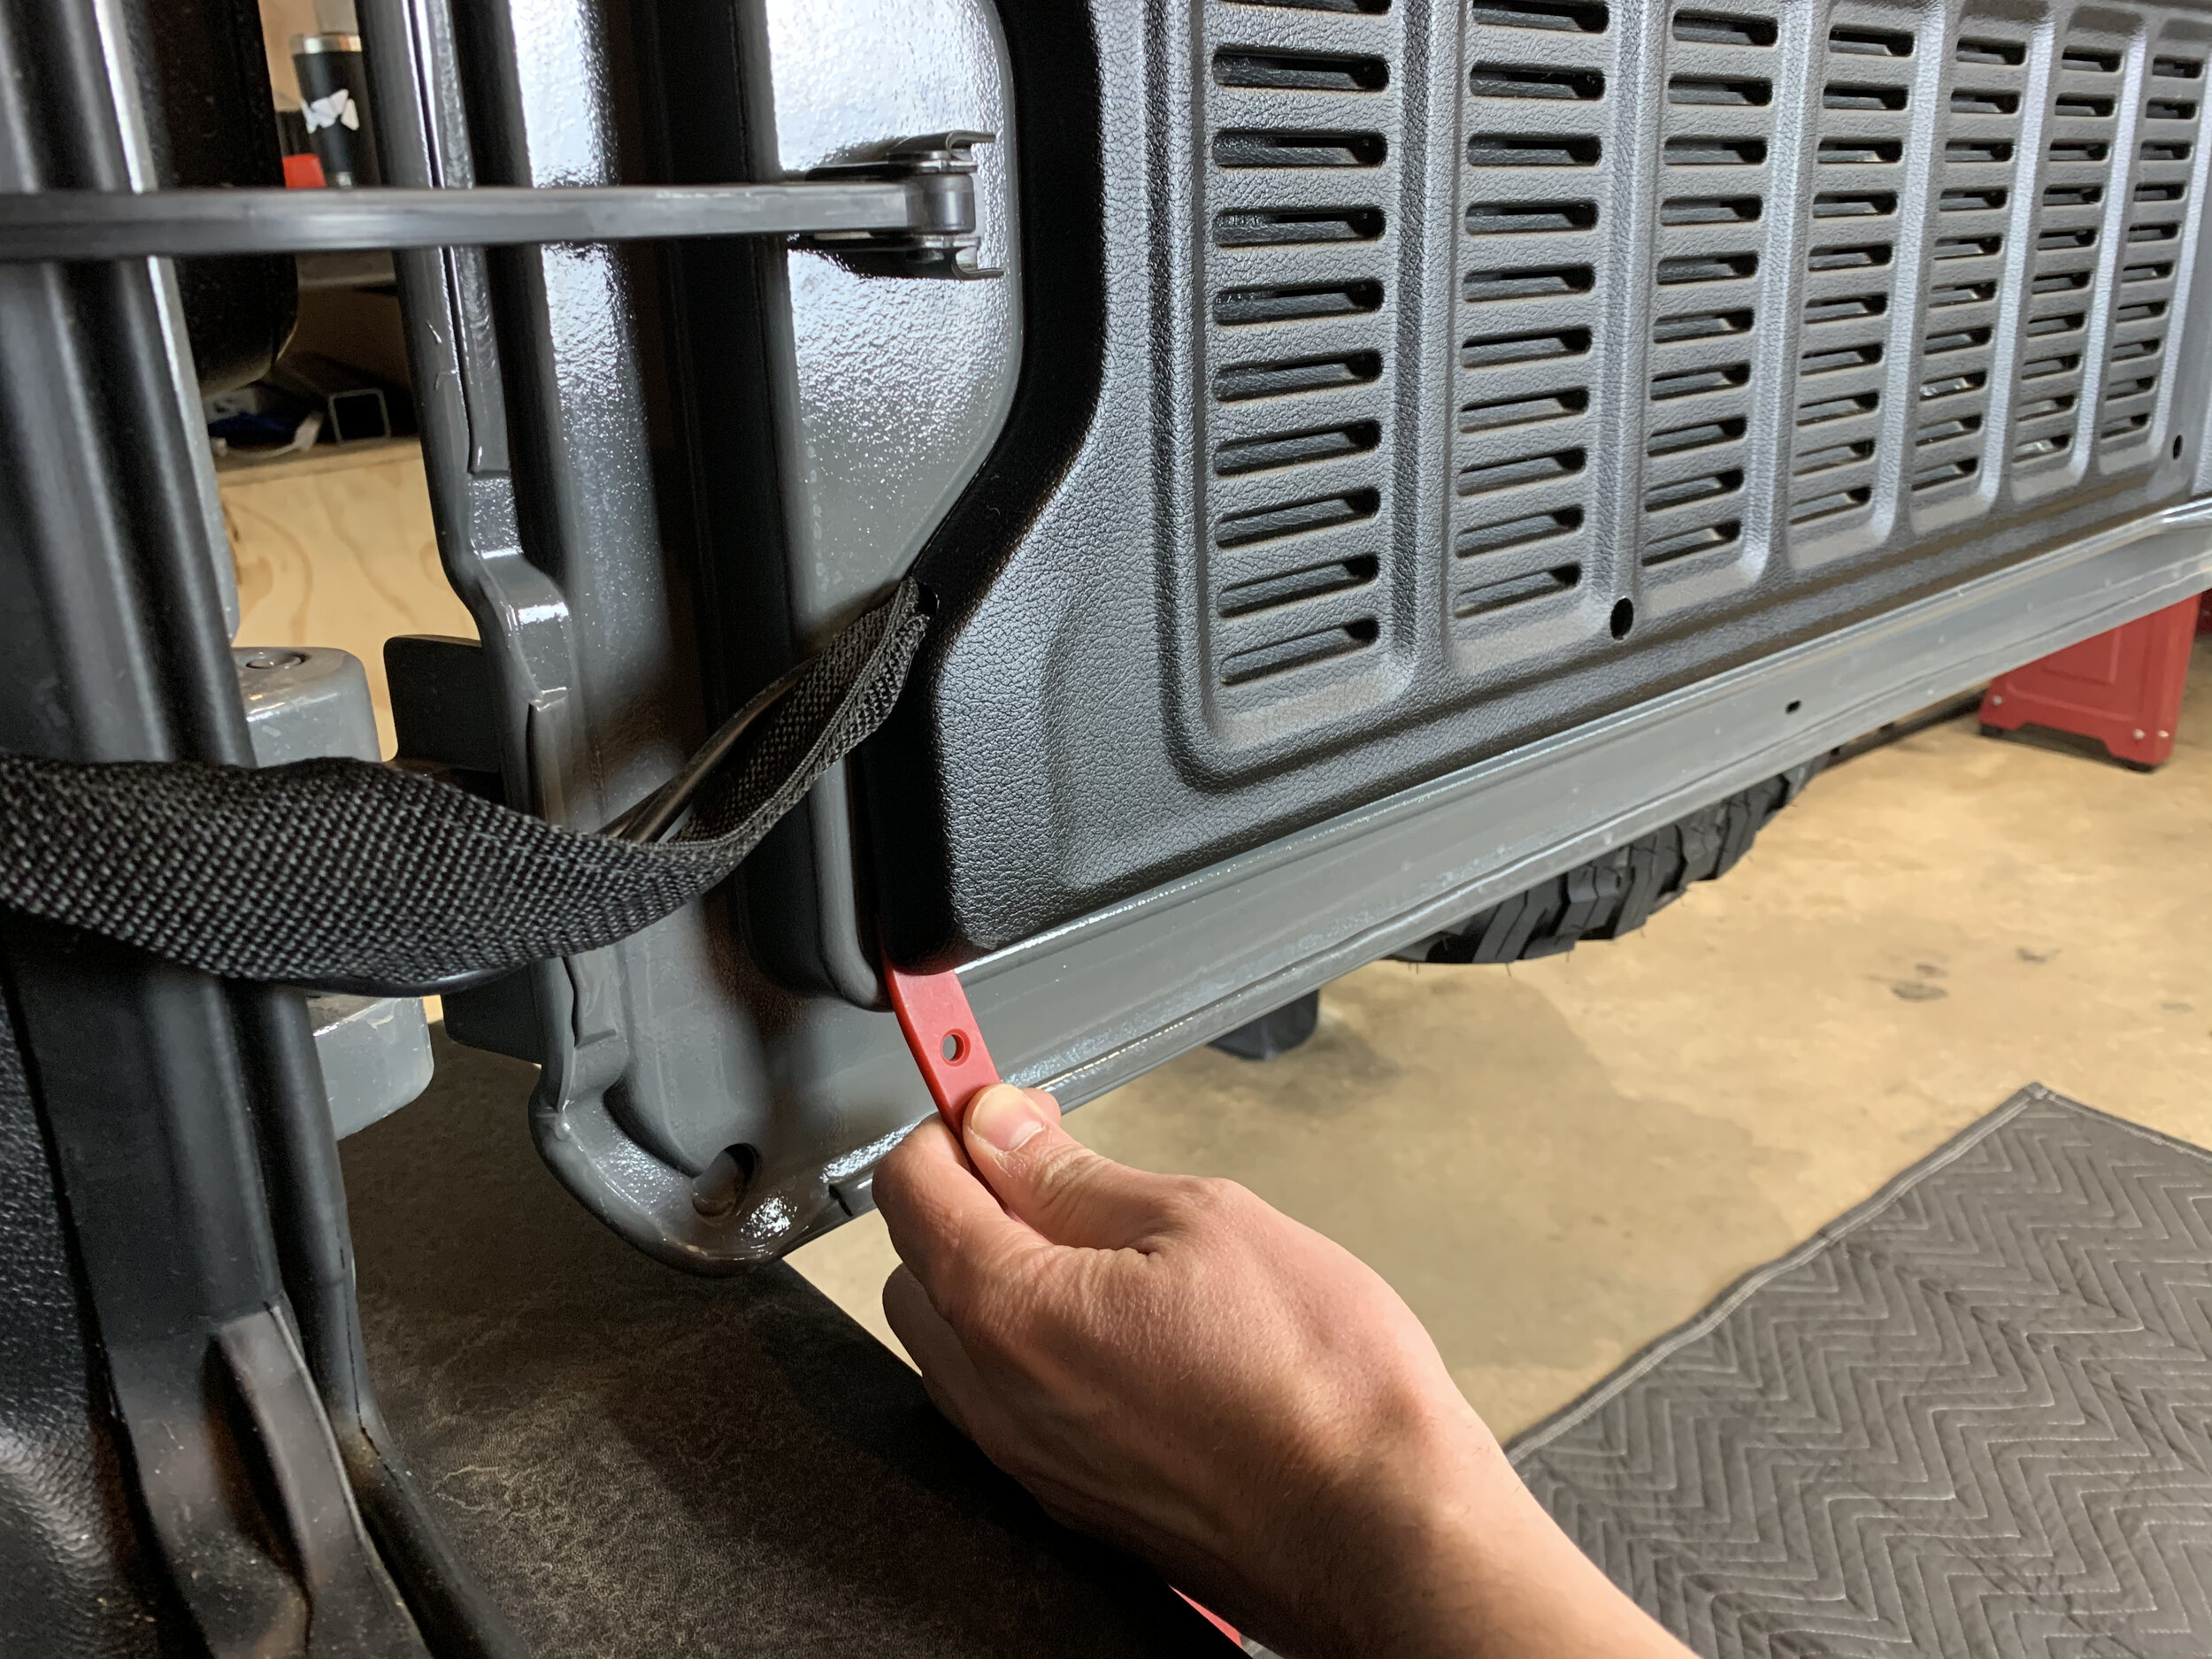
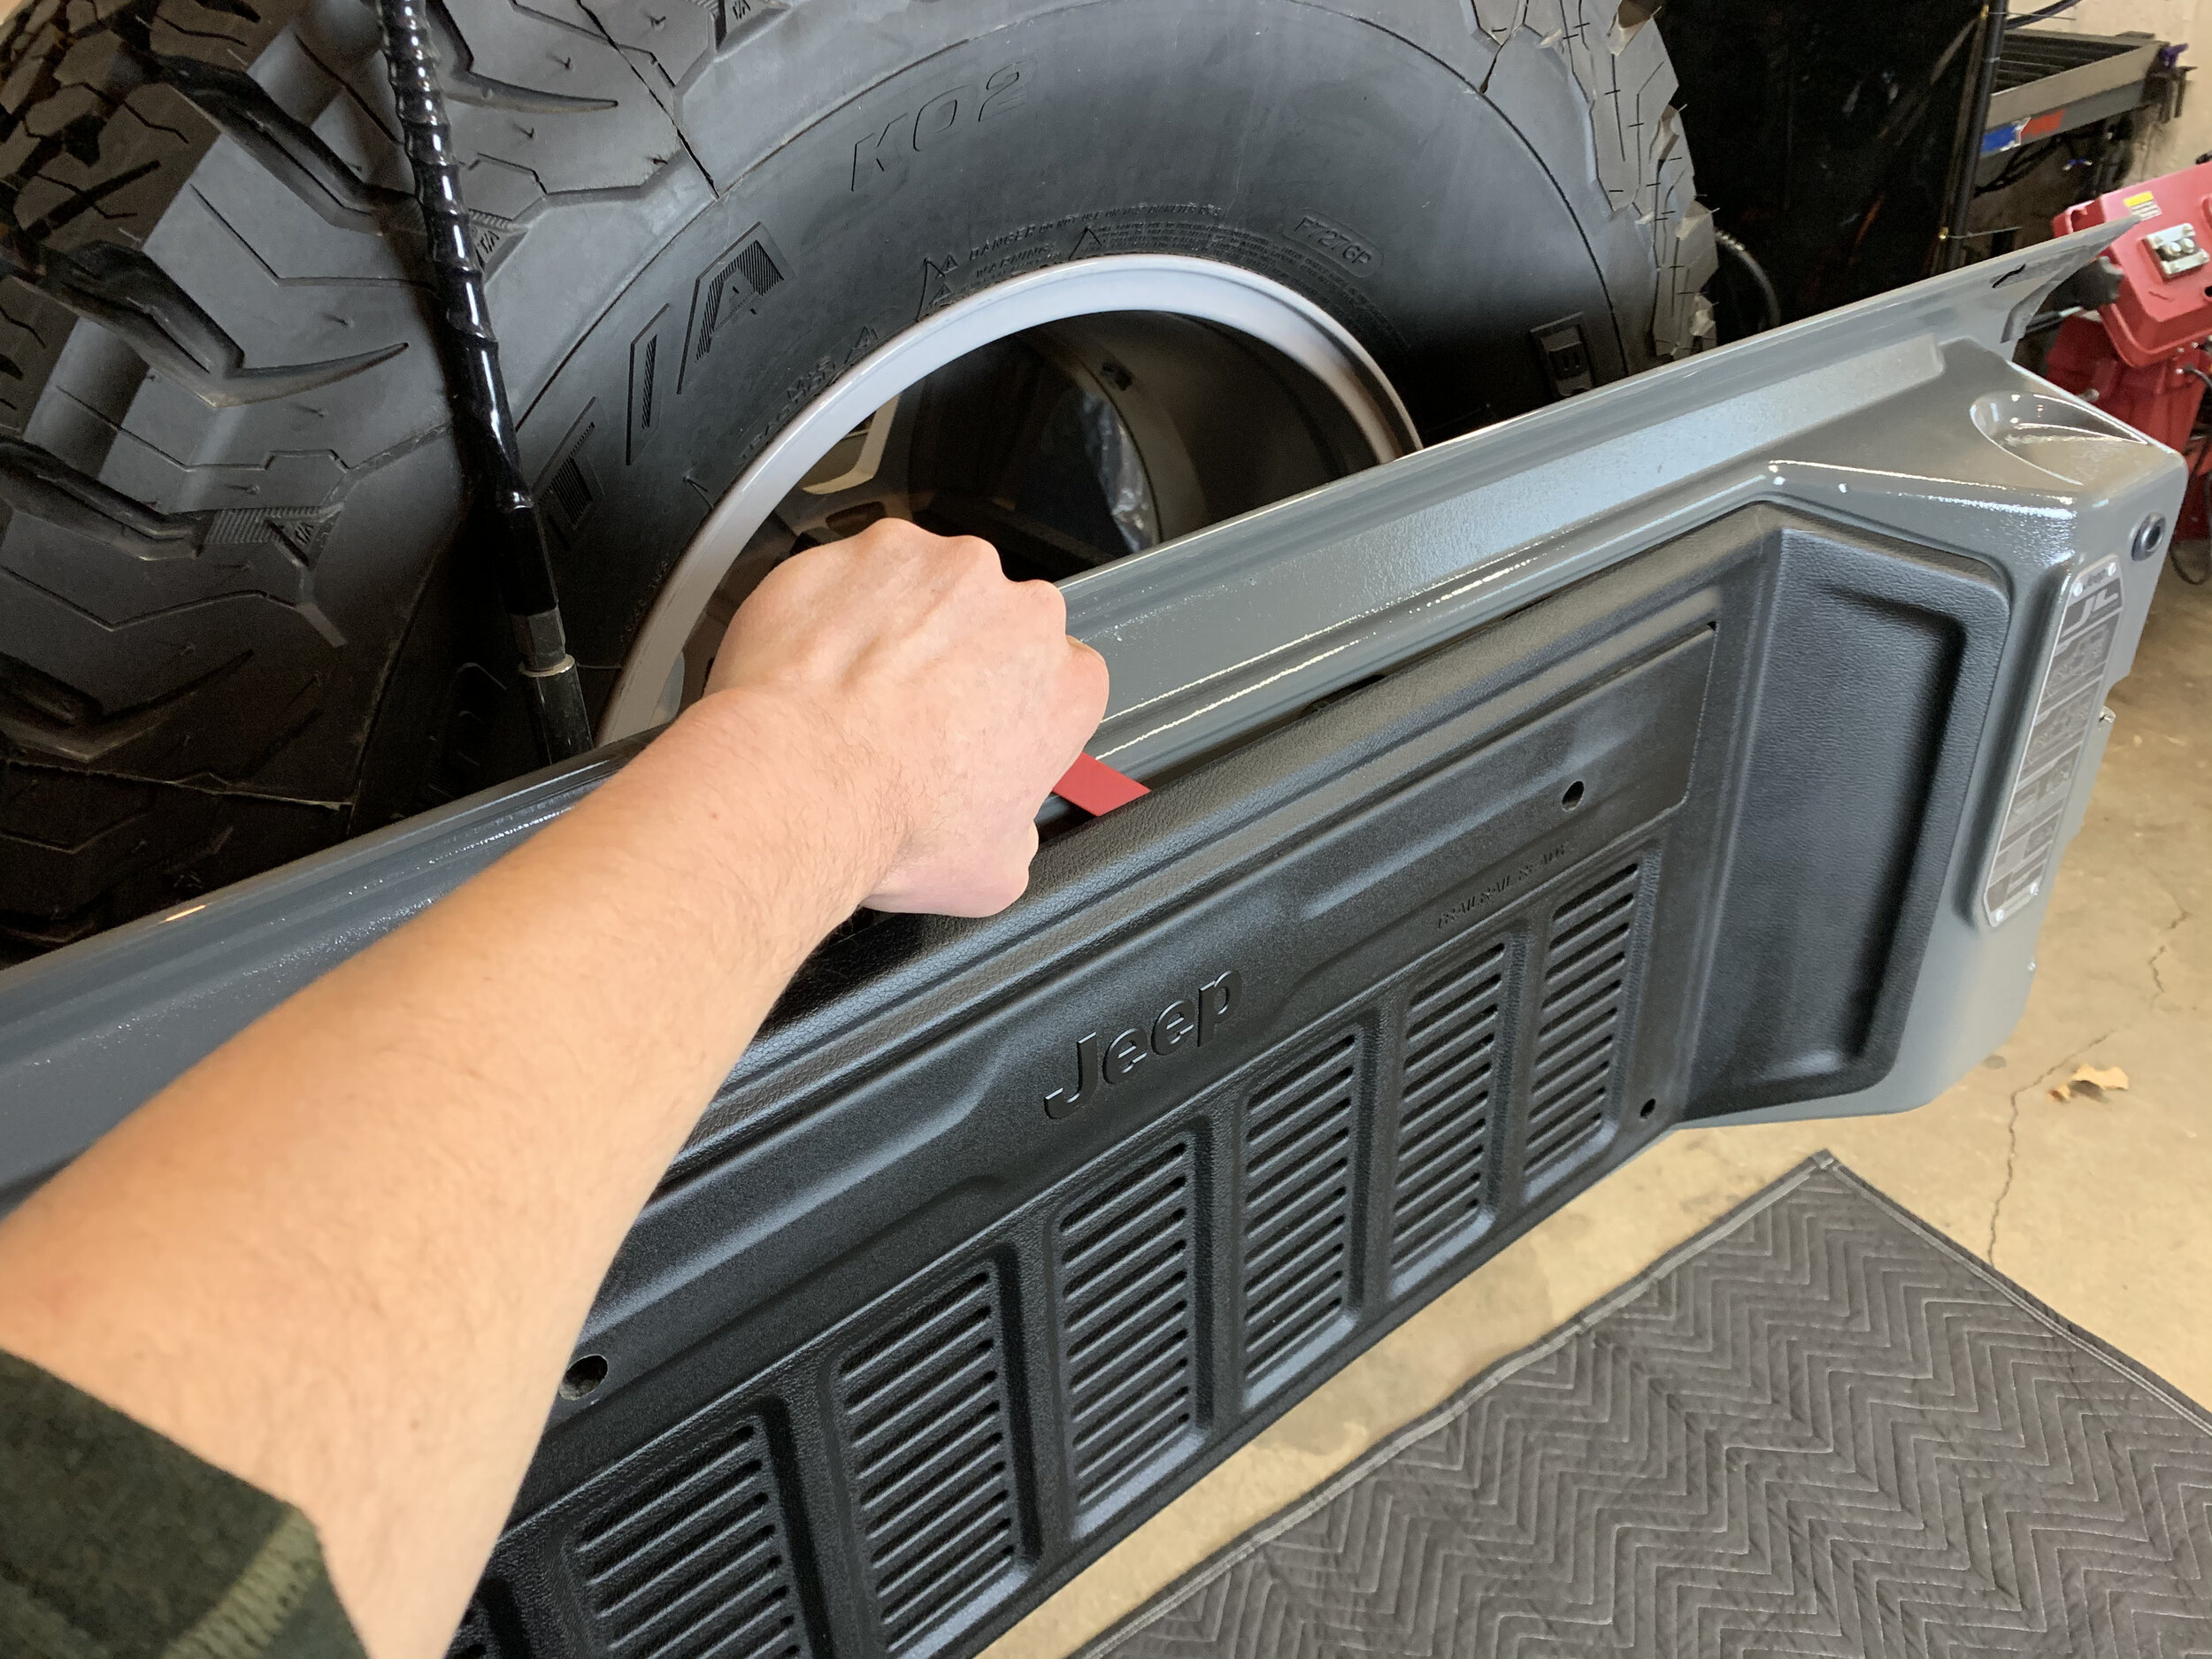
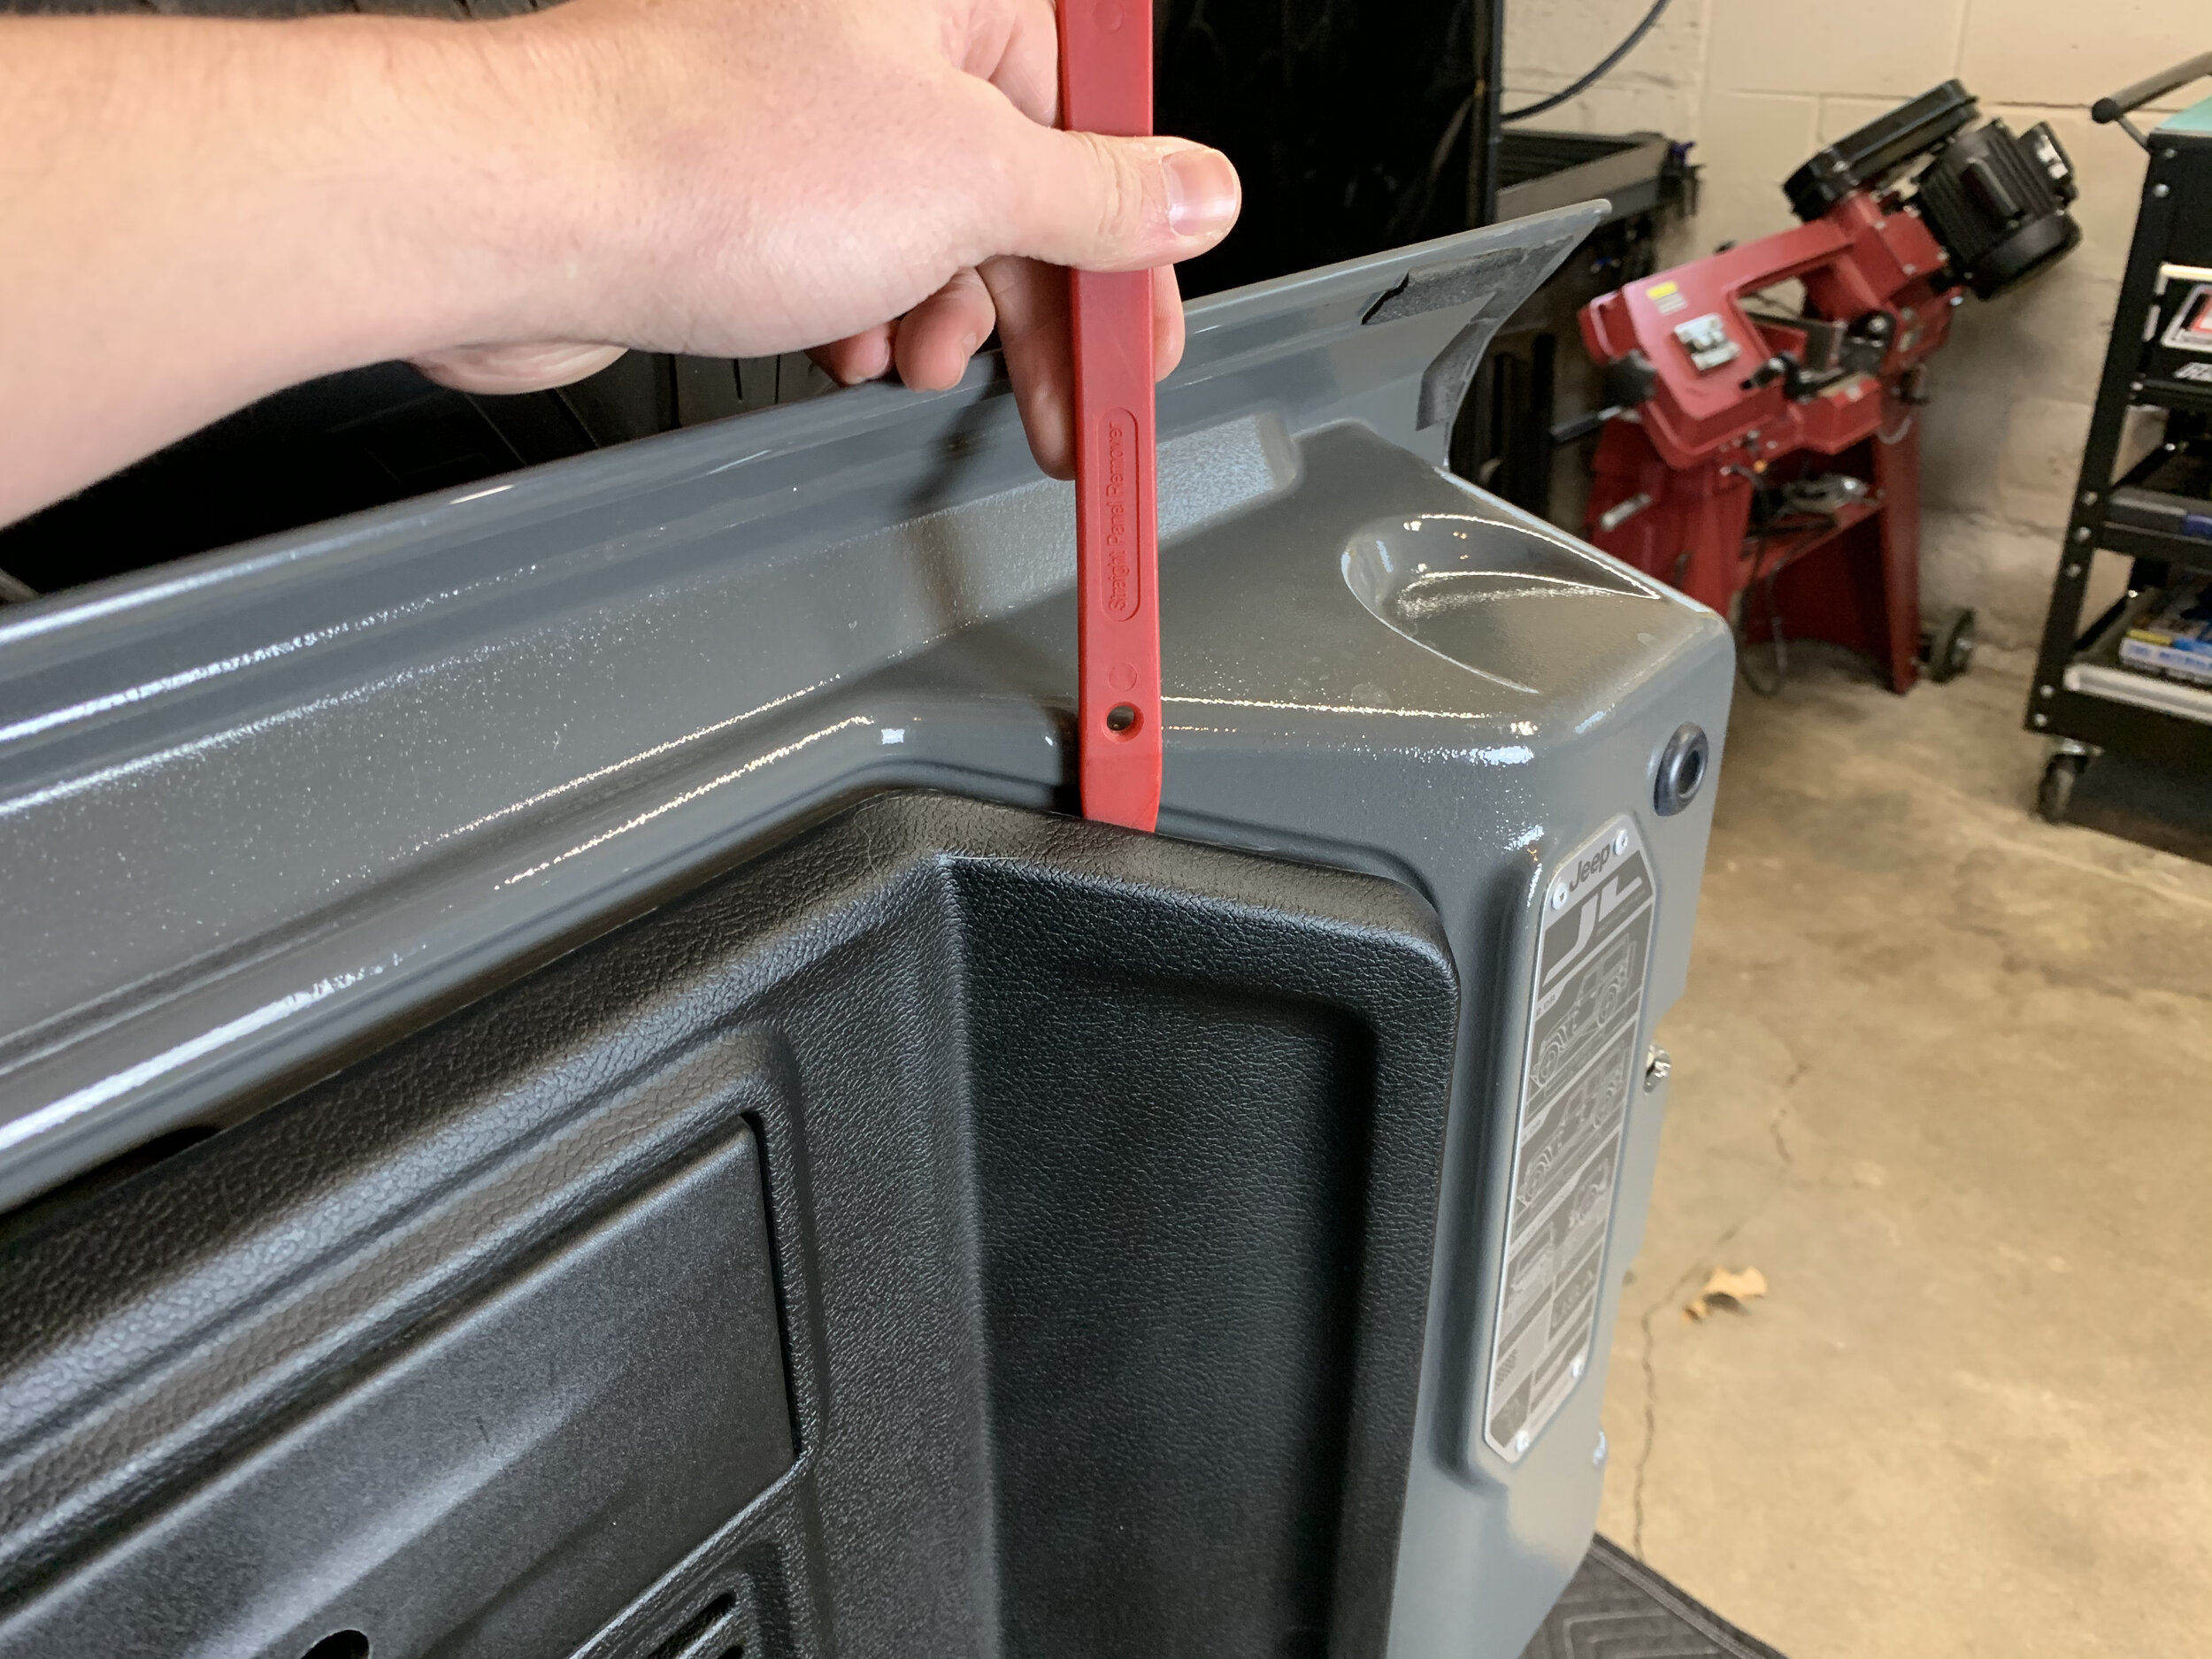
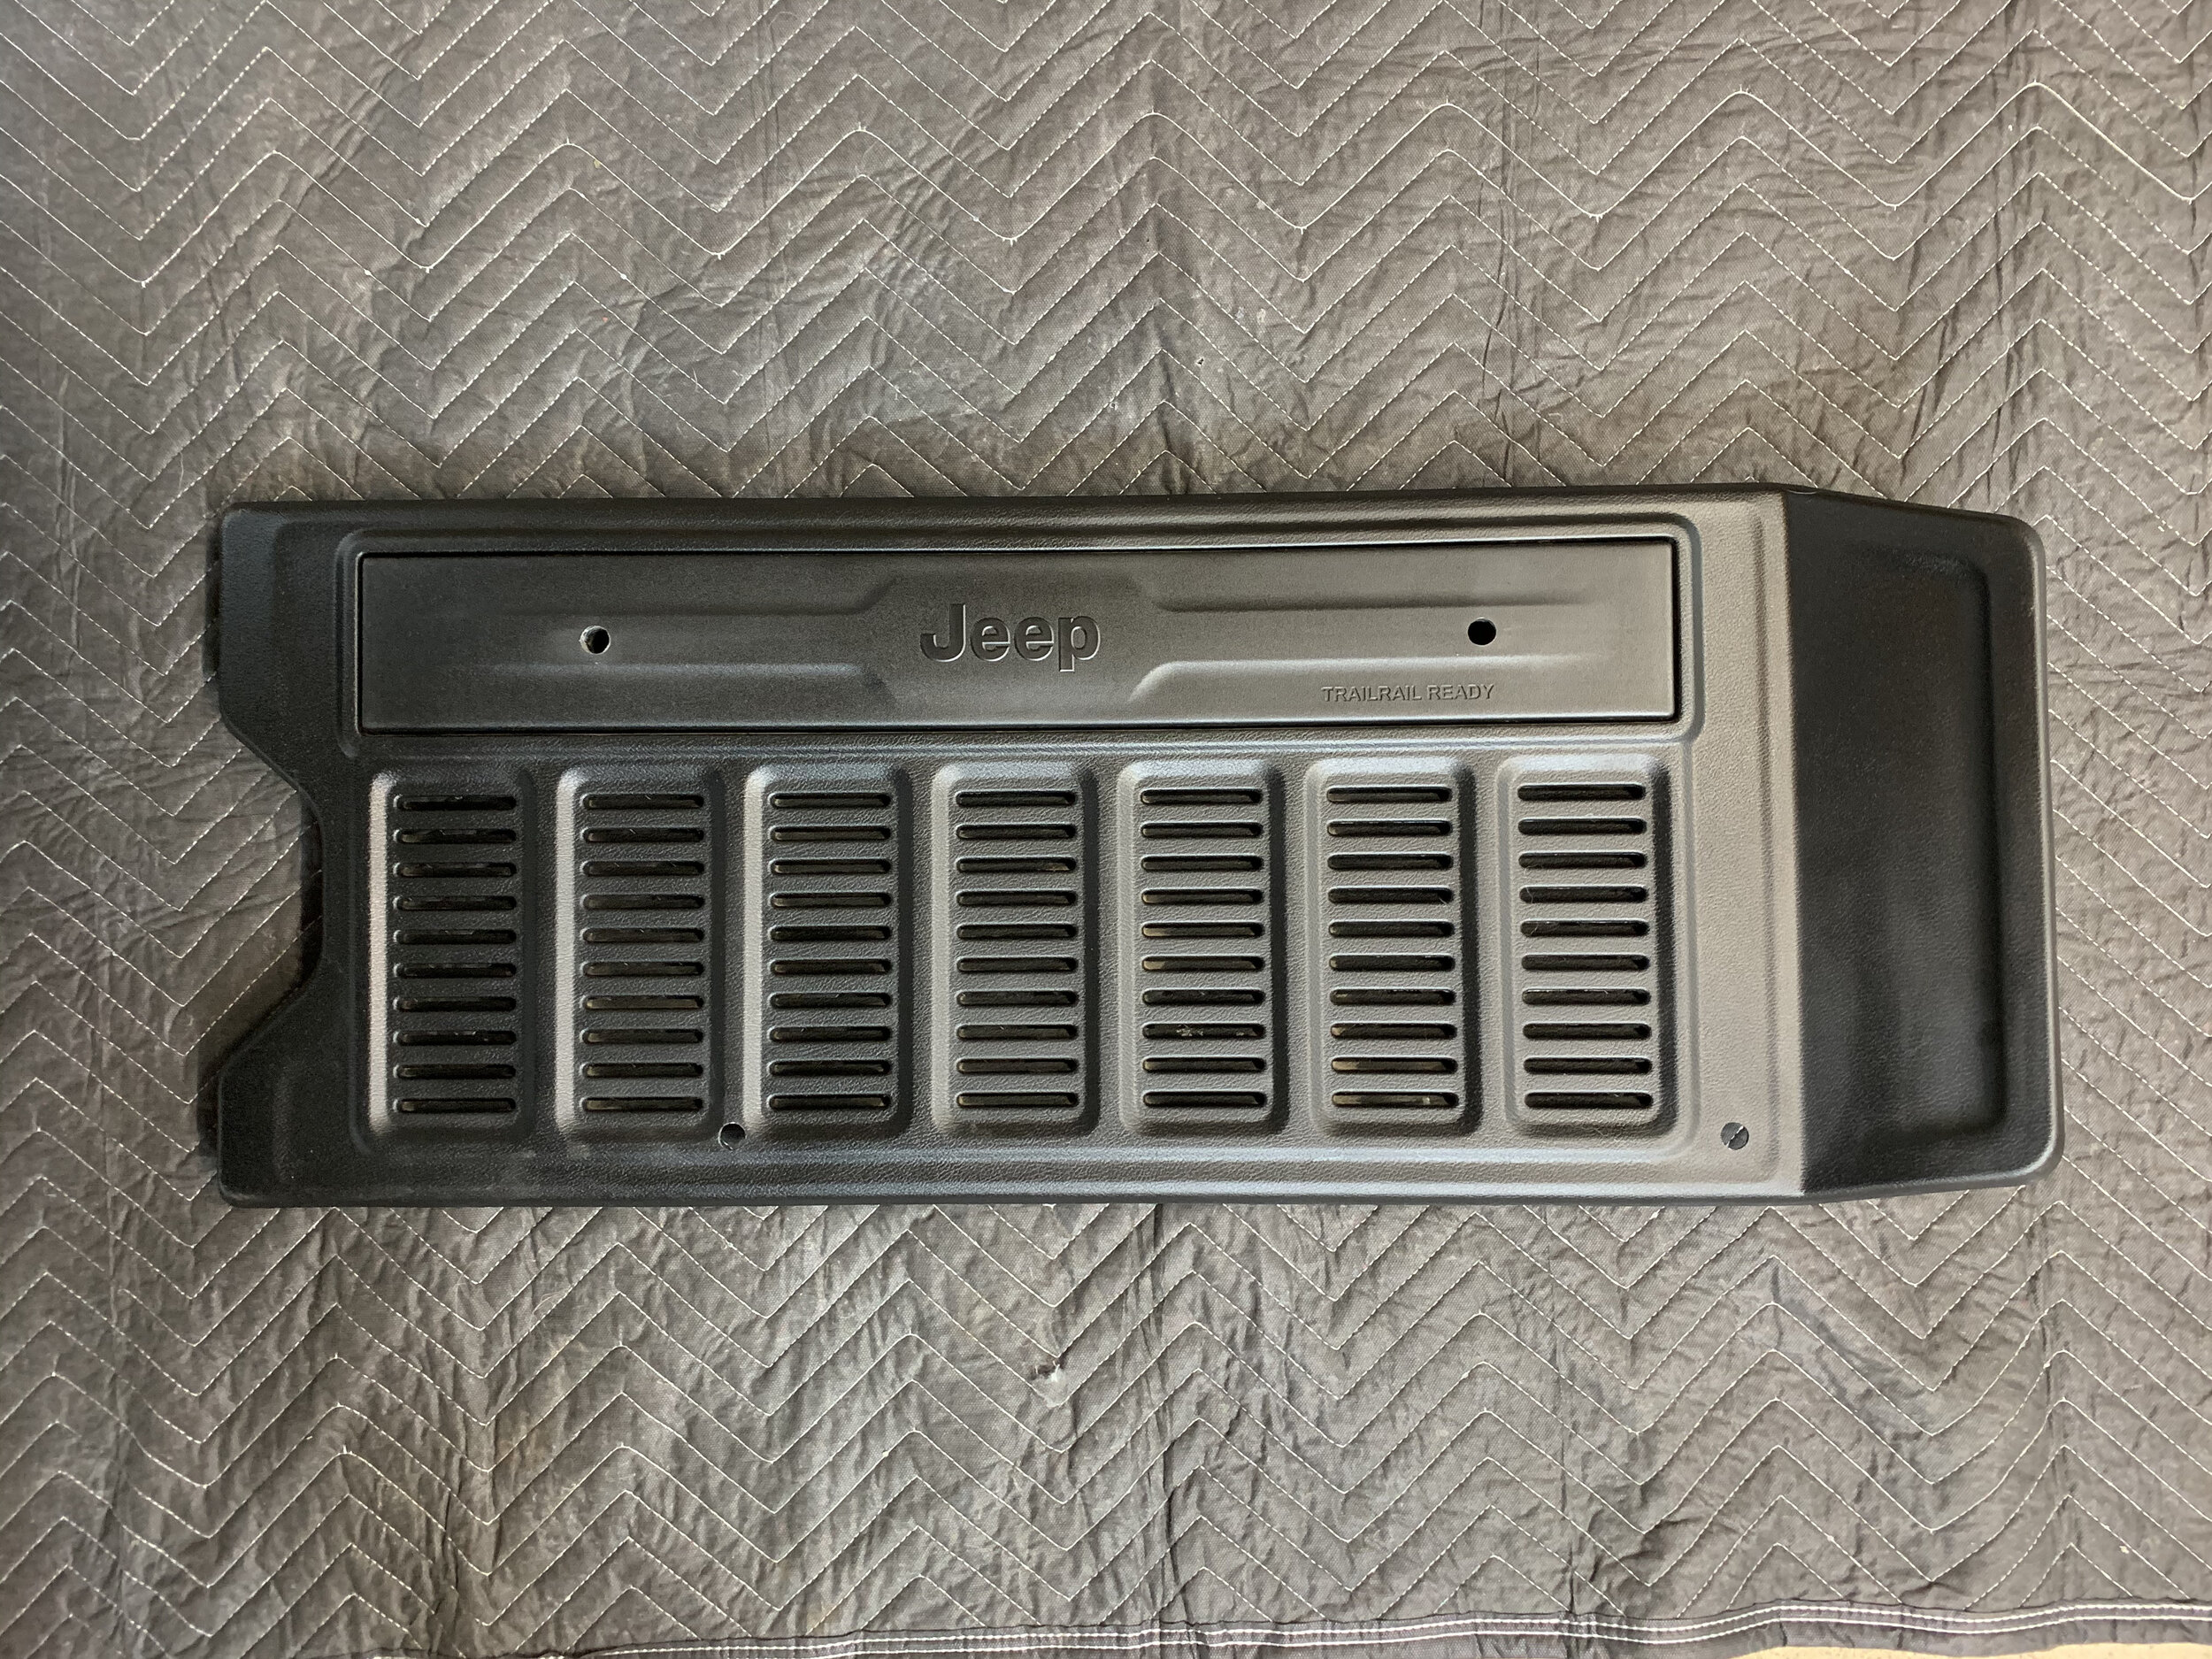
Step 2 - Remove the plastic trim using a Trim removal tool.
Start in the lower left corner of the panel and patiently work around the panel in a clockwise direction. Take your time and be gentle. The panel is resilient but after a few seasons in the summer sun, it can become a little delicate.
Always keep a hand on the panel so that when the last clip releases, it won’t fall to the ground.
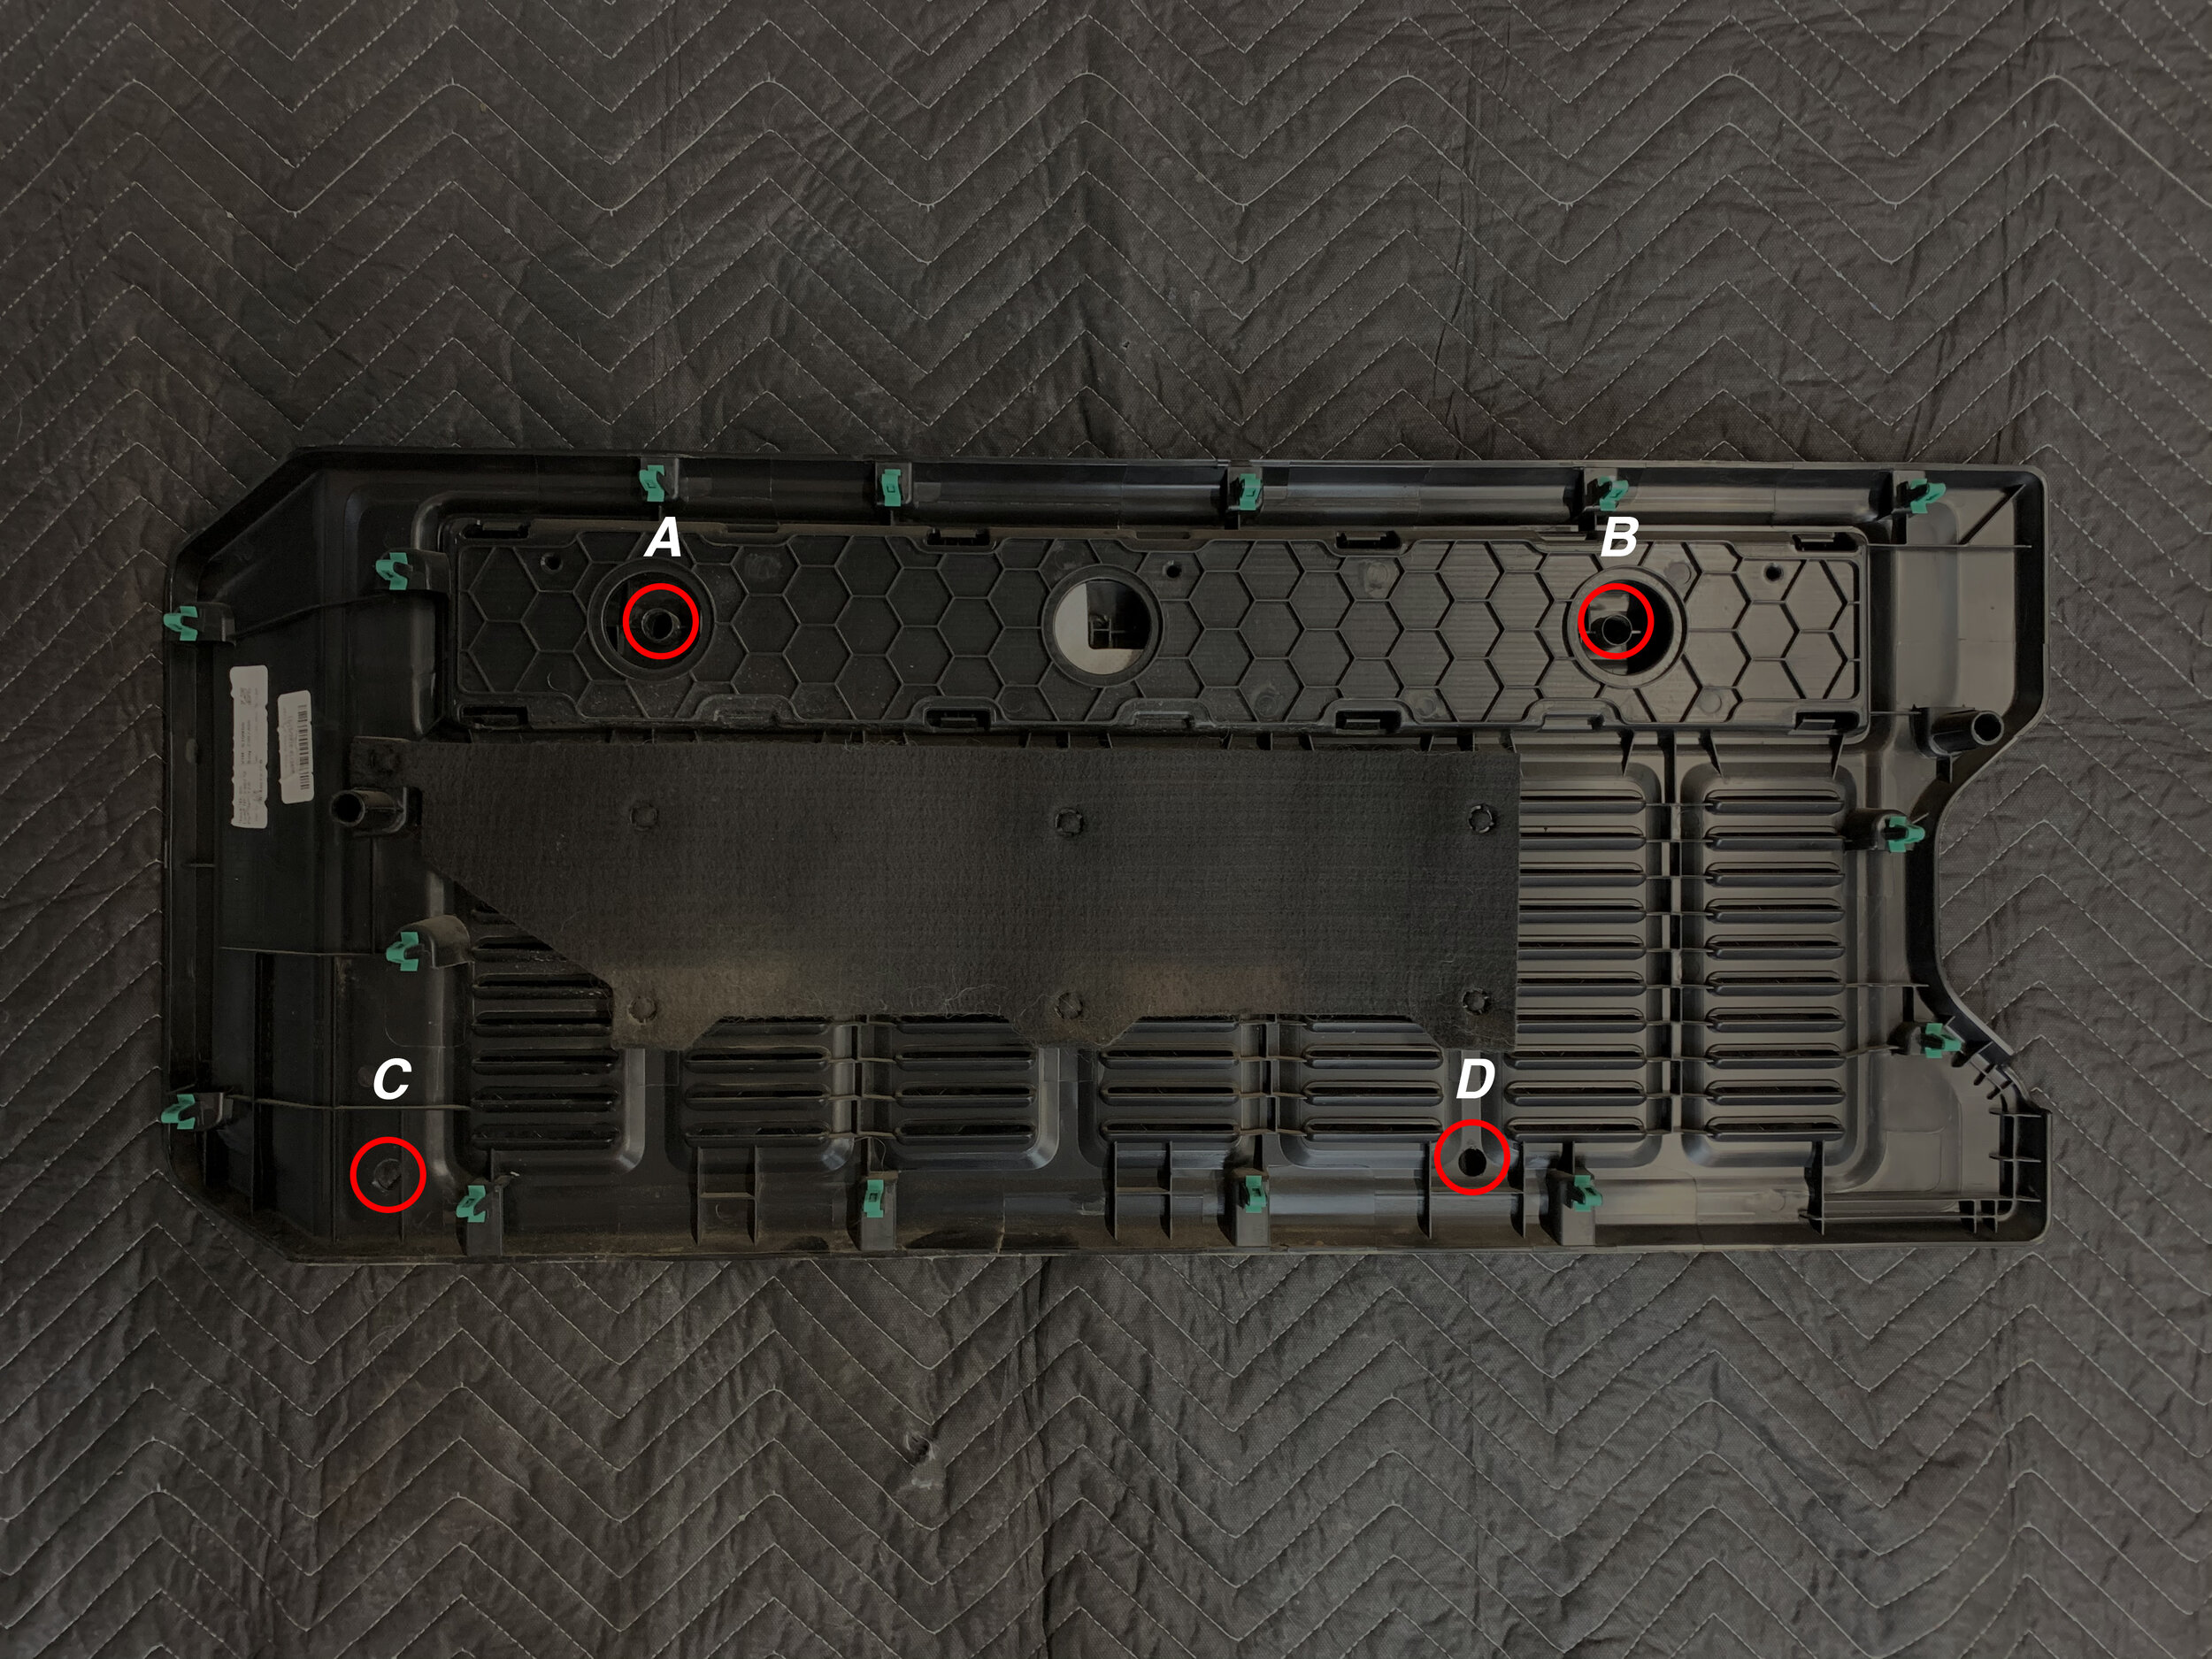
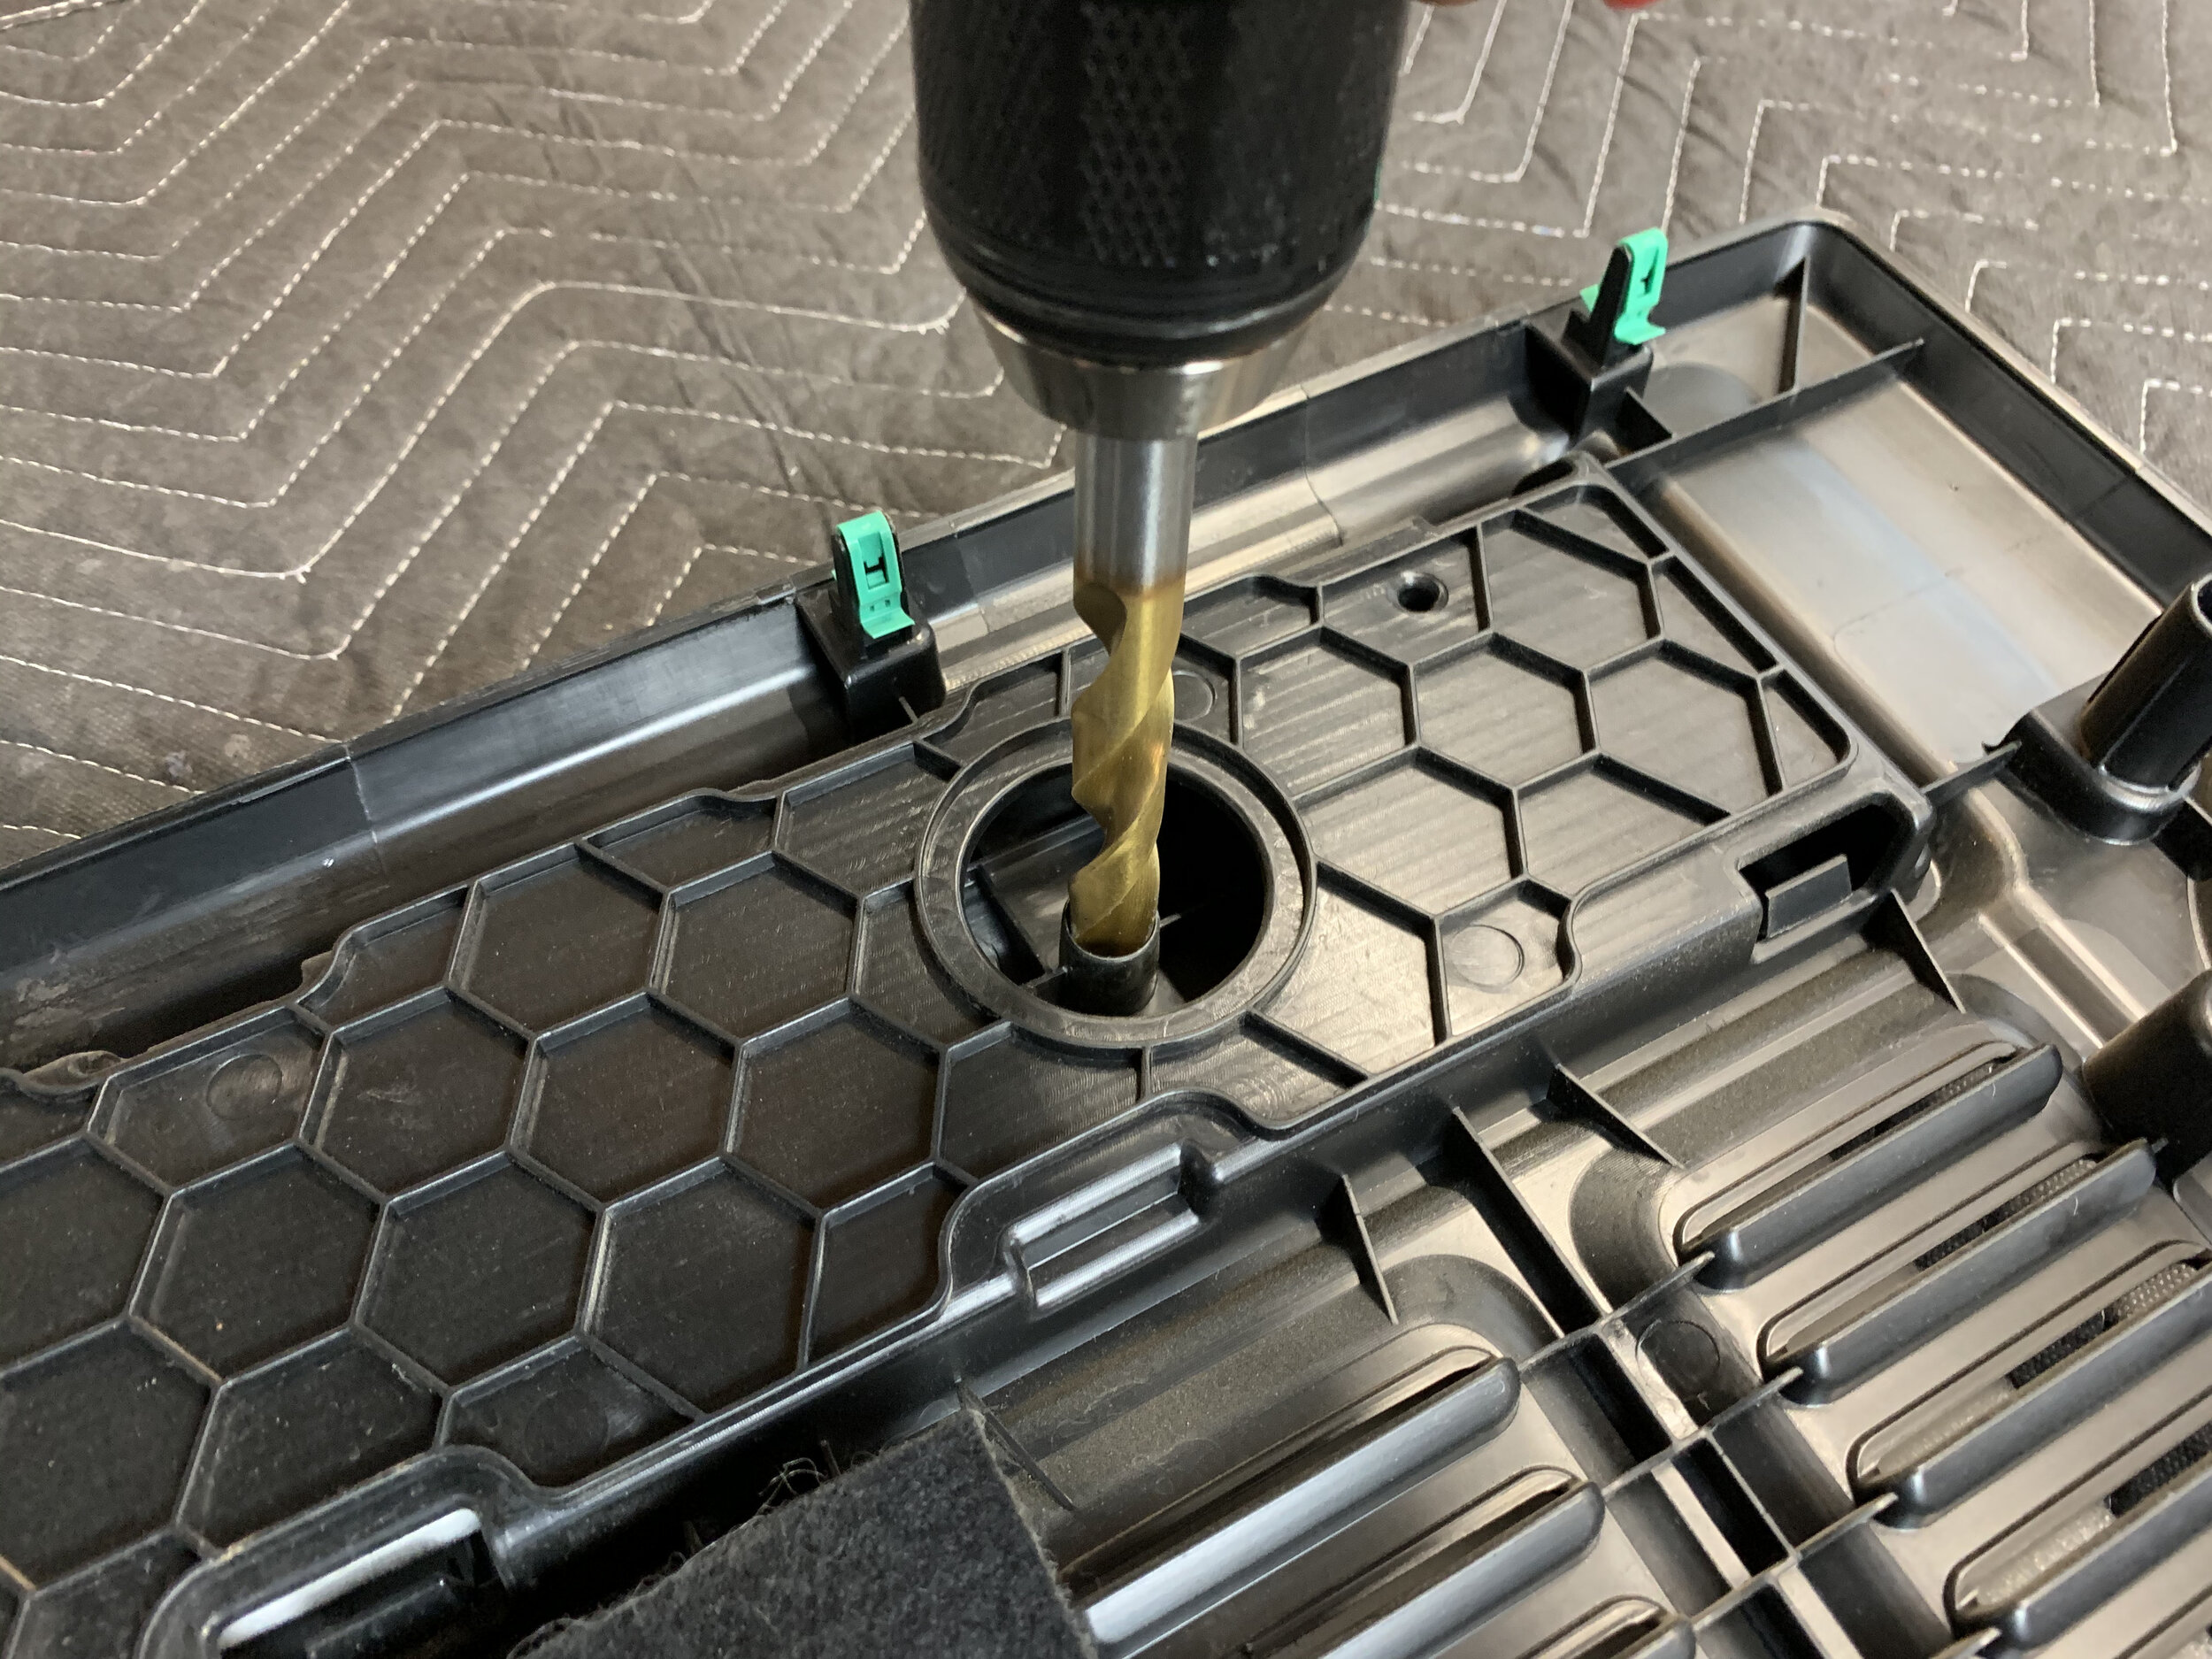
Step 3 - Lay the trim panel face down on the blanket or pad. It’s time to drill a few holes.
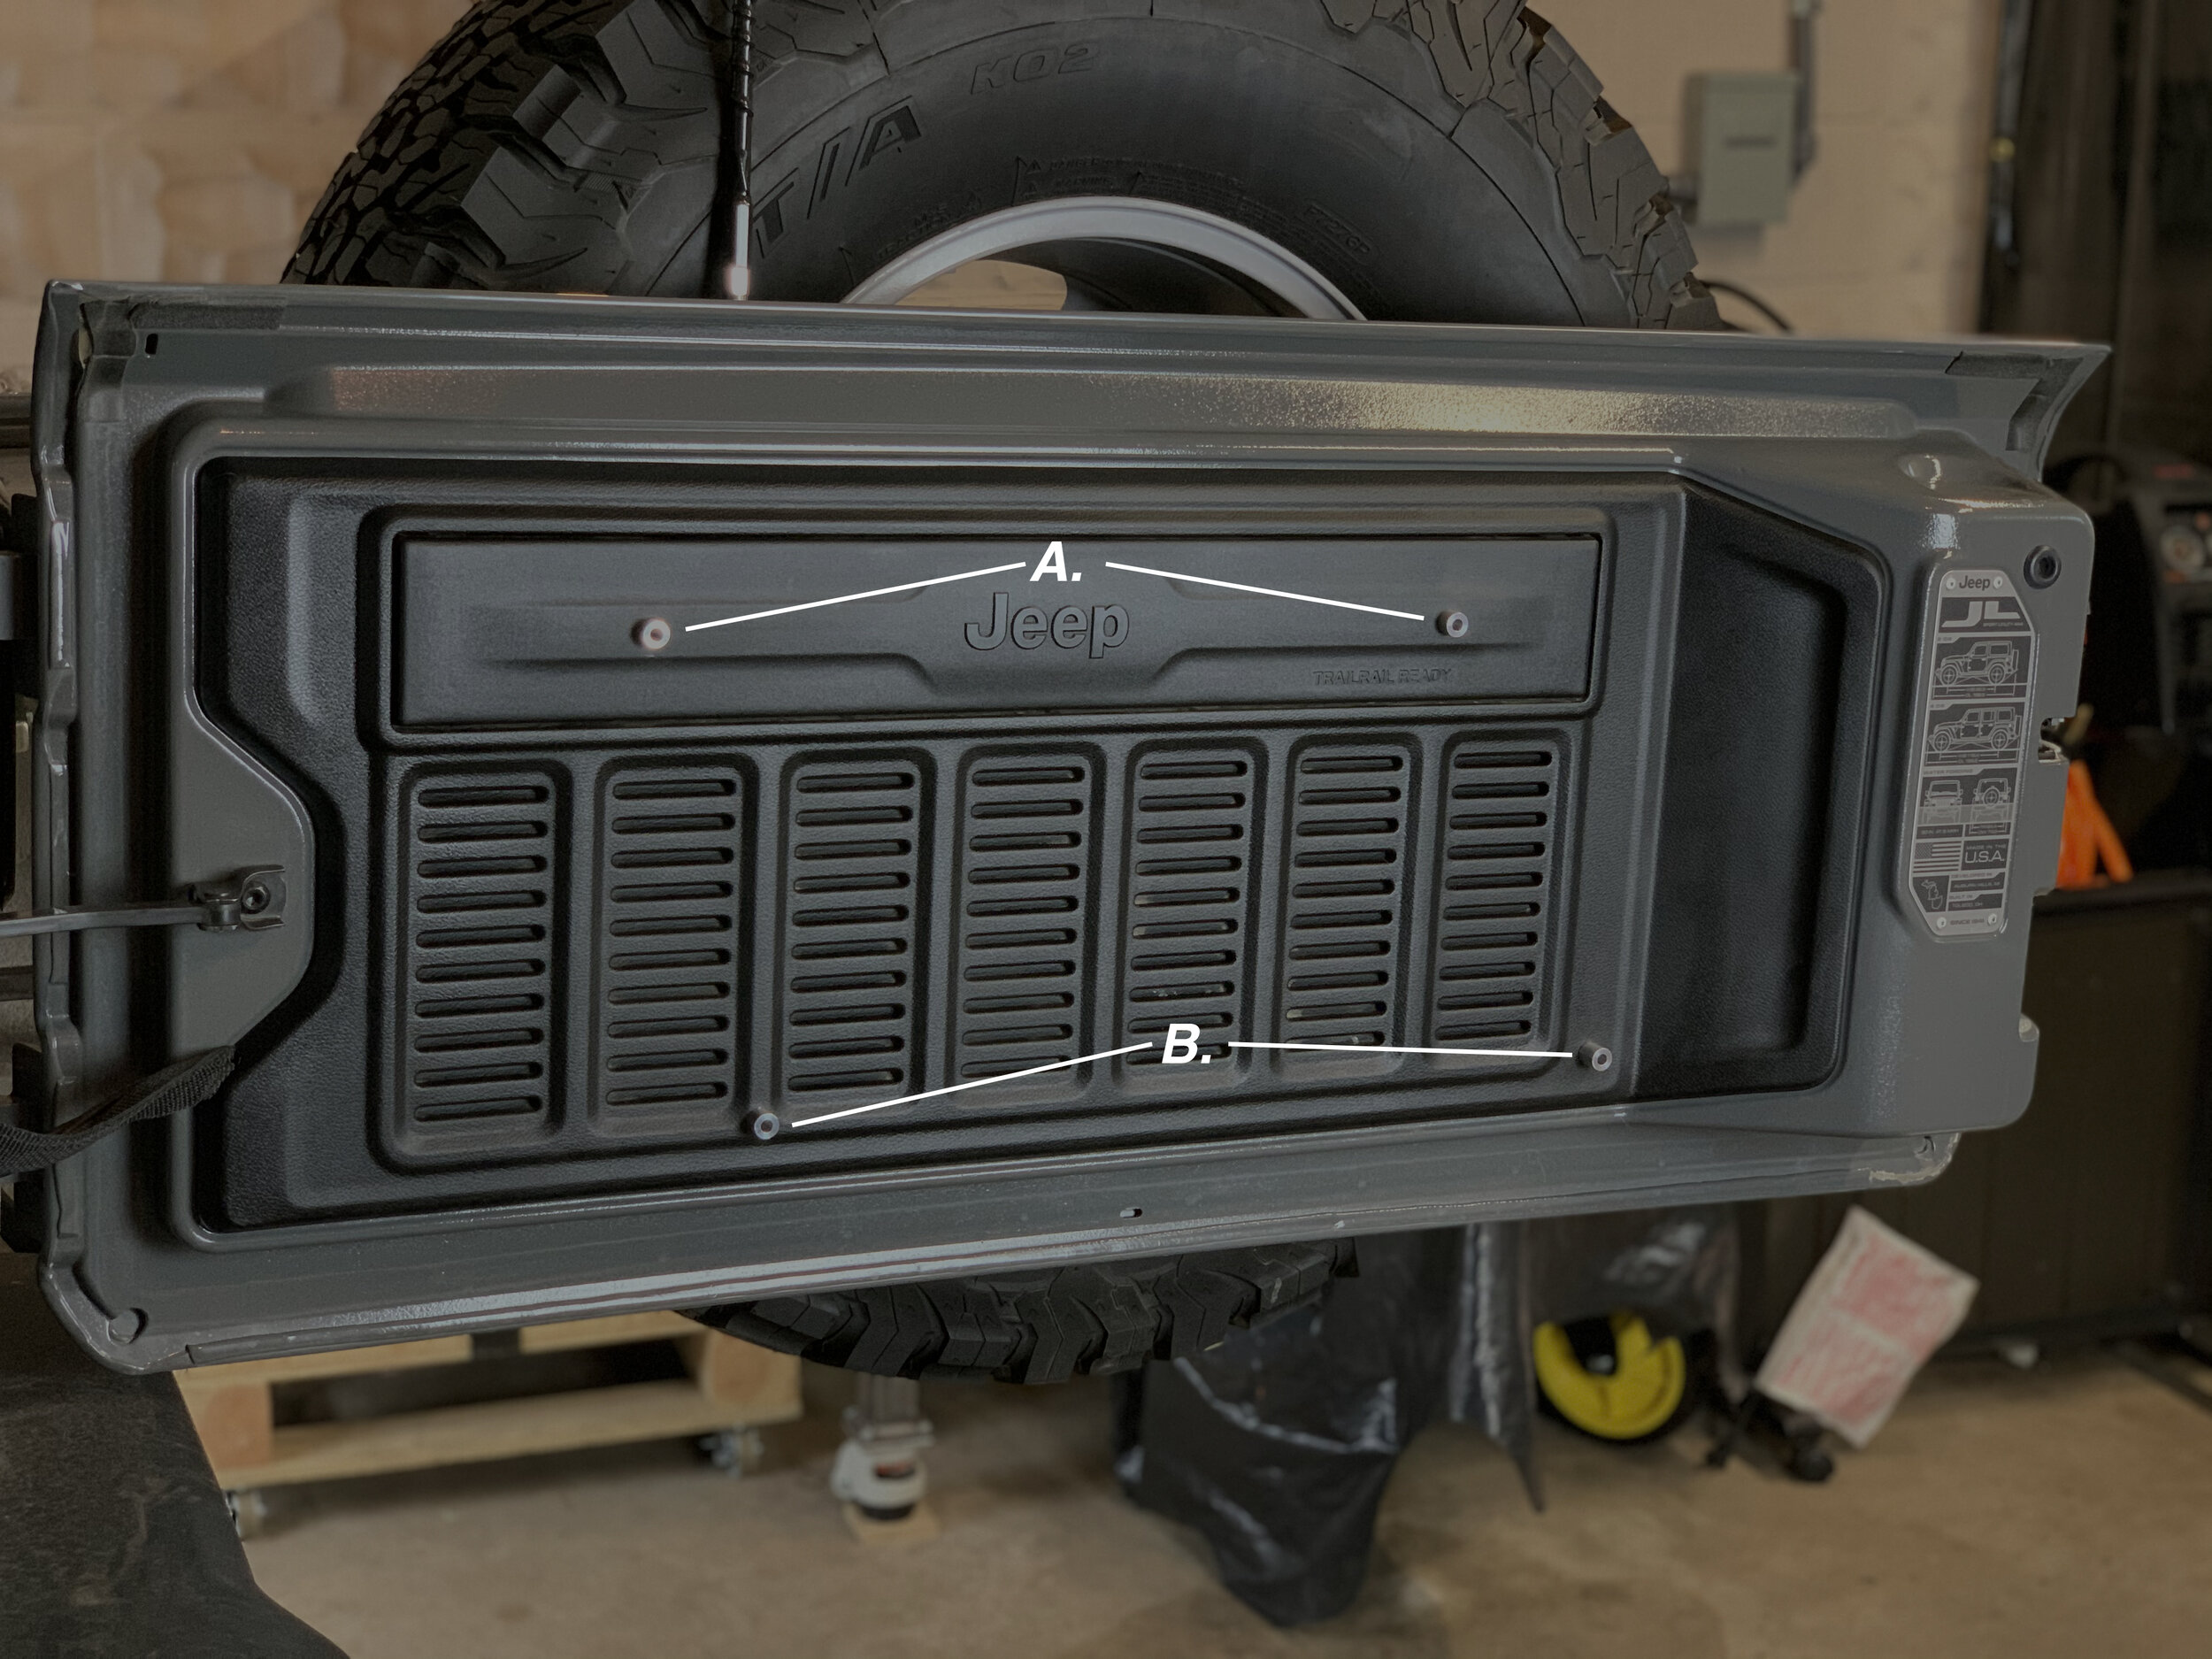
We need to drill a total of 4 holes in the trim panel so our spacers can pass through and interface with the tailgate.
Jeep has done us a huge favor and provided marks on the back of the panel for each hole. (See the diagram below)
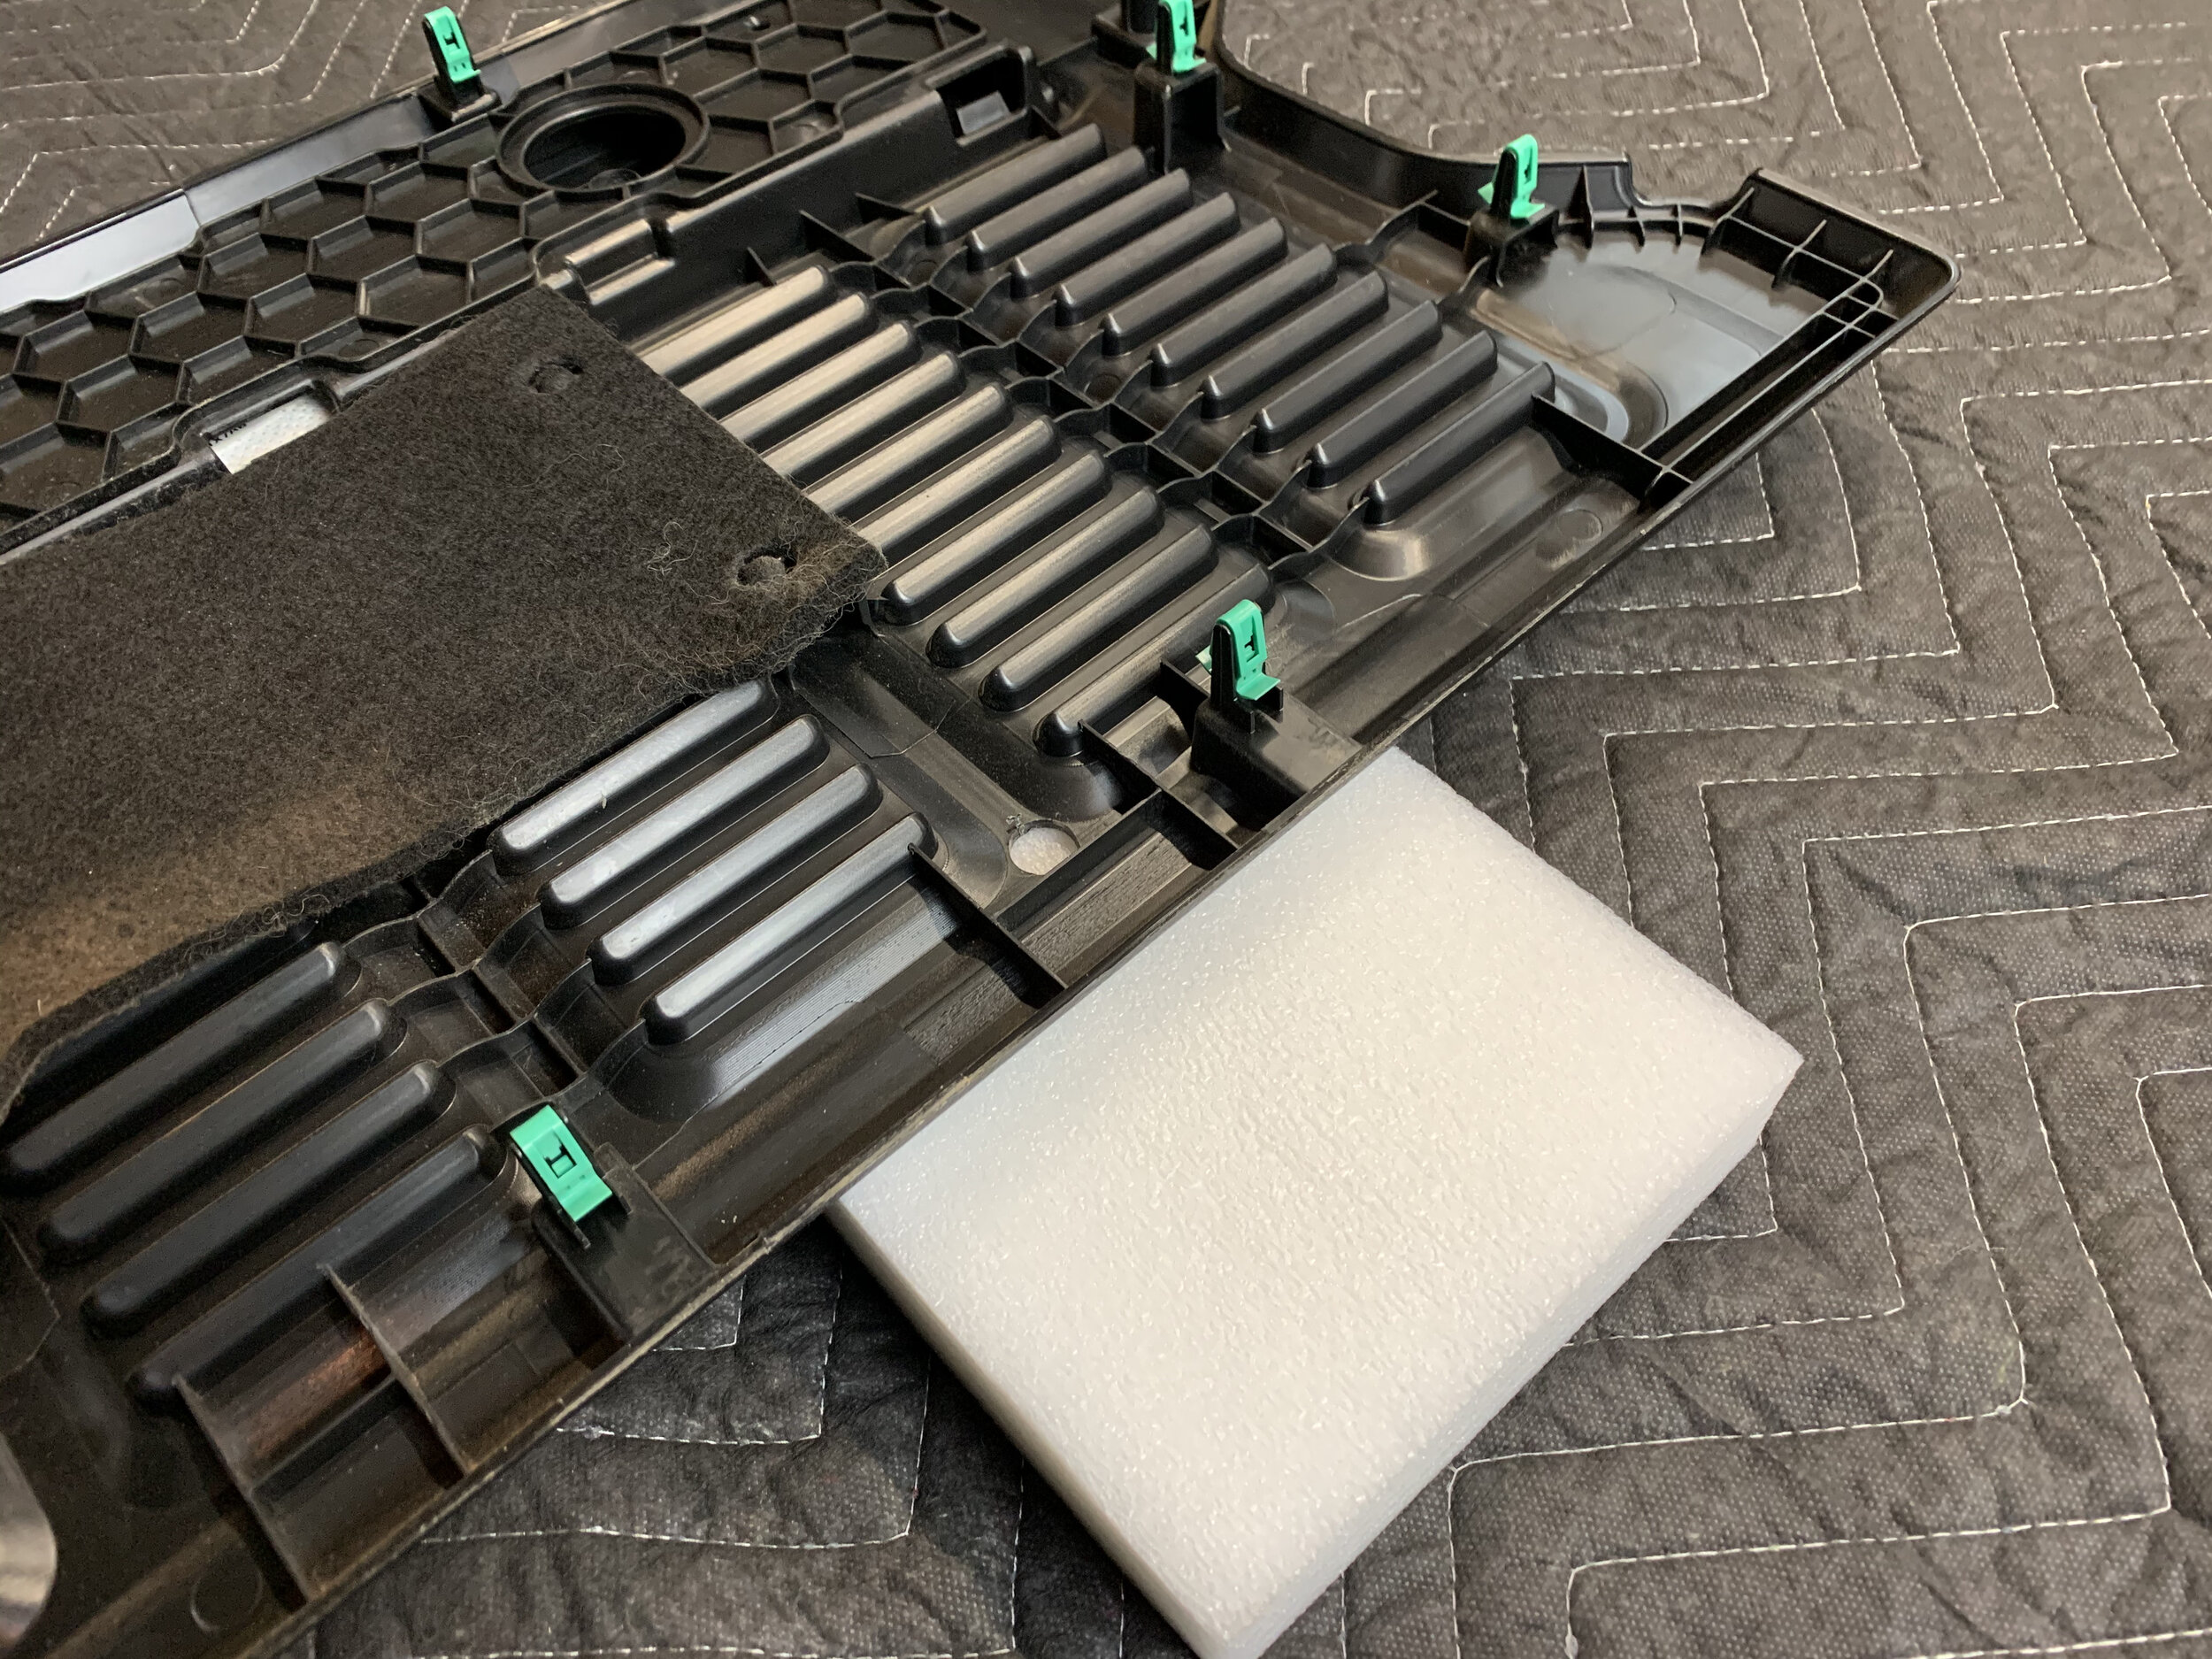
Find a block of foam or something disposable/soft to put under the panel when drilling. This keeps things steady and alleviates risk of cracking the plastic as we drill.
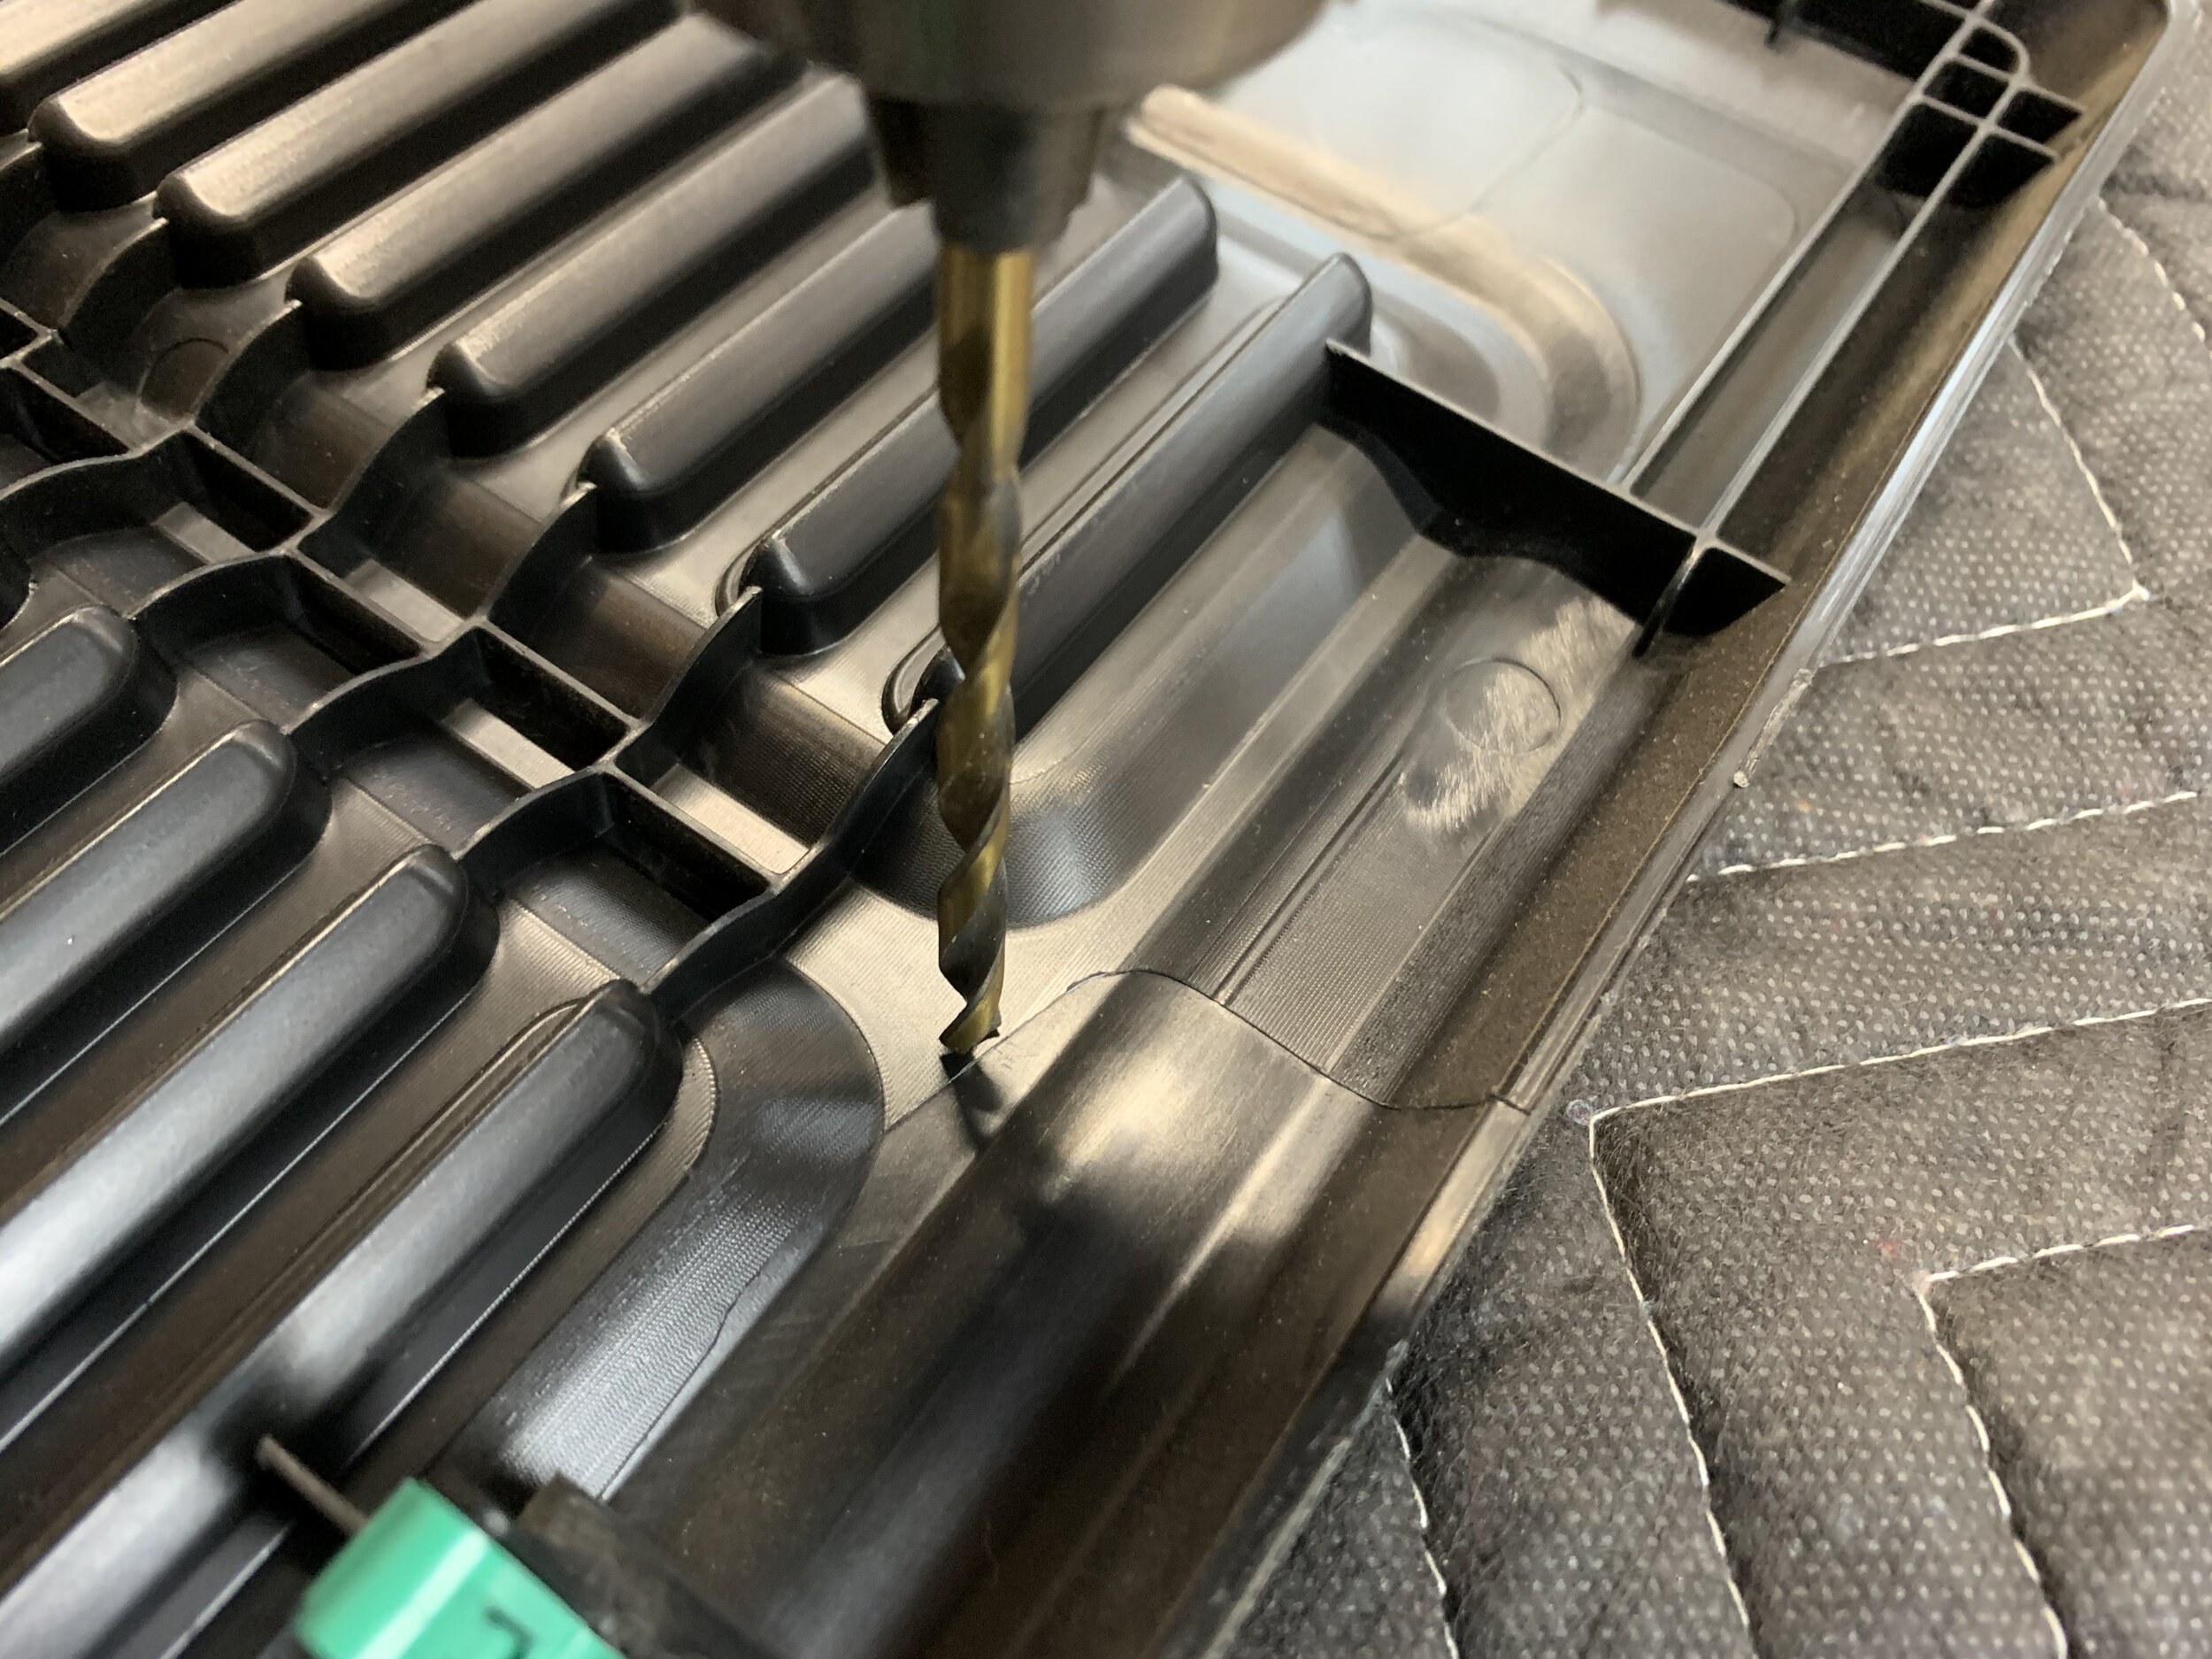
Carefully drill each hole. We recommend drilling a smaller pilot hole for position C and D. Make sure the pilot hole is correctly centered so you are set up for success!
For position A and B, Jeep gave us some nice built-in drill guides. BE CAREFUL. USING PILOT HOLES CAN BE TRICKY HERE. We recommend carefully using the the full 13.5mm/17/32” bit to make these two holes.
Take your time and use a good sharp drill bit. Drill bits made specifically for plastic can make this process a bit easier as well.
Lastly, clean up the holes from the front of the panel by following up with the drill bit, or a piece of sand paper.
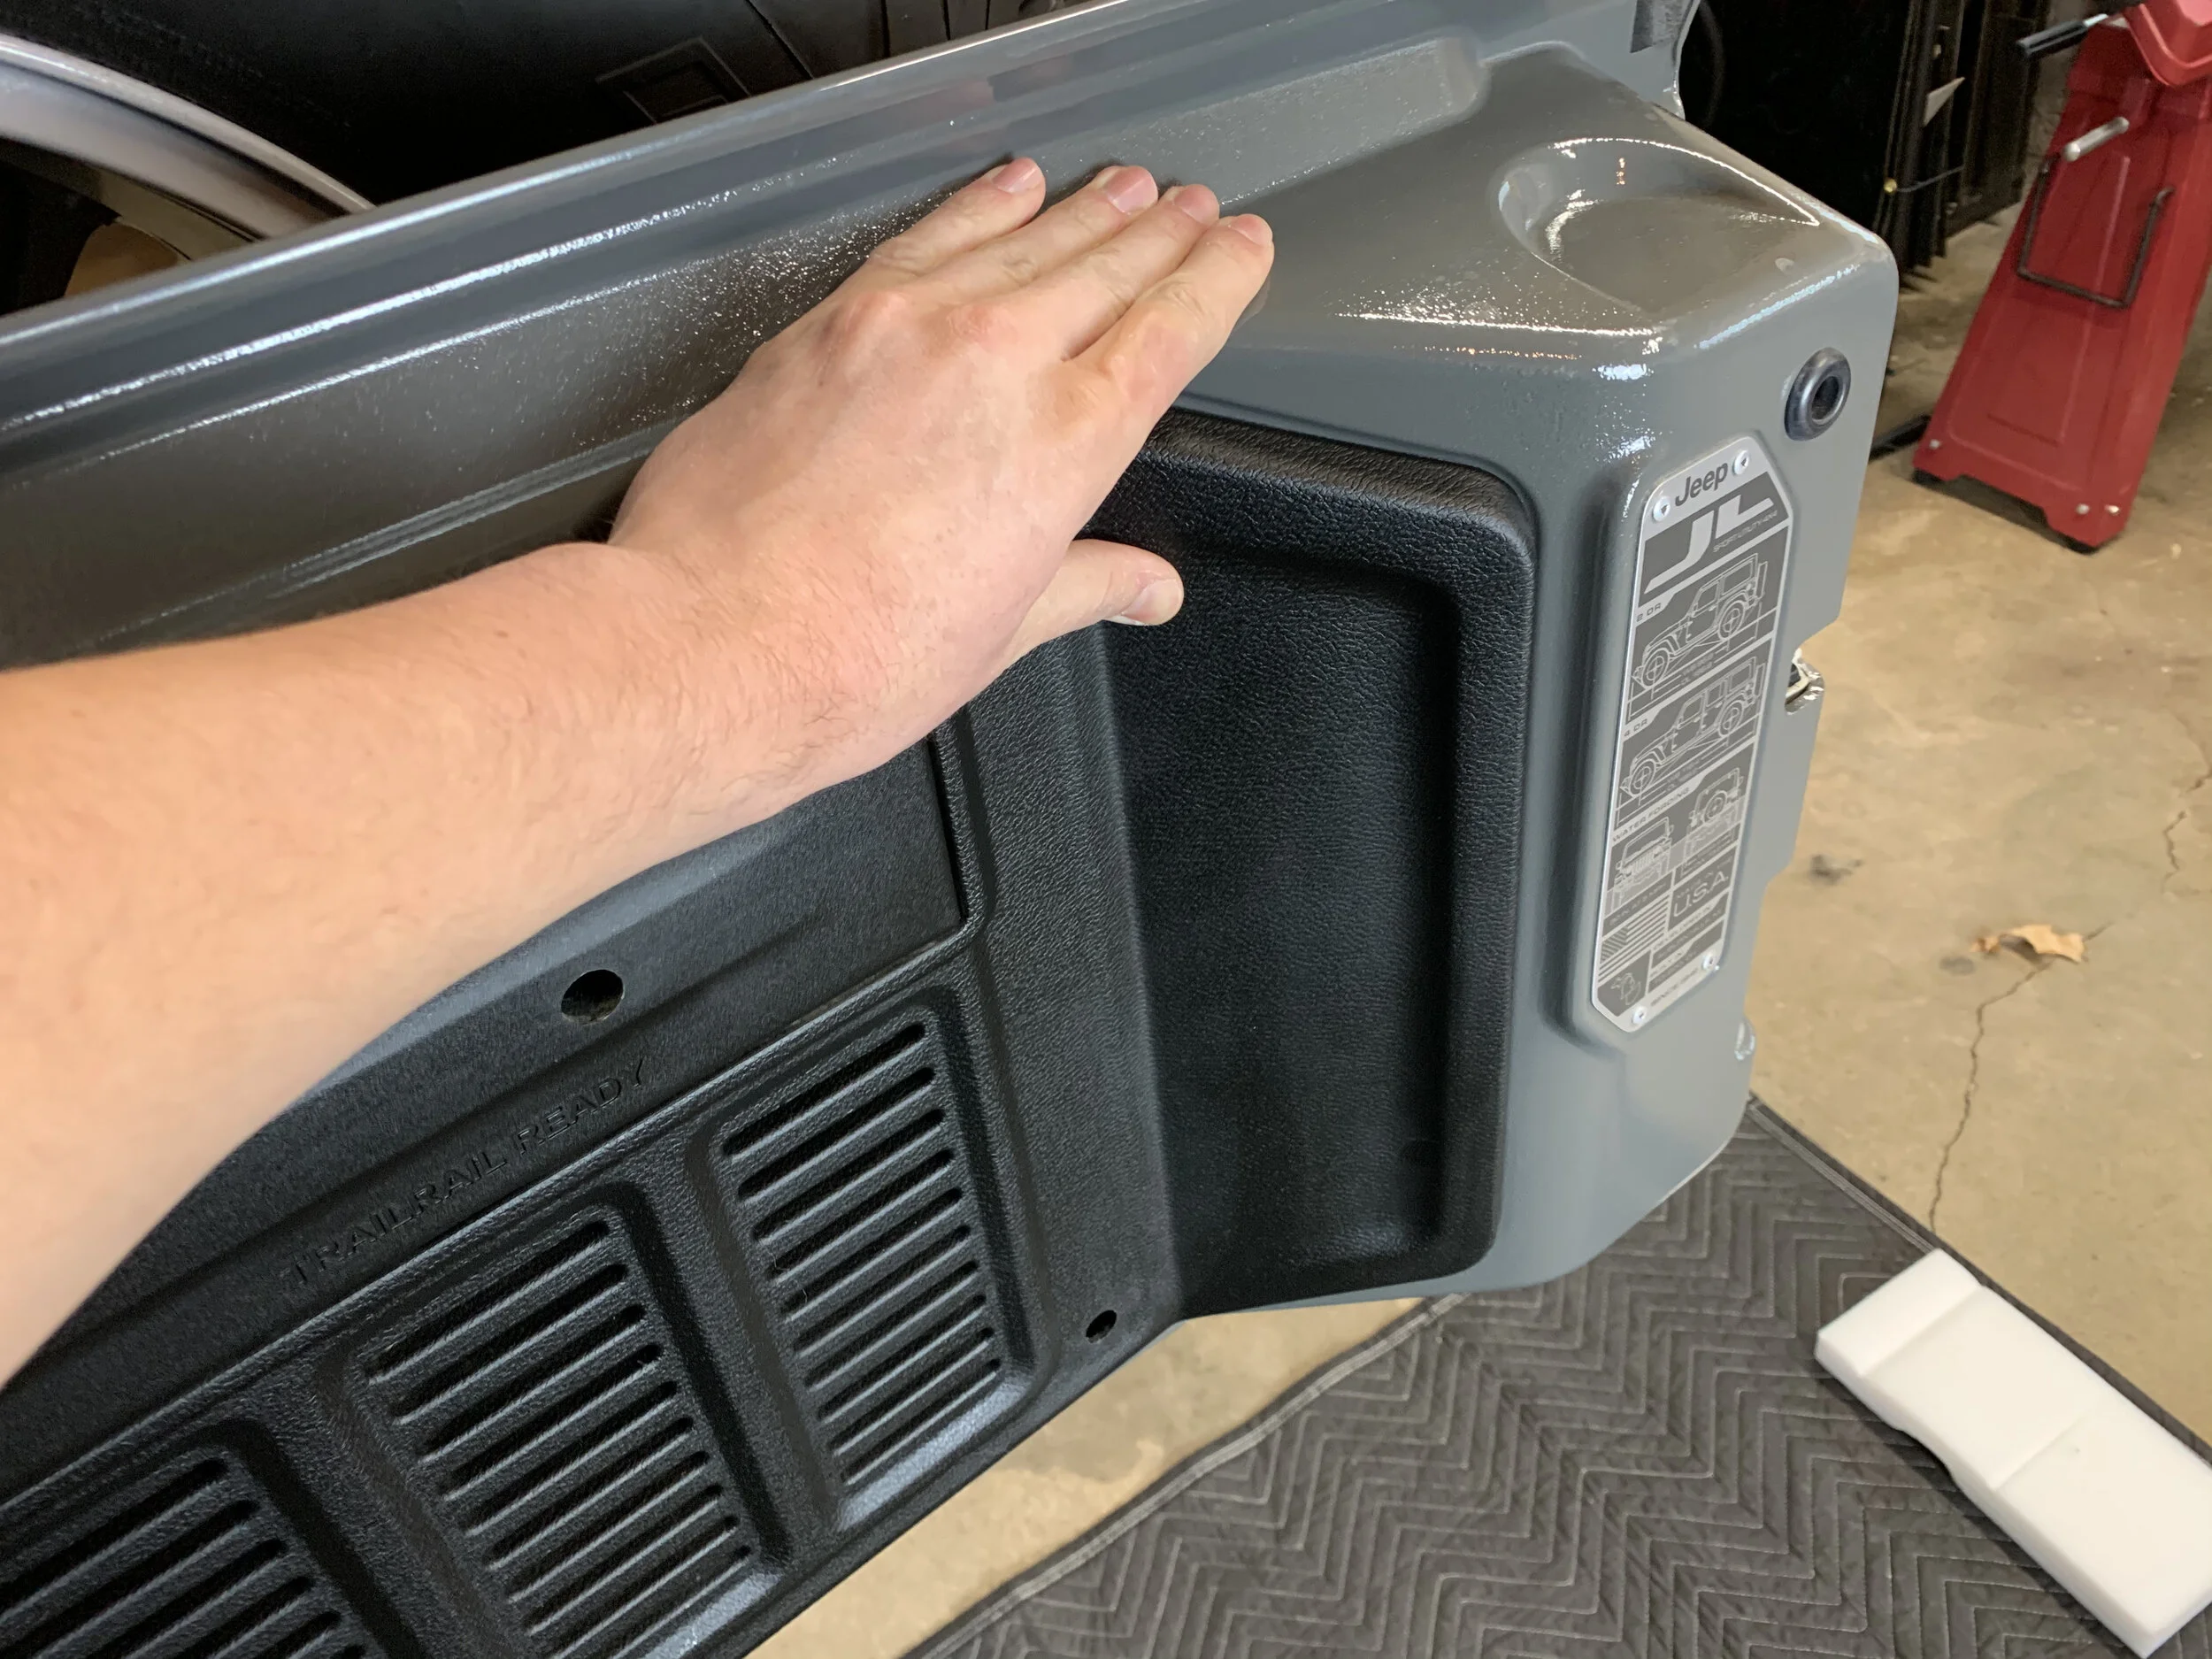
Step 4 - Time to reinstall the trim panel.
Make sure the trim piece is cleaned up and ready to go.
Clip the panel back in. We recommend starting on the right side and working your way to the left.
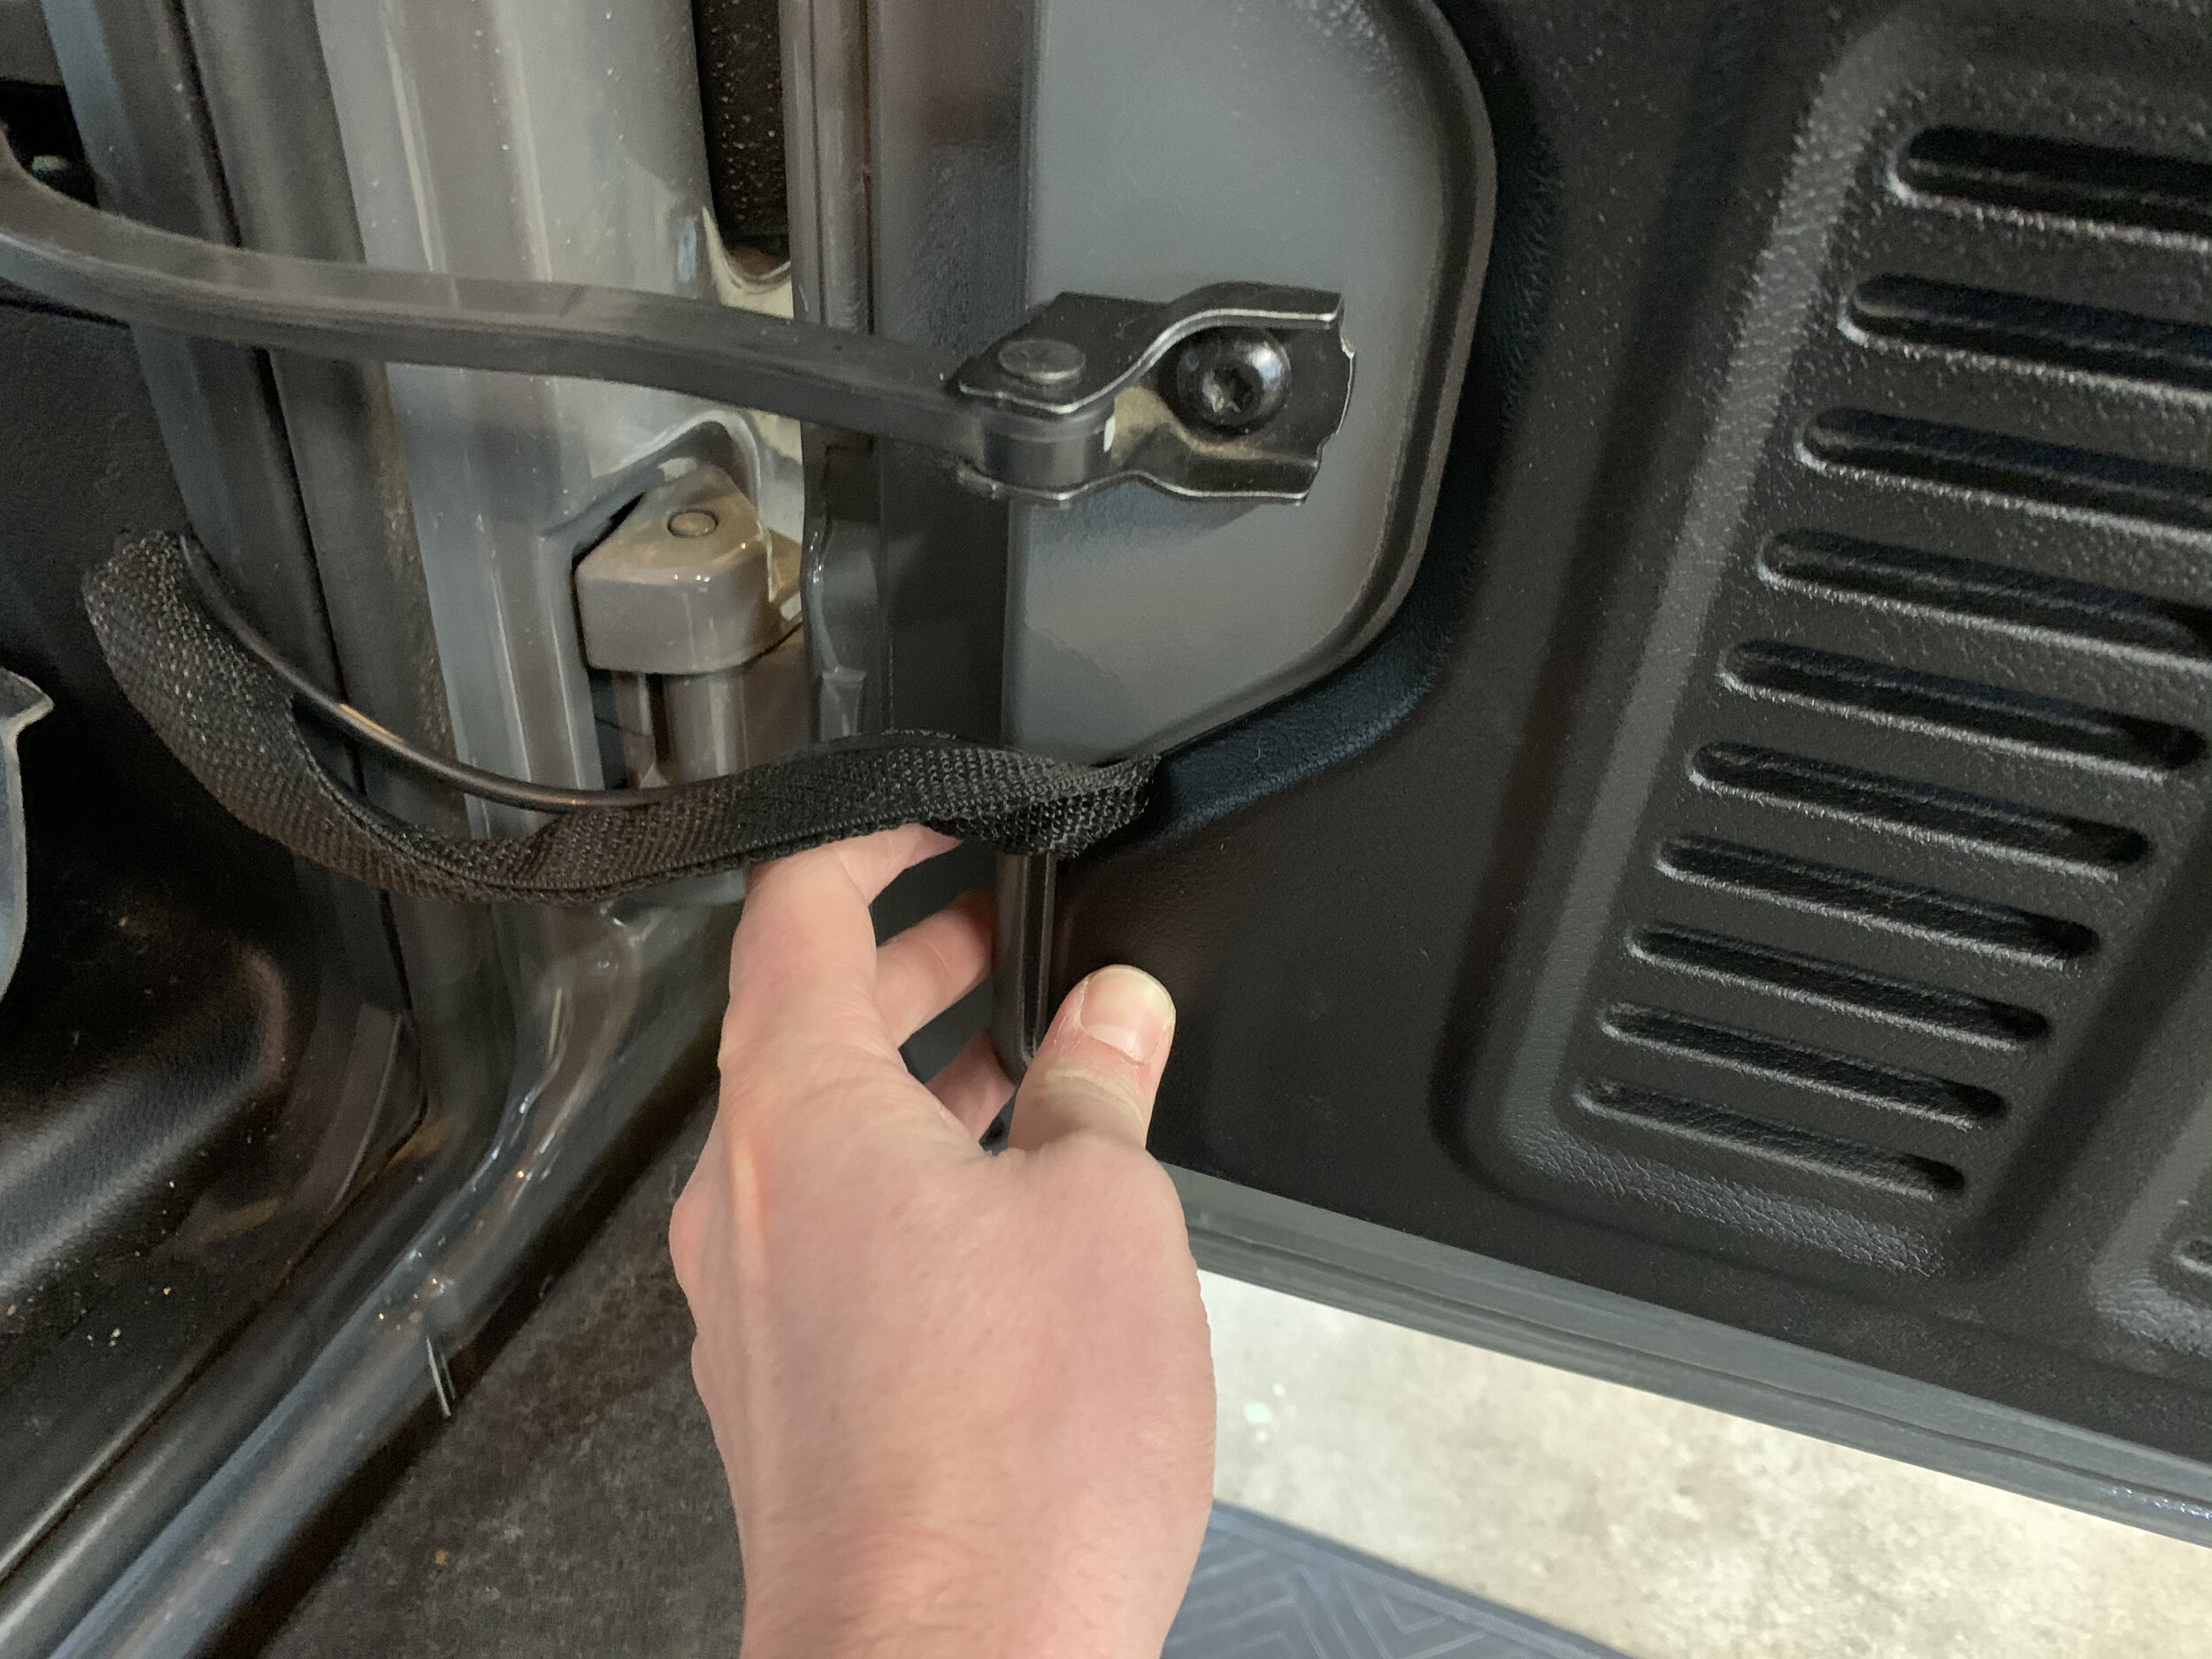
Lastly, make sure the wire harness finds a home in the relief cut in the bottom right corner of the panel.
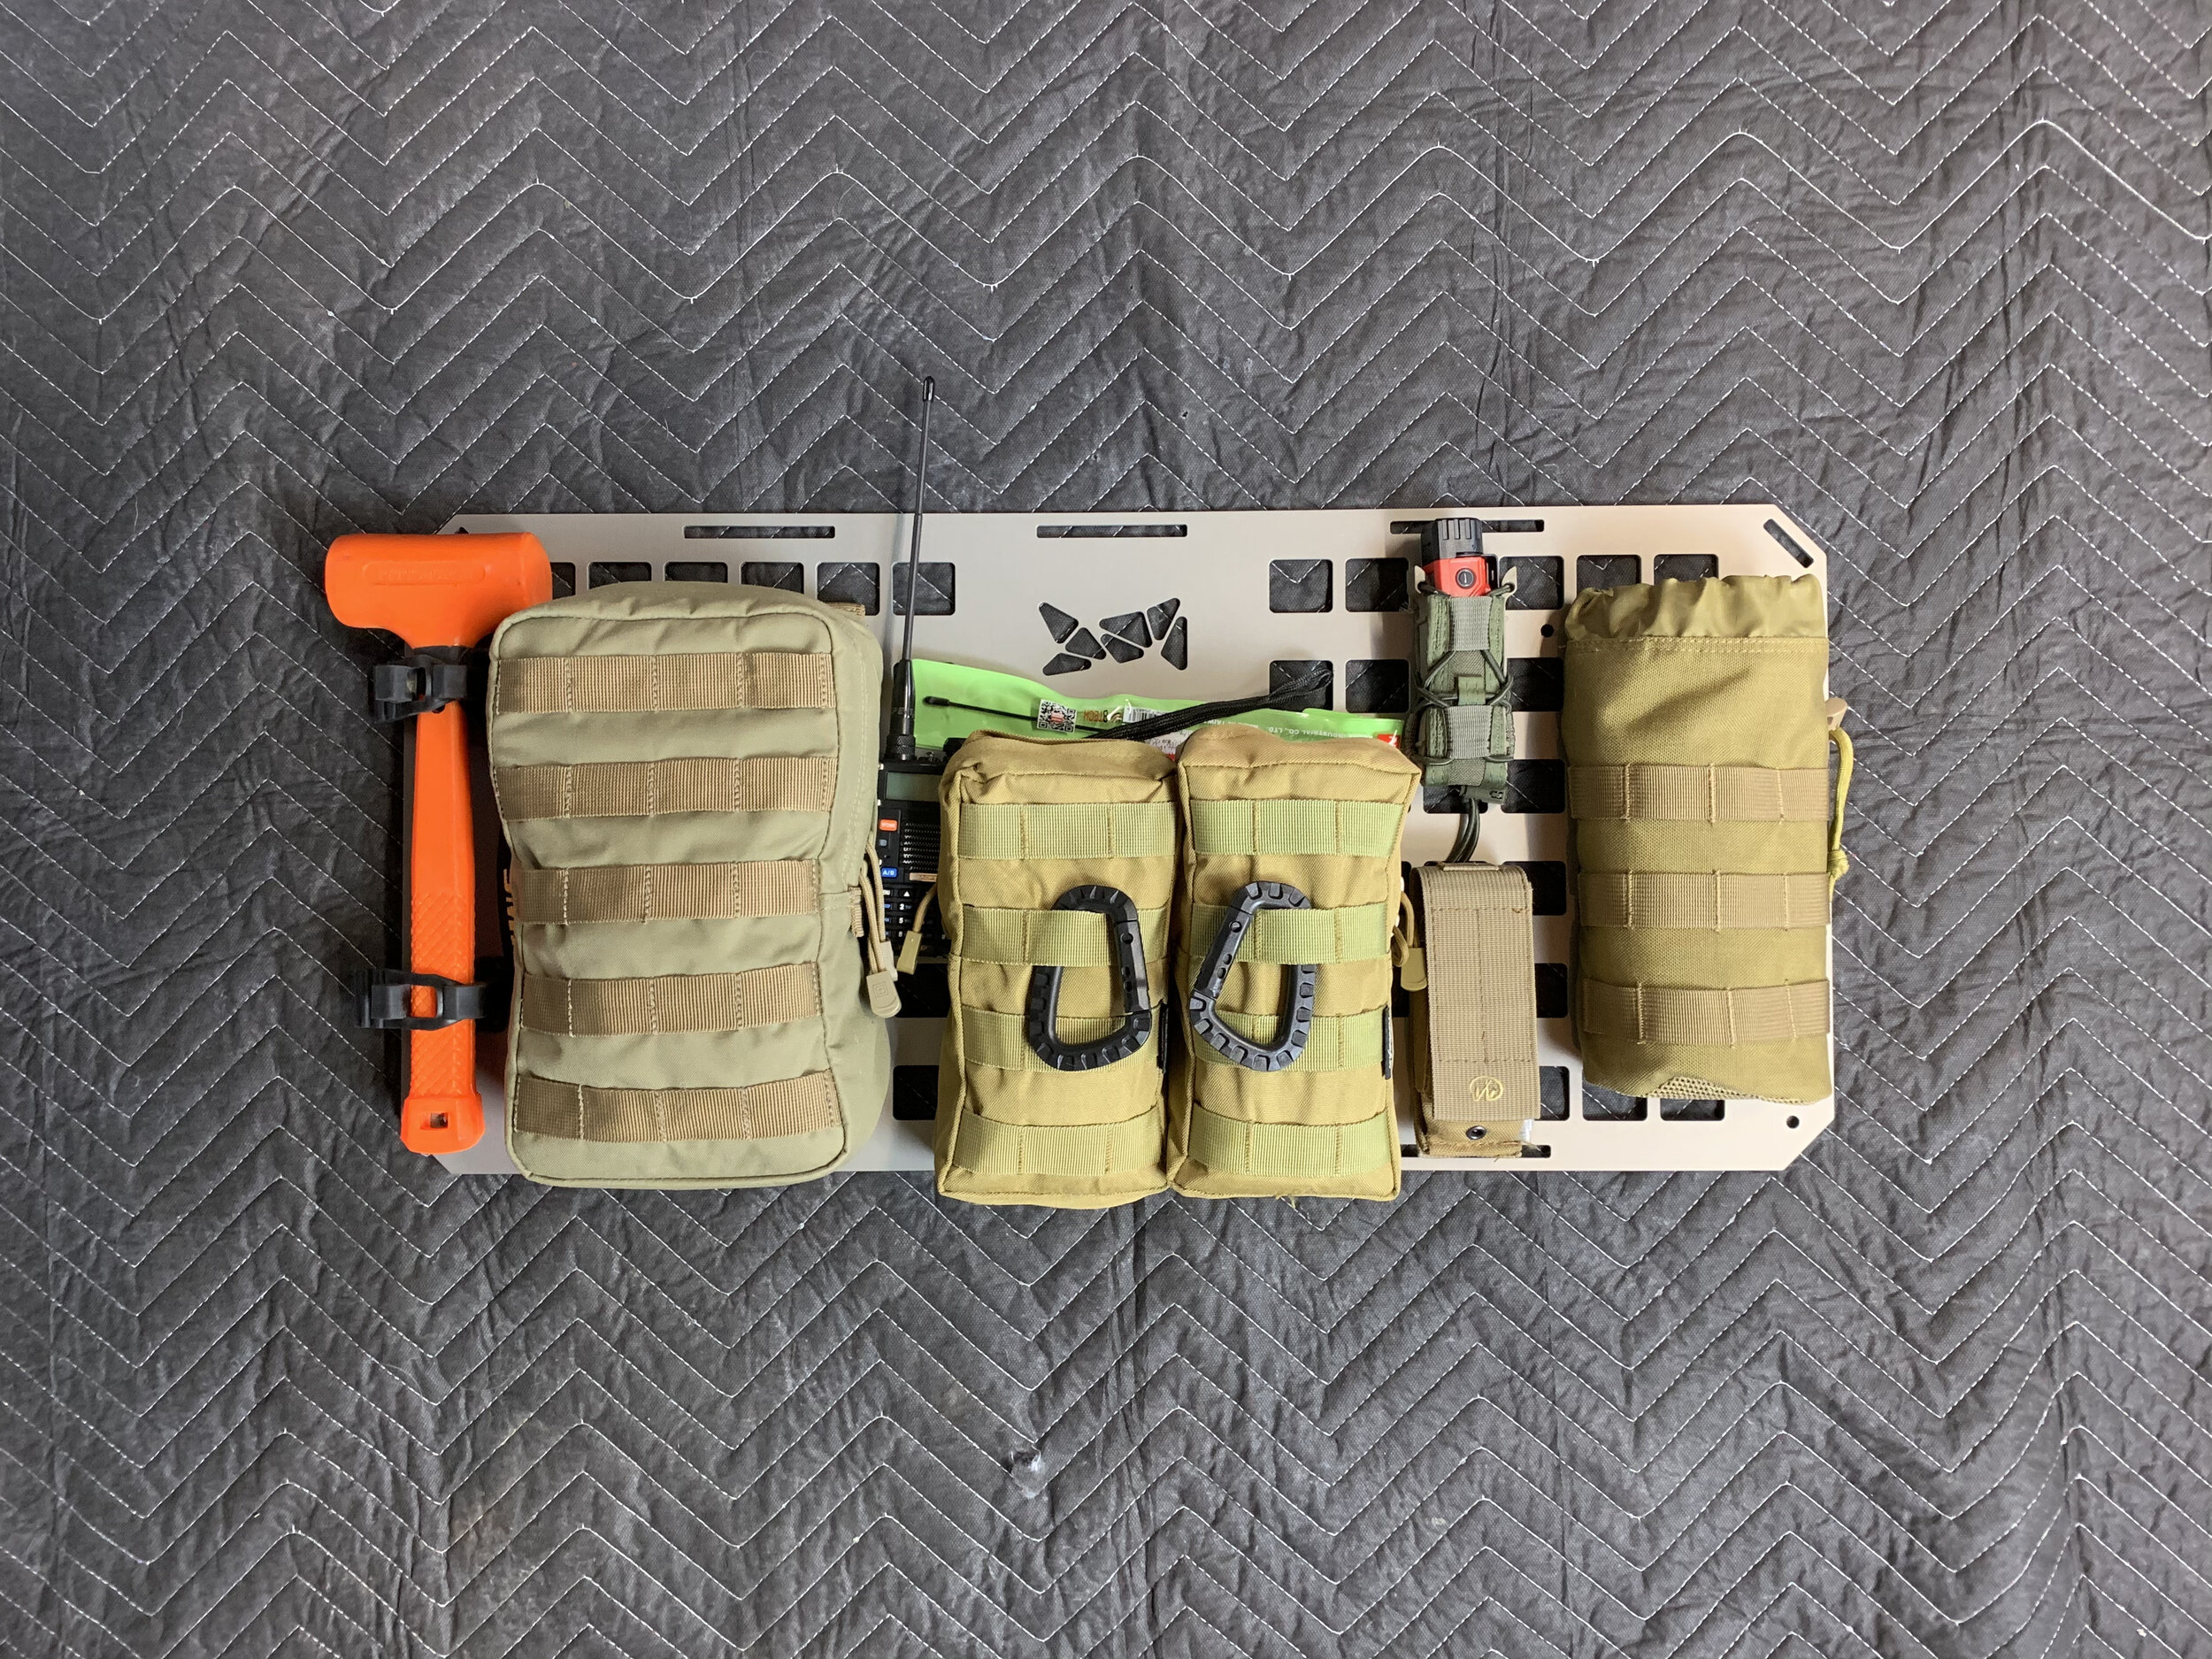
Step 5 - Prep and Layout Grid // JL.
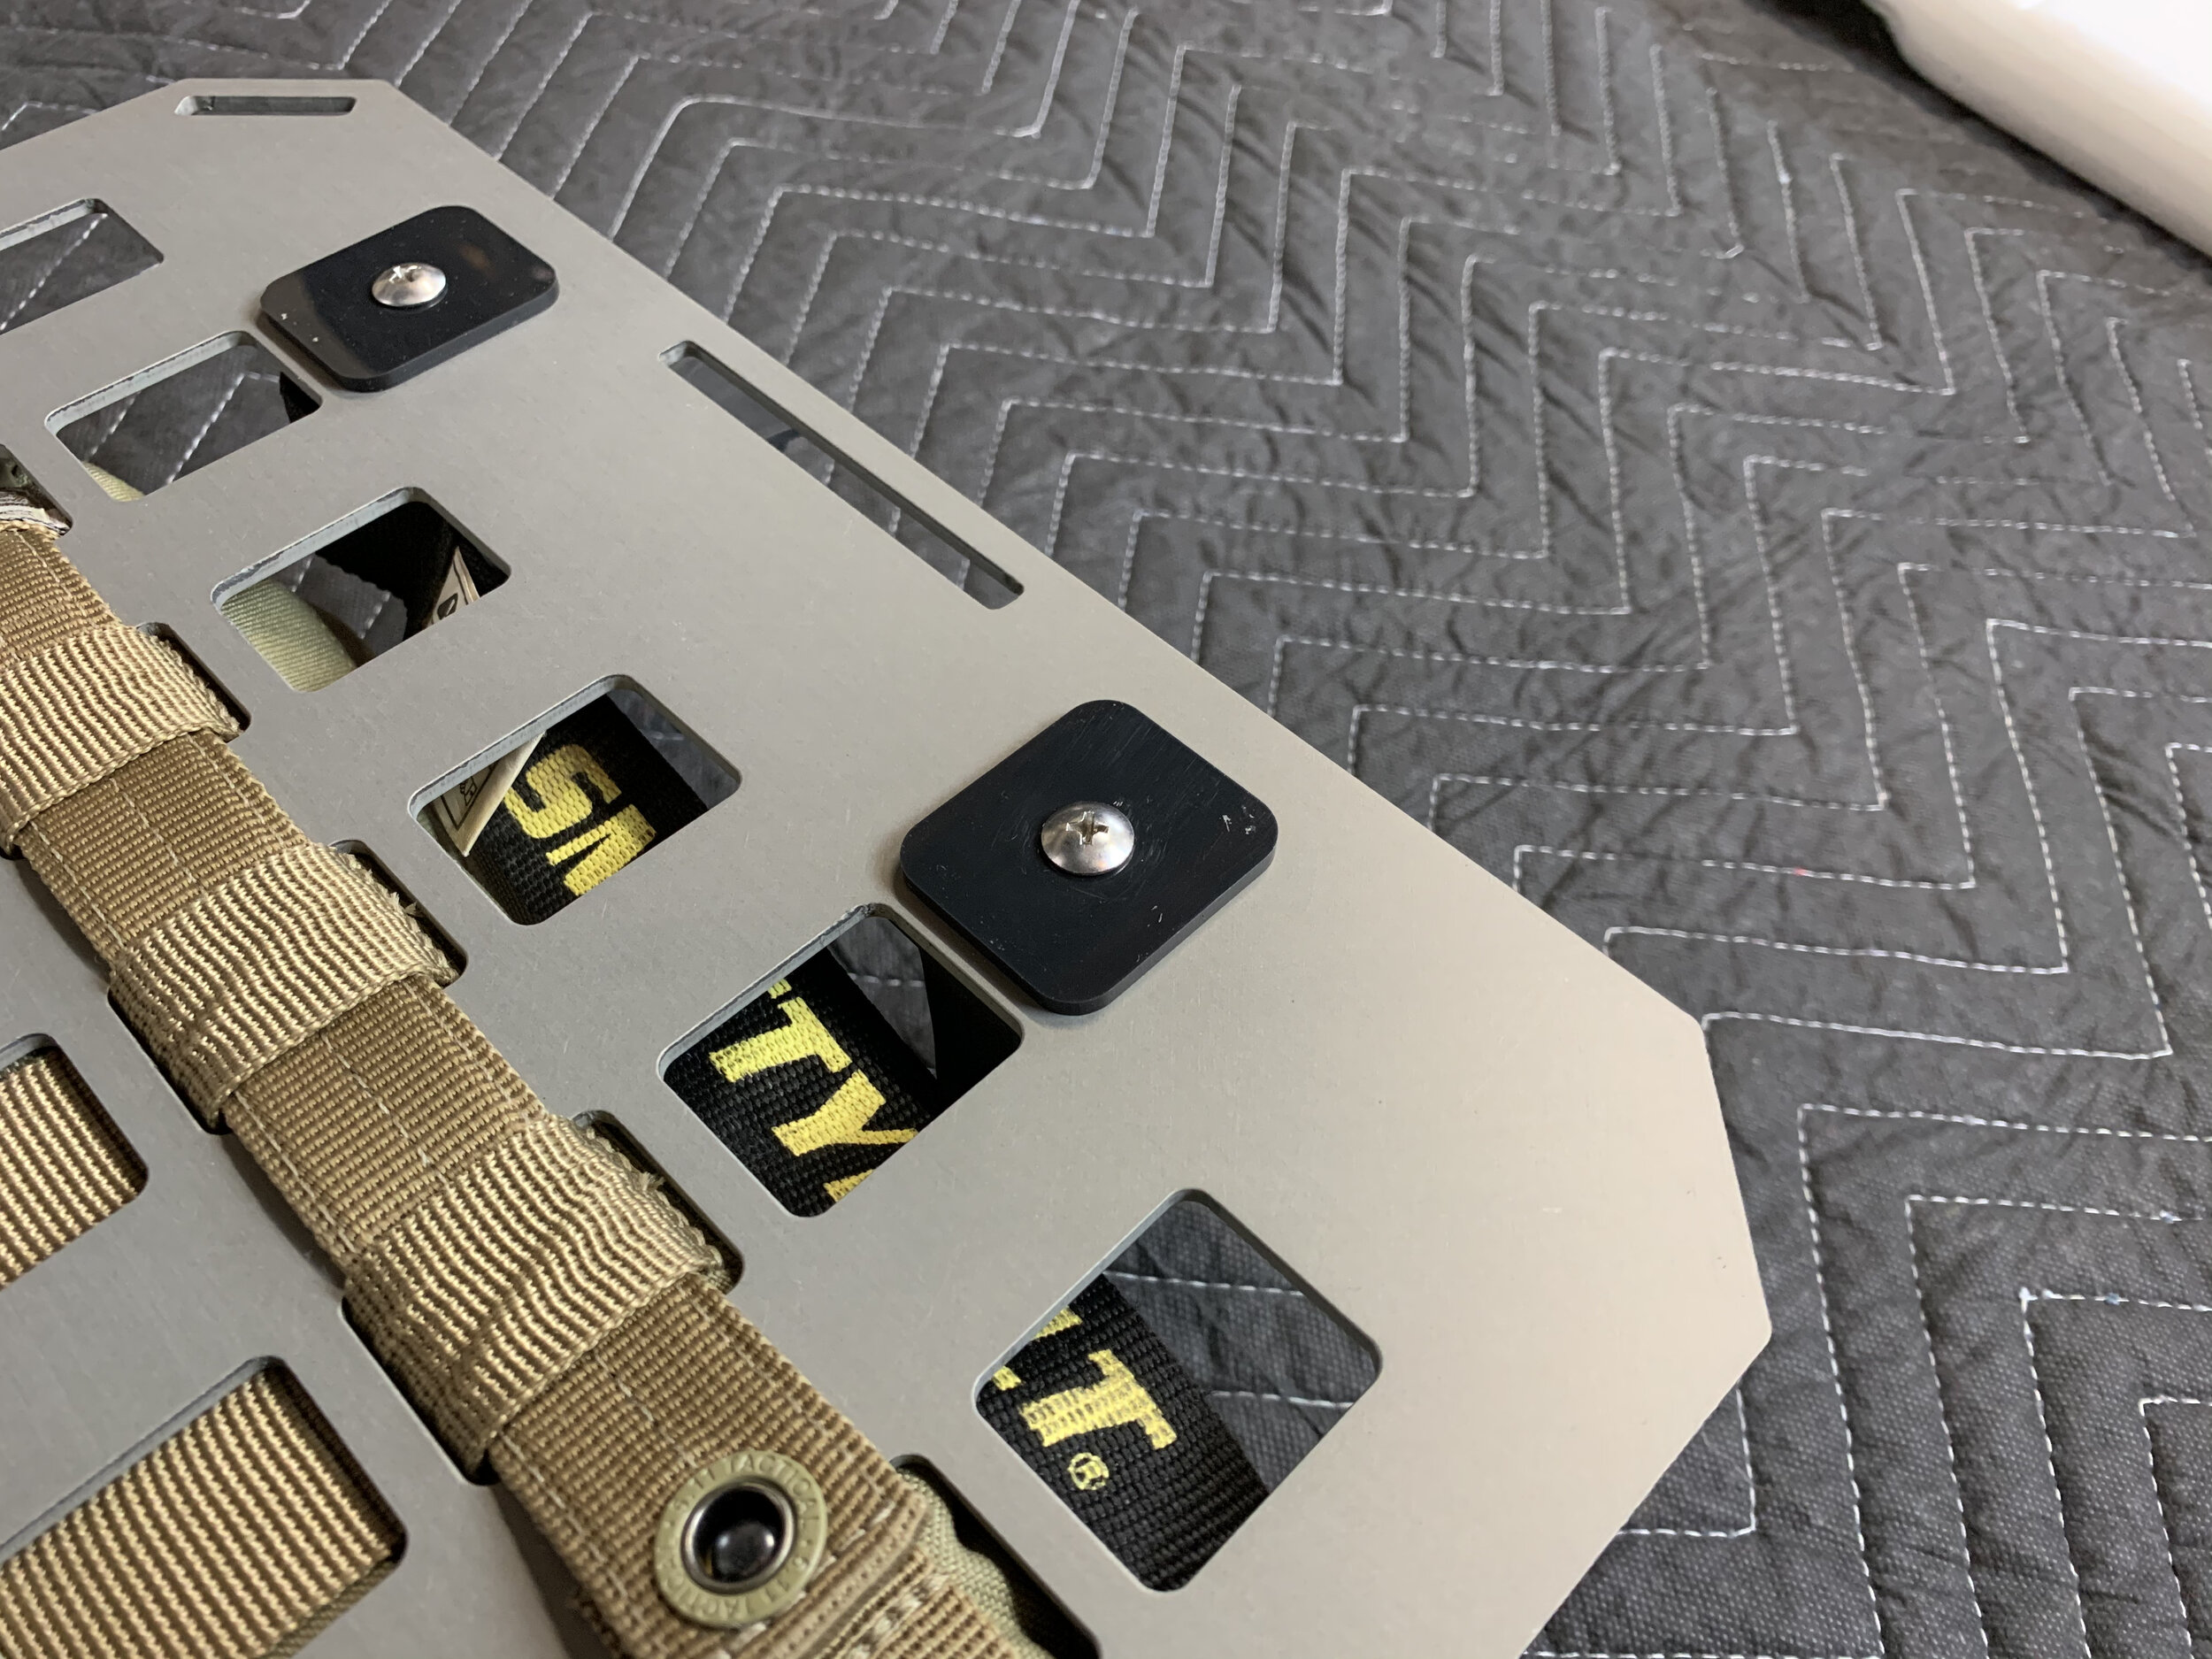
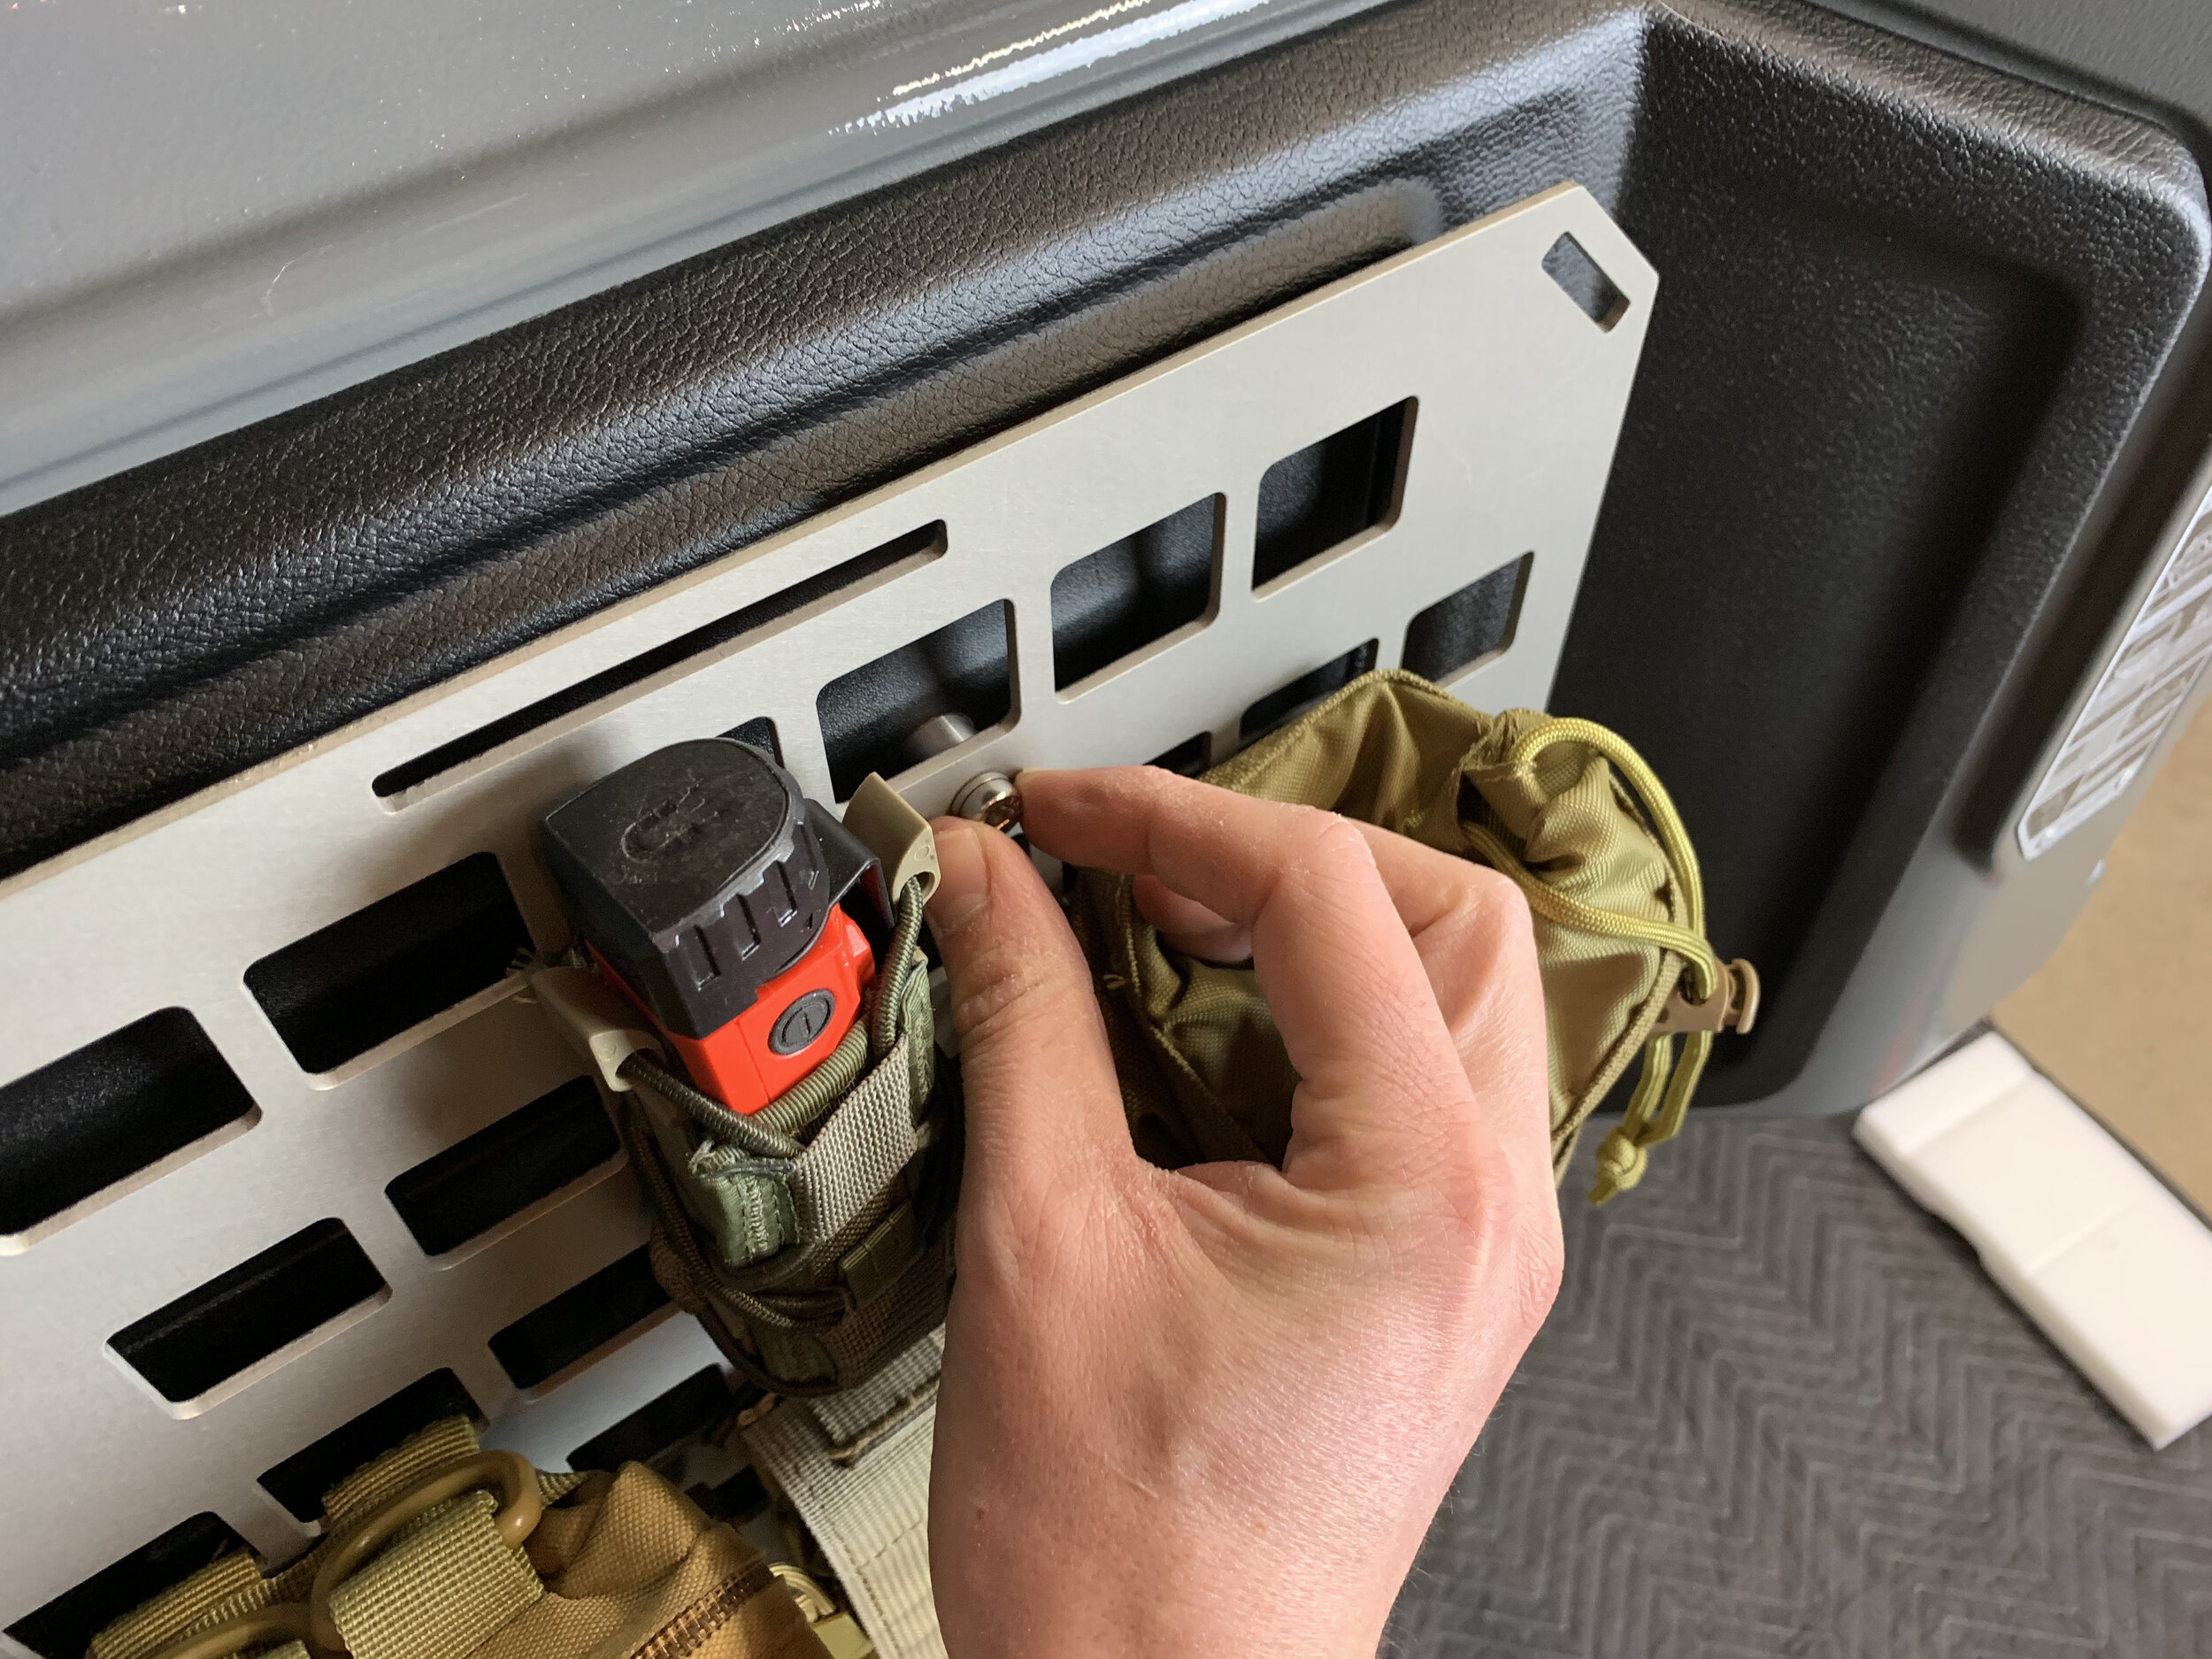
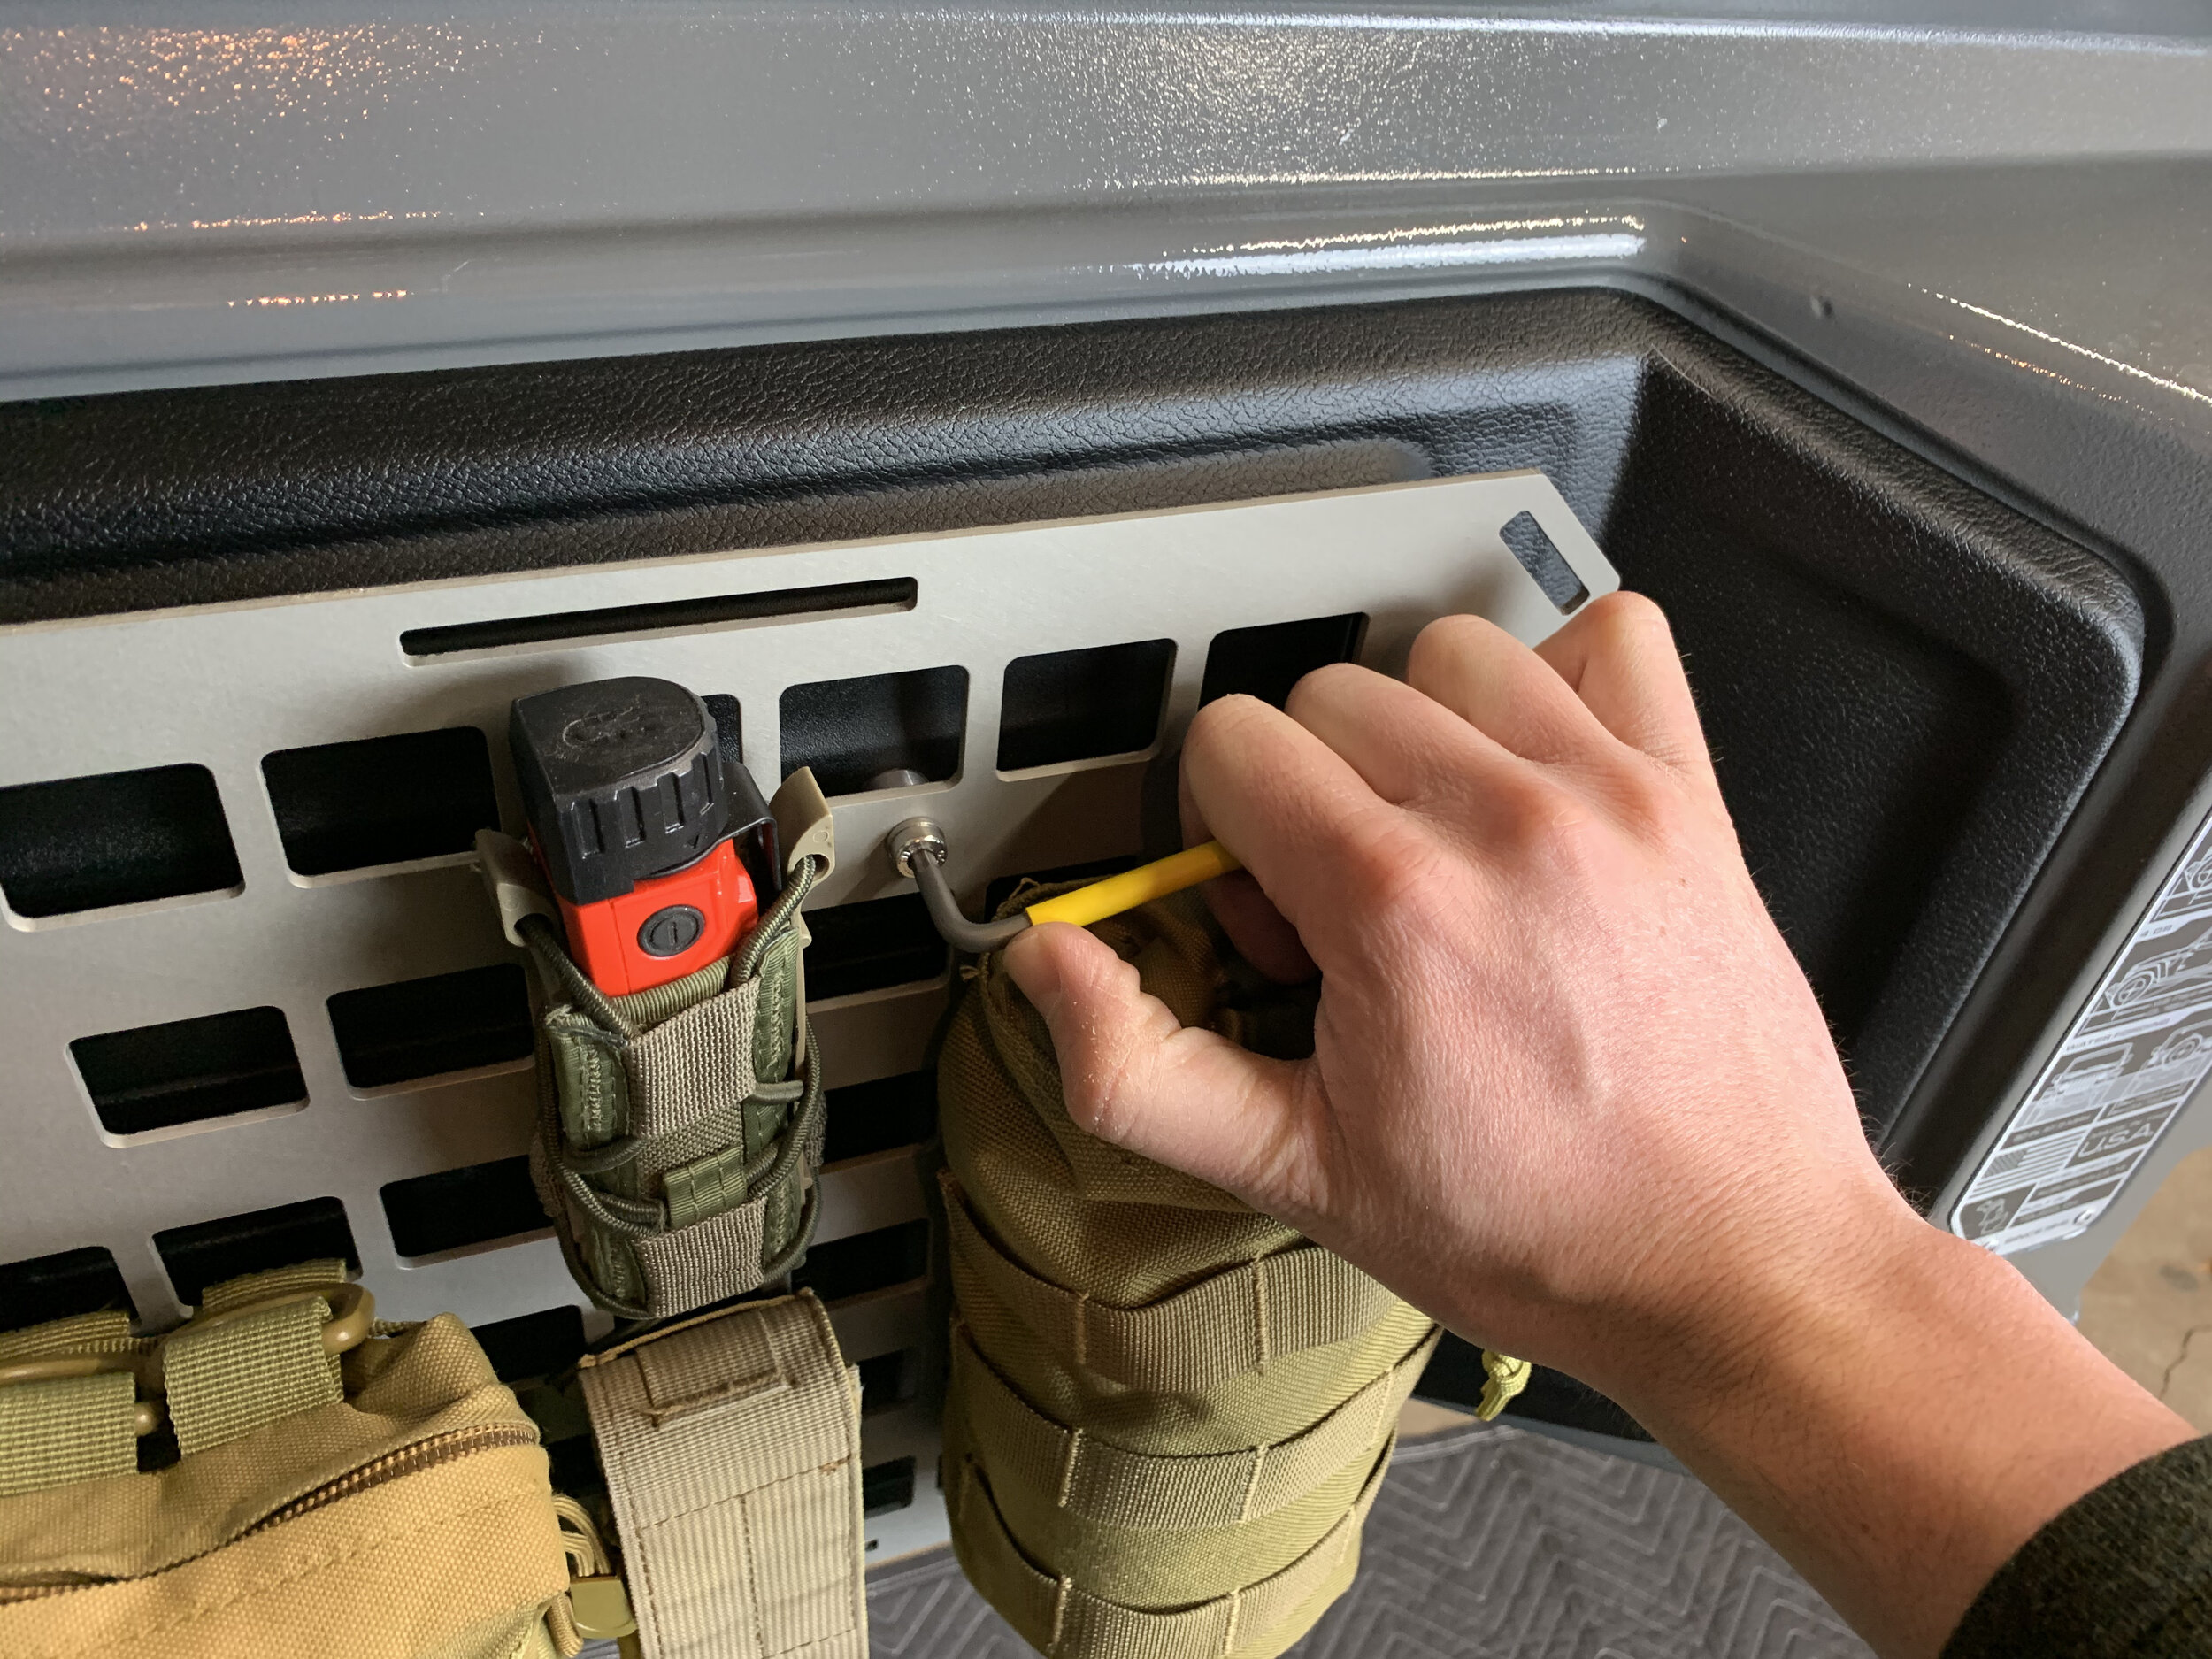
We’ll need to attach any pouches, clamps or other mounting hardware before you install grid on your Jeep. Plan around the 4 mounting holes located on the panel- we’ll need access to these to mount the grid to the tailgate.
Use the grid adapters to turn the grid squares into through-holes for things like quick fist clamps or other bolt-on accessories. Place the adapter on the back side of the panel, and then fasten accessories onto the front.
Leave all your pouches empty. Keeping things light makes it way easier to install. You can move an empty pouch out of the way to give yourself some space when you install. With a full pouch, it’s a bit harder.
Step 6 - Install Grid // JL.
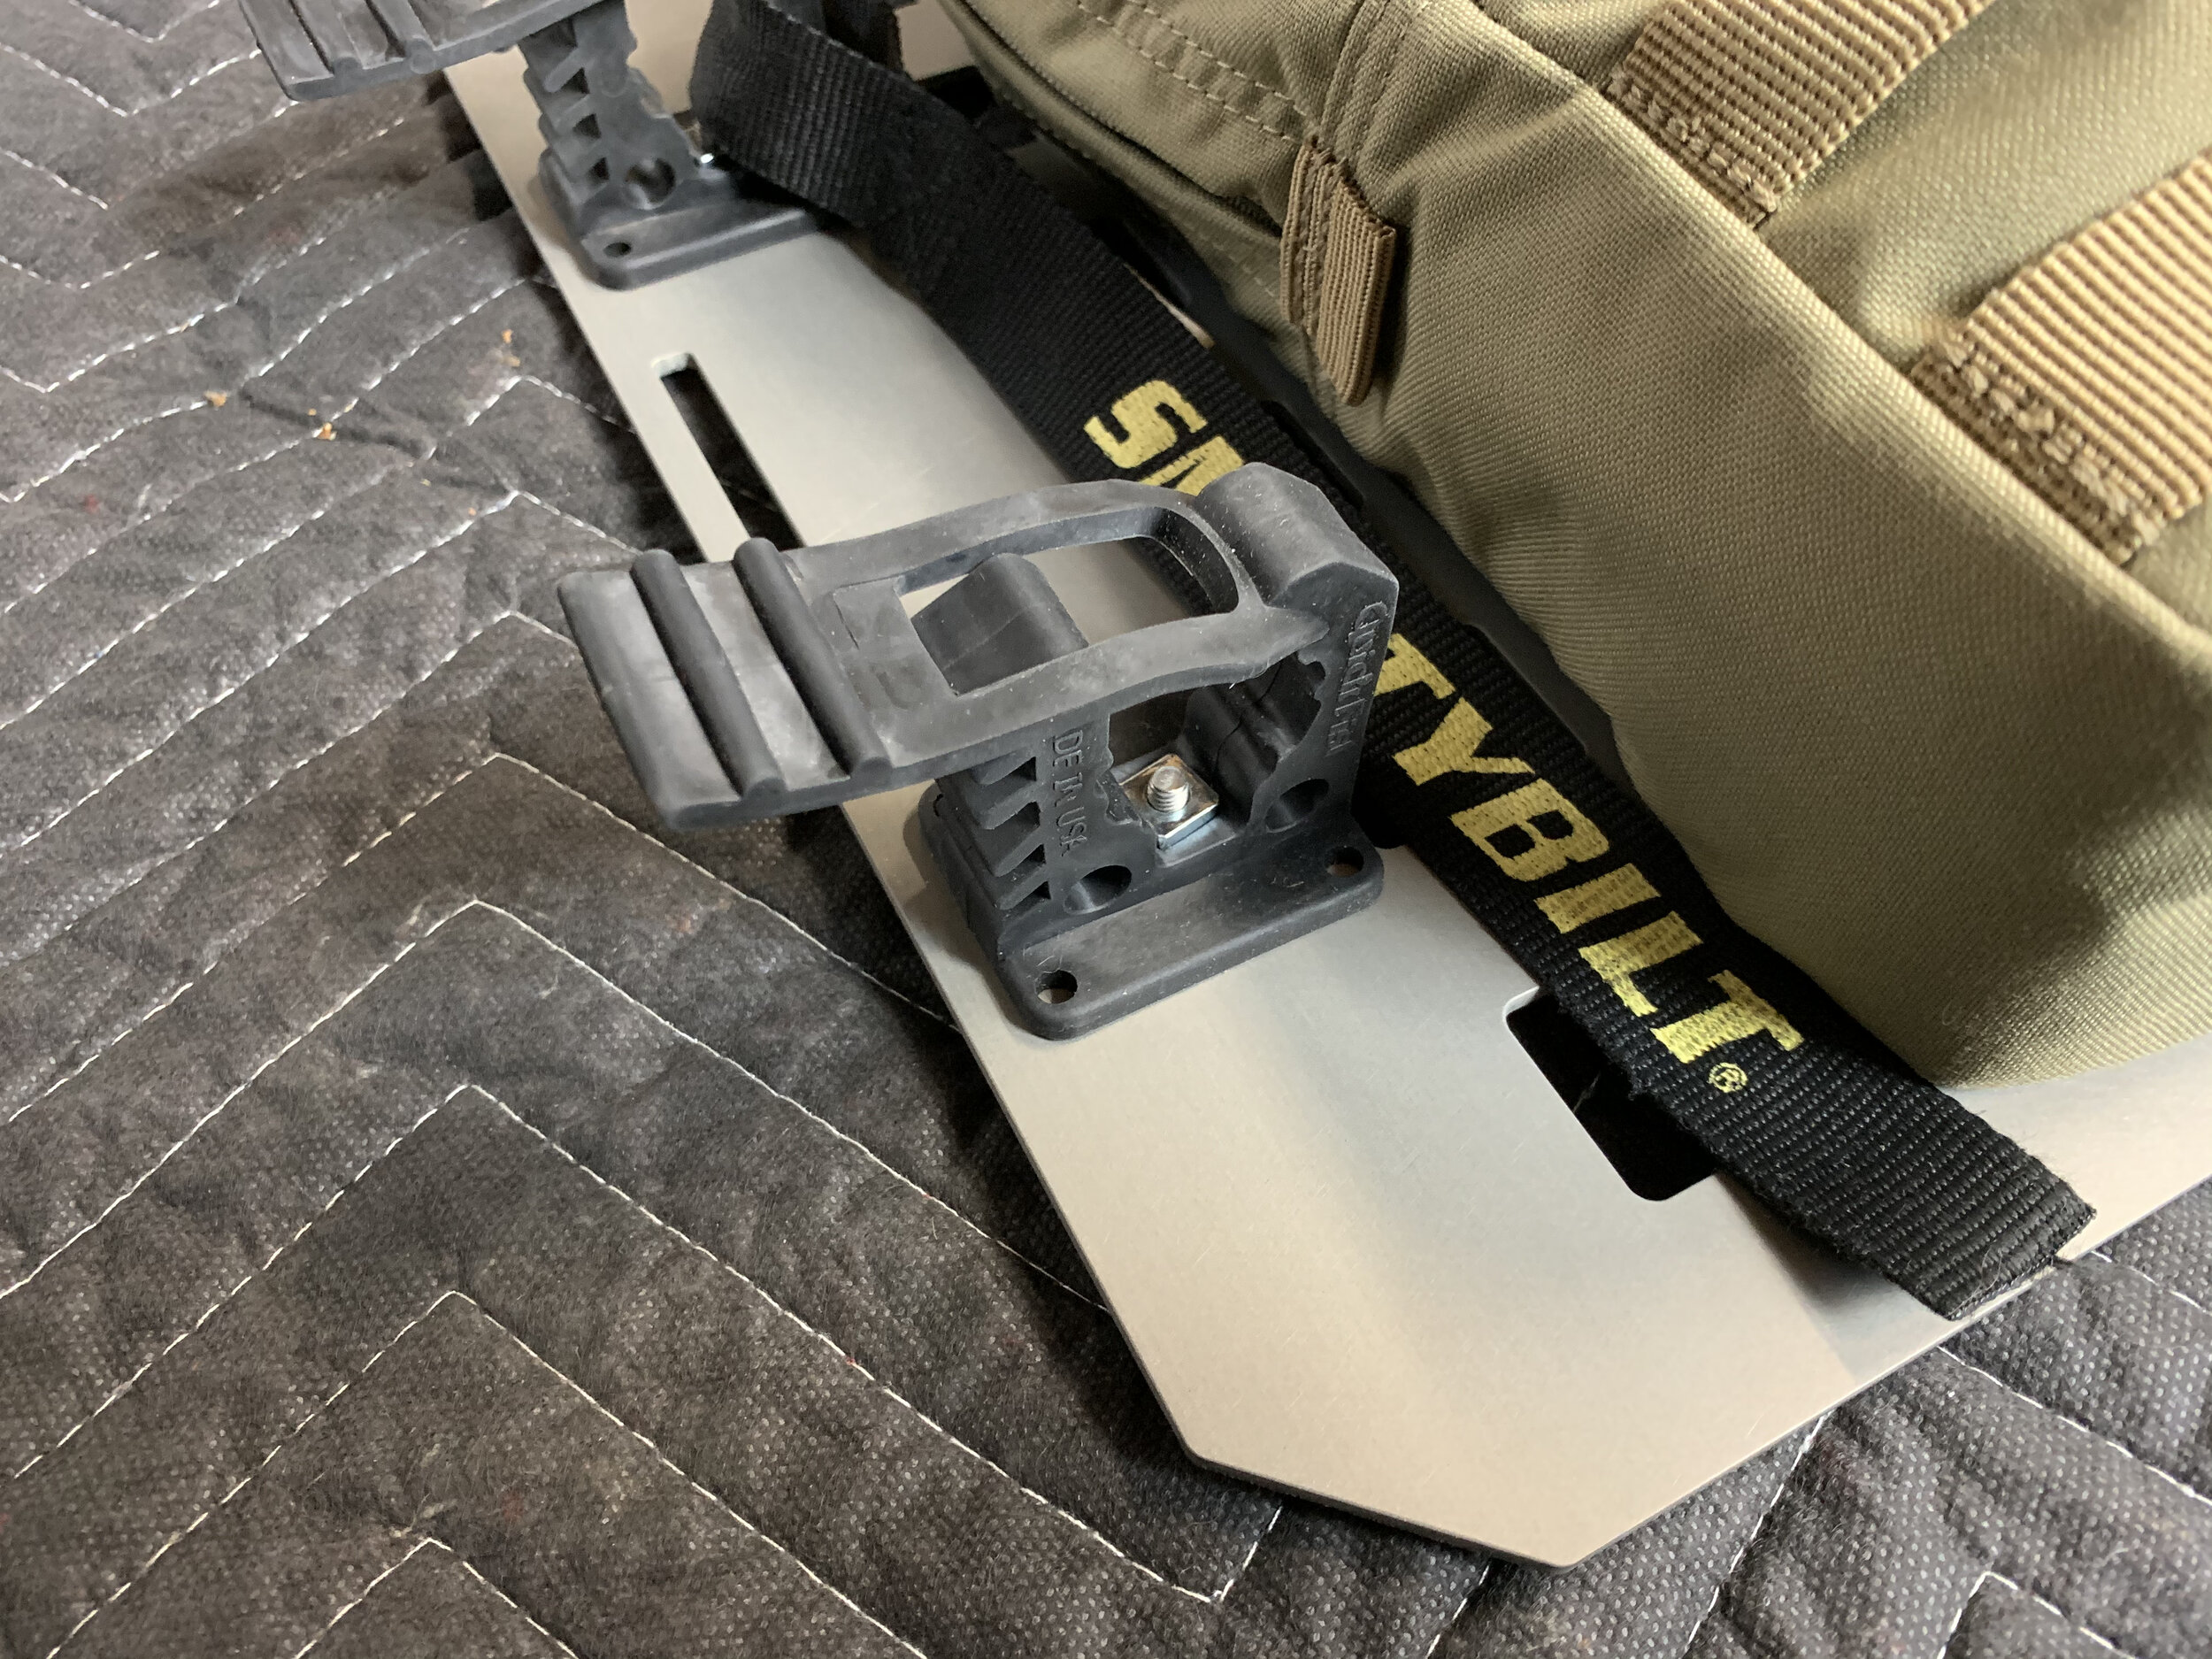
Insert the spacers into the trim panel. Short (A) spacers/bolts go into the upper positions and the long (B) spacers/bolts go into the lower positions.
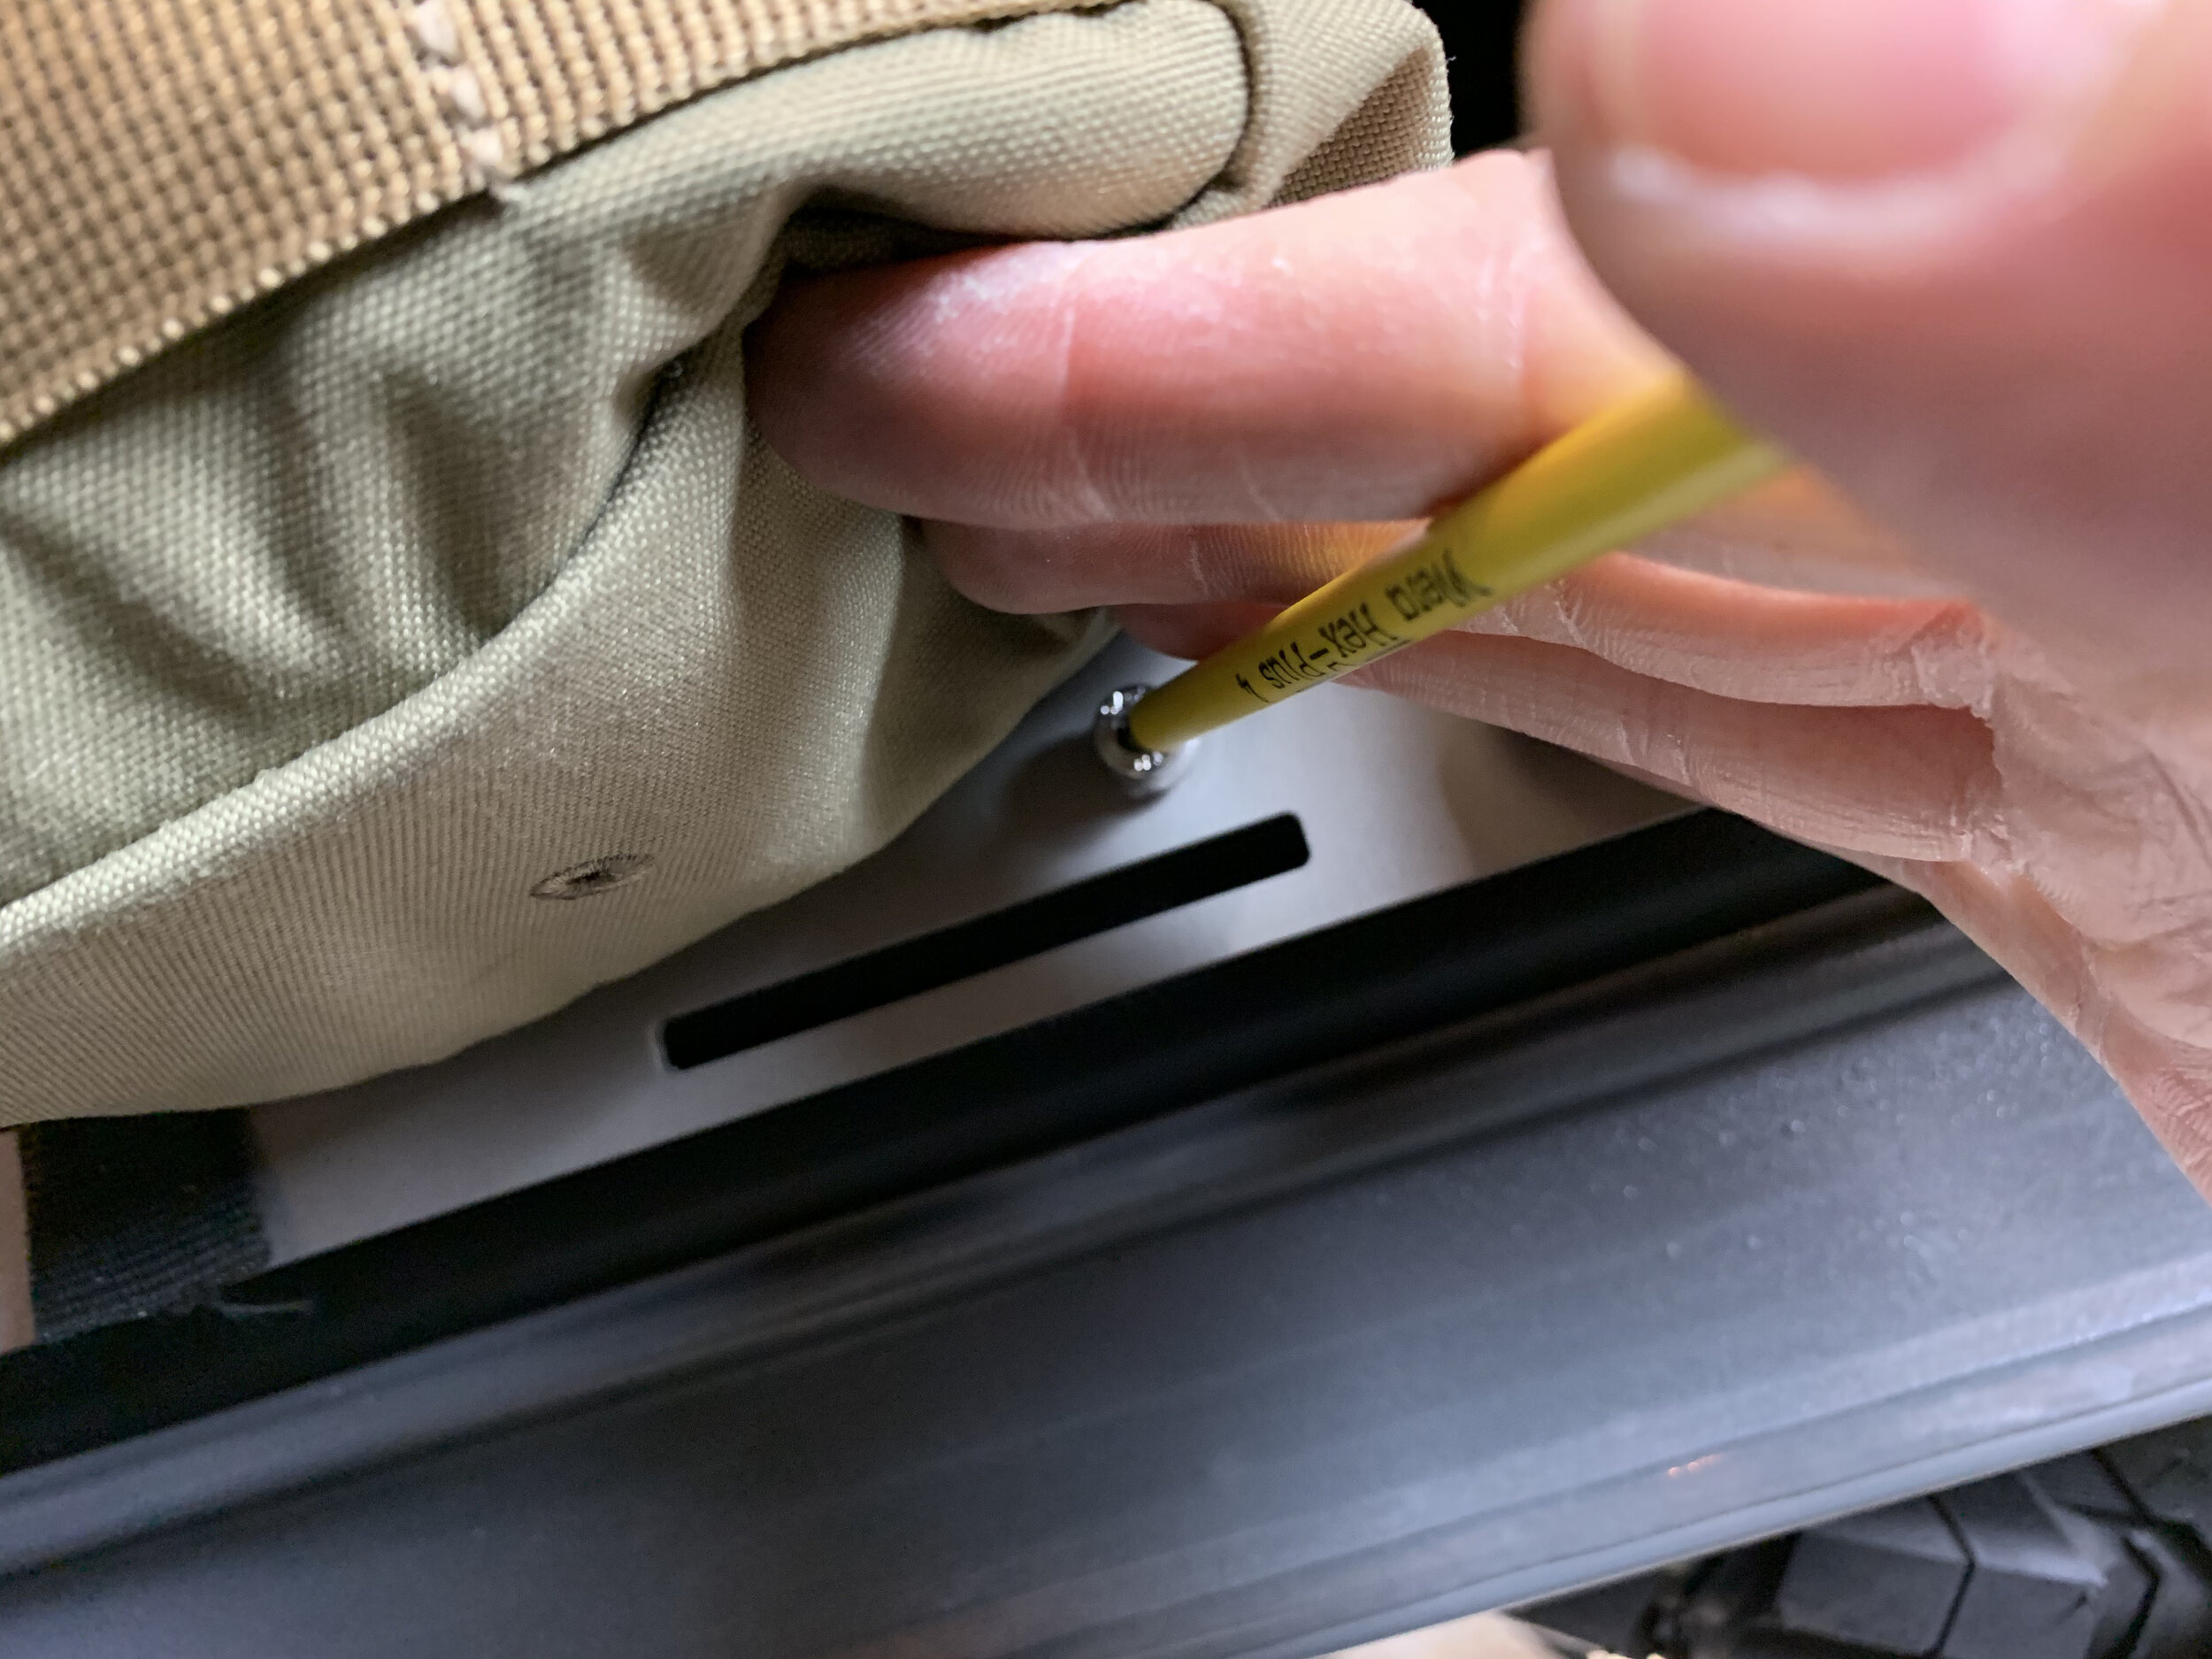
Pre- thread the fasteners into their corresponding positions. There may be a little paint in the threads from the factory, so this step will clear all of that out. Try and start all fasteners by hand first and then use the allen key (with care) if you need a little leverage. BE CAREFUL NOT TO CROSS THREAD THESE BOLTS. It can be repaired but it takes time and some special tools.
Once everything is threaded in and you know that everything goes together, remove the bolts and line up grid to the tailgate.
Install the upper (A) bolts first to hold the grid in place. Don’t tighten all the way just yet- you’ll want a little wiggle room to install the lower (B) bolts.
Install the lower (B) bolts and then tighten all the fasteners down evenly. DON’T OVER TIGHTEN THE BOLTS. The bolts should be snug (wrist tight as they say) but don’t wrench down with everything you’ve got. You can damage the hardware and tailgate this way.
Step 7- Last Step!… Almost there!
Time for the fun part. Load up your grid with all of your gear! Now is the time to fill all of the pouches and clamps with all the stuff you need for your daily commute, adventures, or whatever else you have going on.
Once everything is loaded up, all that’s left to do is clean up the garage or driveway and hit the trails!
